


Azure AI Document Intelligence (formerly called Form Recognizer) is a service that reads documents and forms uses machine learning to analyze documents stored in various formats, such as JPEG and PDF– and extracts structured data from the content.
In a previous post, we learned how to call Azure AI Document Intelligence using the direct Azure REST API. In this post we'll use Document Intelligence via the Python SDK from a Jupyter Notebook.
Unlike other earlier posts covering language translation and sentiment analysis in Fabric Notebooks, in this example we'll call Azure AI directly without assistance from Synapse ML.
Video Tutorial Available
The balance of this tutorial-orientated post is available in video format on YouTube using the following embedded video. The rest of the text walk-through continues after the embedded video.
About Document Intelligence
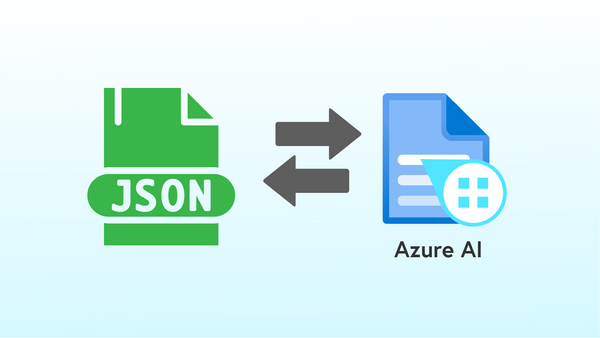
Azure AI Document intelligence accepts documents in a variety of formats (e.g. JPEG, PDF, TIFF, etc.), and applies trained models to analyze input images, identify data fields in the images, and return data found in the images as JSON objects.
The Input Data
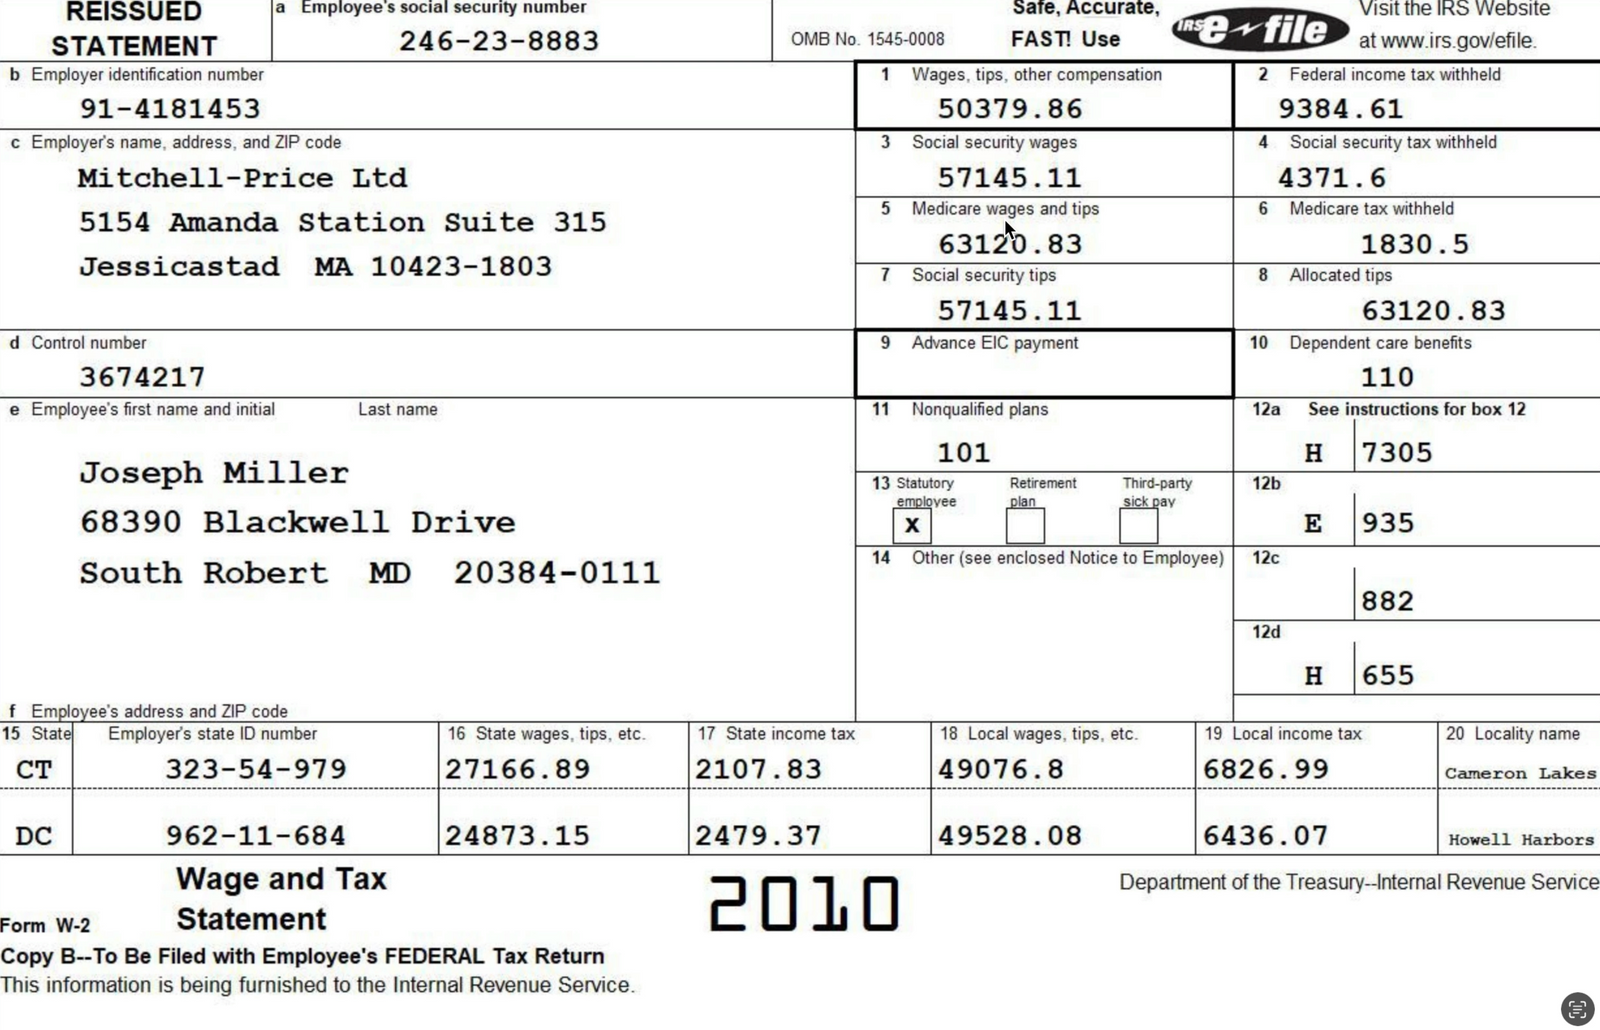
The input data for this solution will be a collection of US IRS W-2 Forms in JPEG format. W-2 Forms are issued by US-based employers to report to employees (and the federal government) employee wages, tax withholdings and other financial information used in calculating final employee income tax liabilities.
Here's an example of a W-2 like the ones we'll use as input for the solution:
Create an Azure AI Service
We start by creating an Azure Document Intelligence service (or a multi-service service) in Azure.
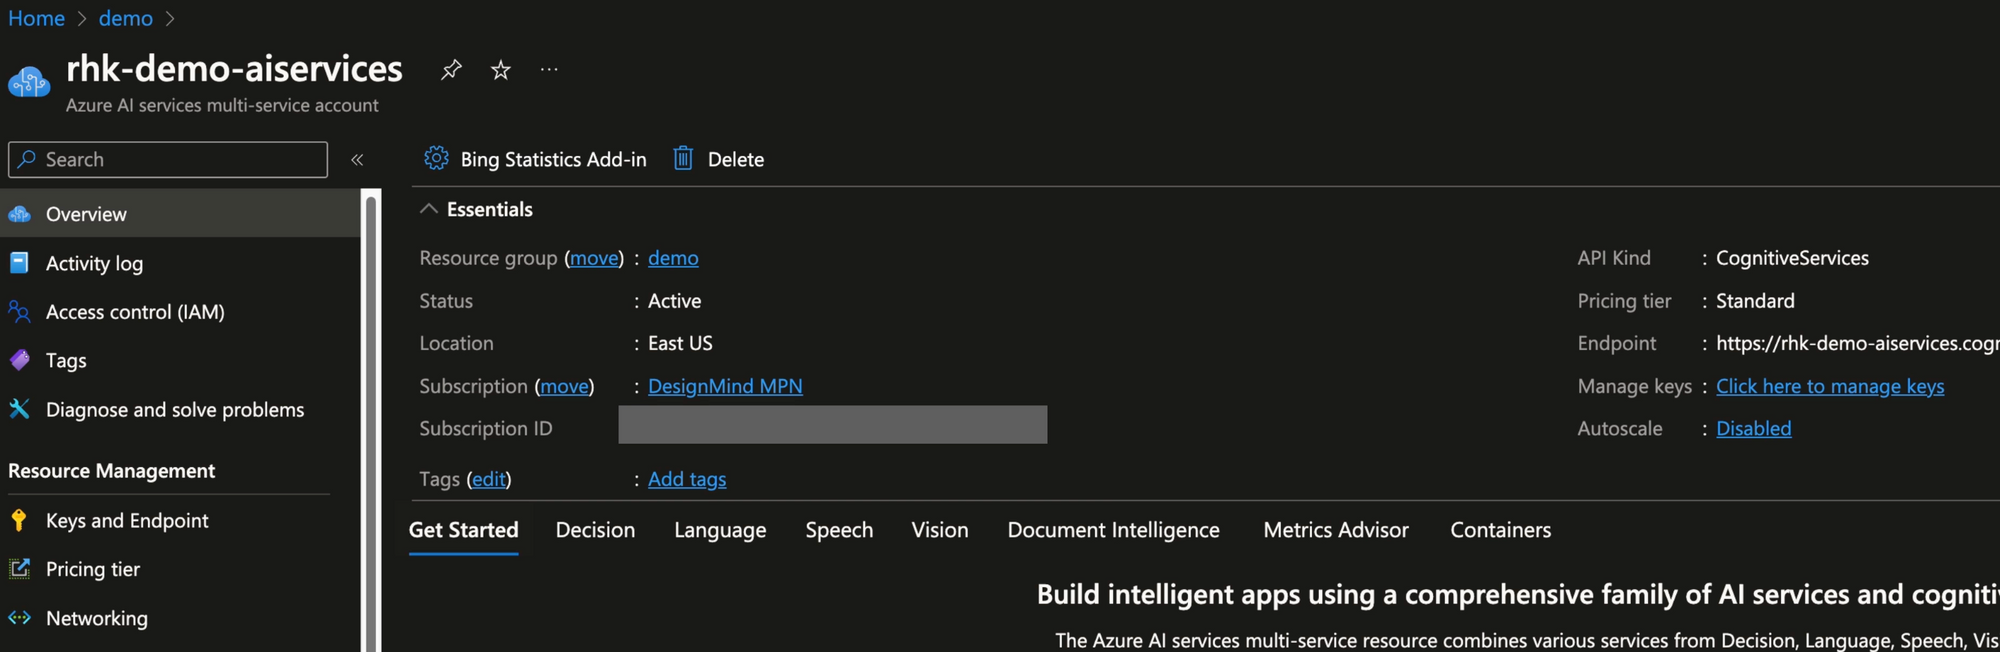
From the Azure AI Service, we need to record the endpoint and one of the KEY values. We'll use these values in Python code in the Jupyter notebook.
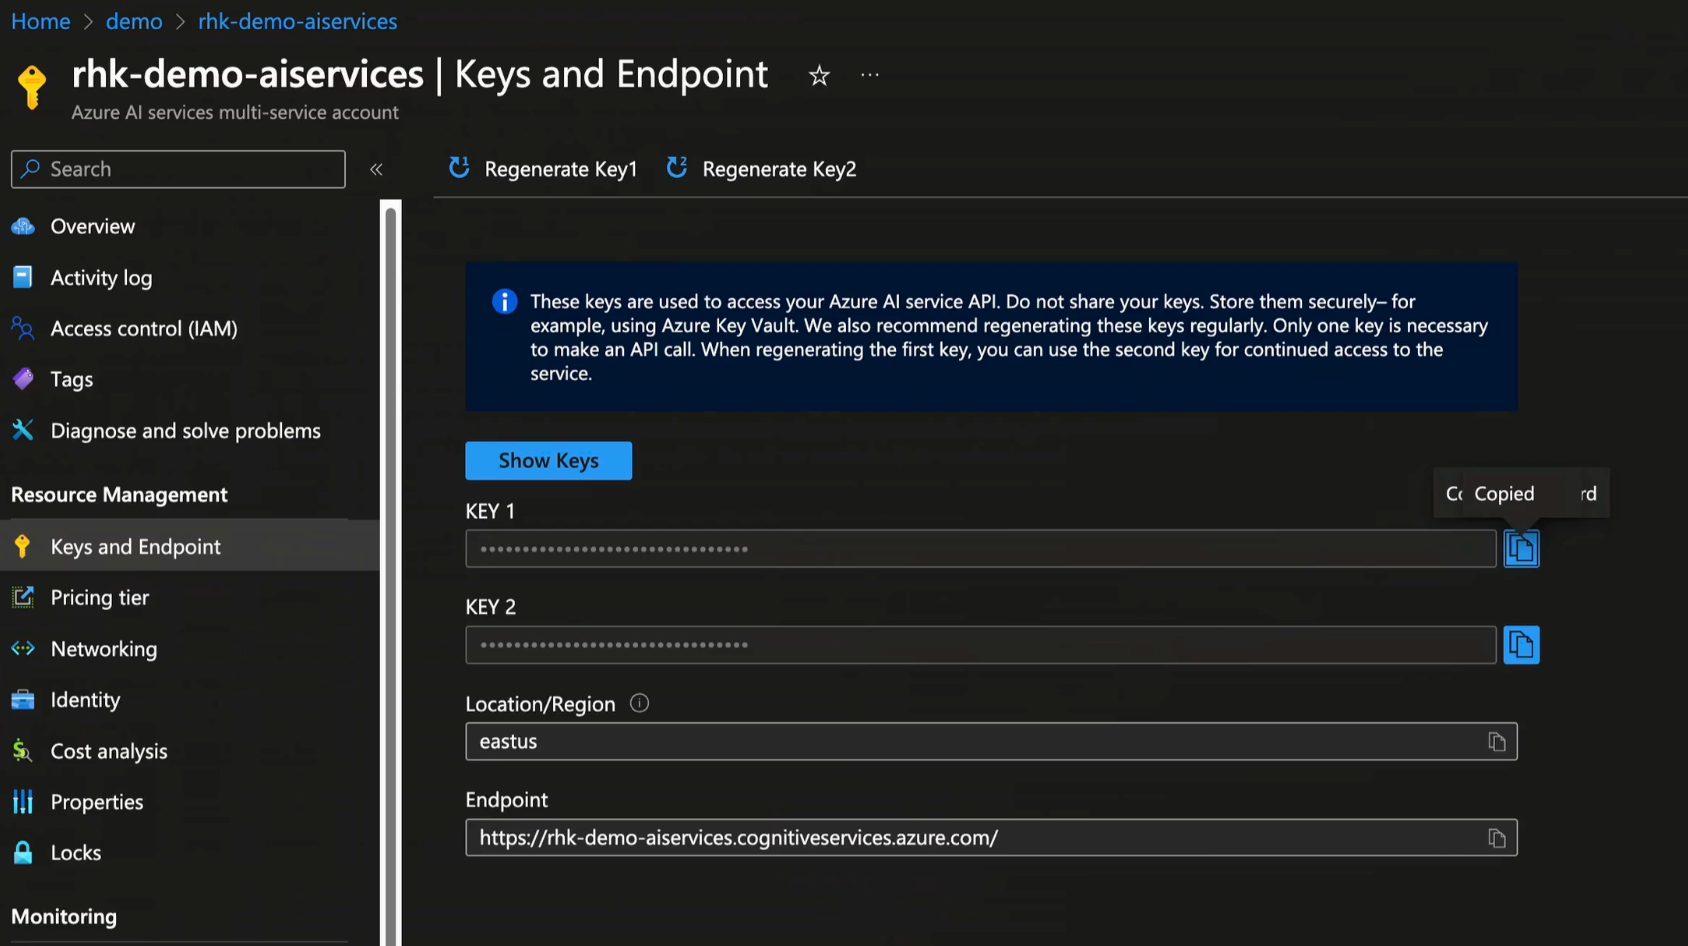
Store Keys in Key Vault
As a best practice, store keys in Azure Key Vault. Key Vault provides underlying keys to requesting processes based on authorization granted by Azure Entra ID.
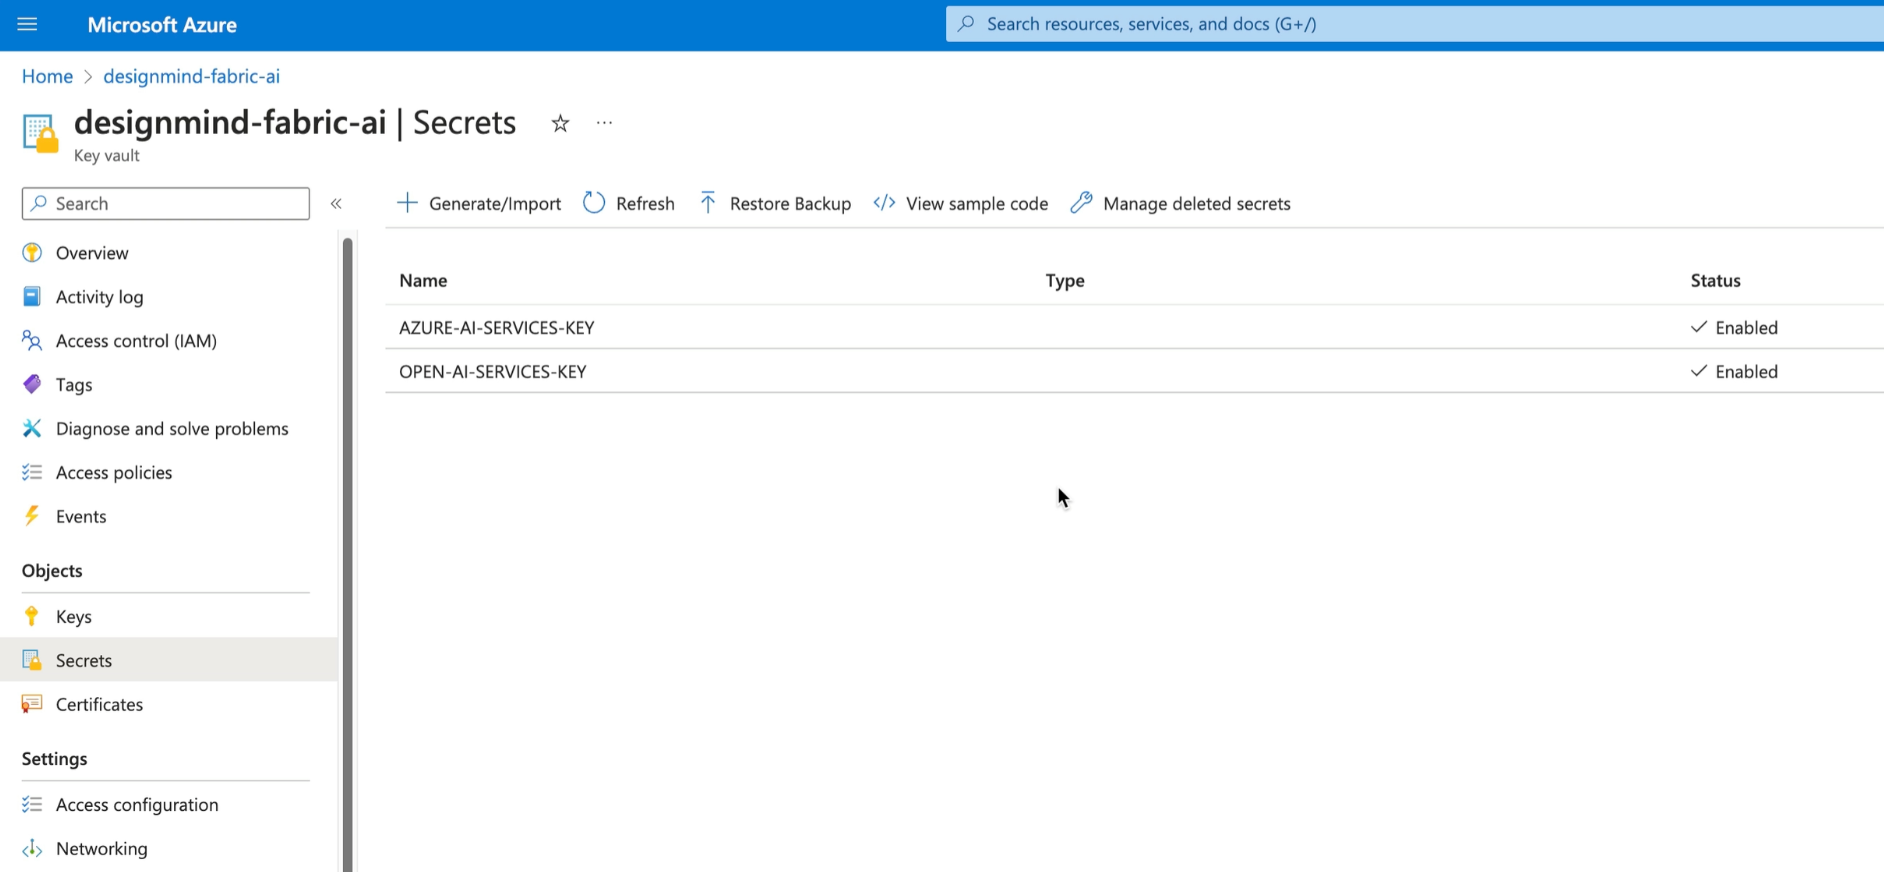
If you're not sure how to use Key Vault, refer to my Azure Key Vault cheat sheet!
Authoring the Jupyter Notebook
With the Key Vault and Azure AI Service in place, we can move forward to creating code in the Jupyter Notebook.
Fetching the Azure AI Key from Azure Key Vault
Once keys are stored in key vault, we can fetch them into the notebook session using the Fabric PyTridentTokenLibrary dependency.
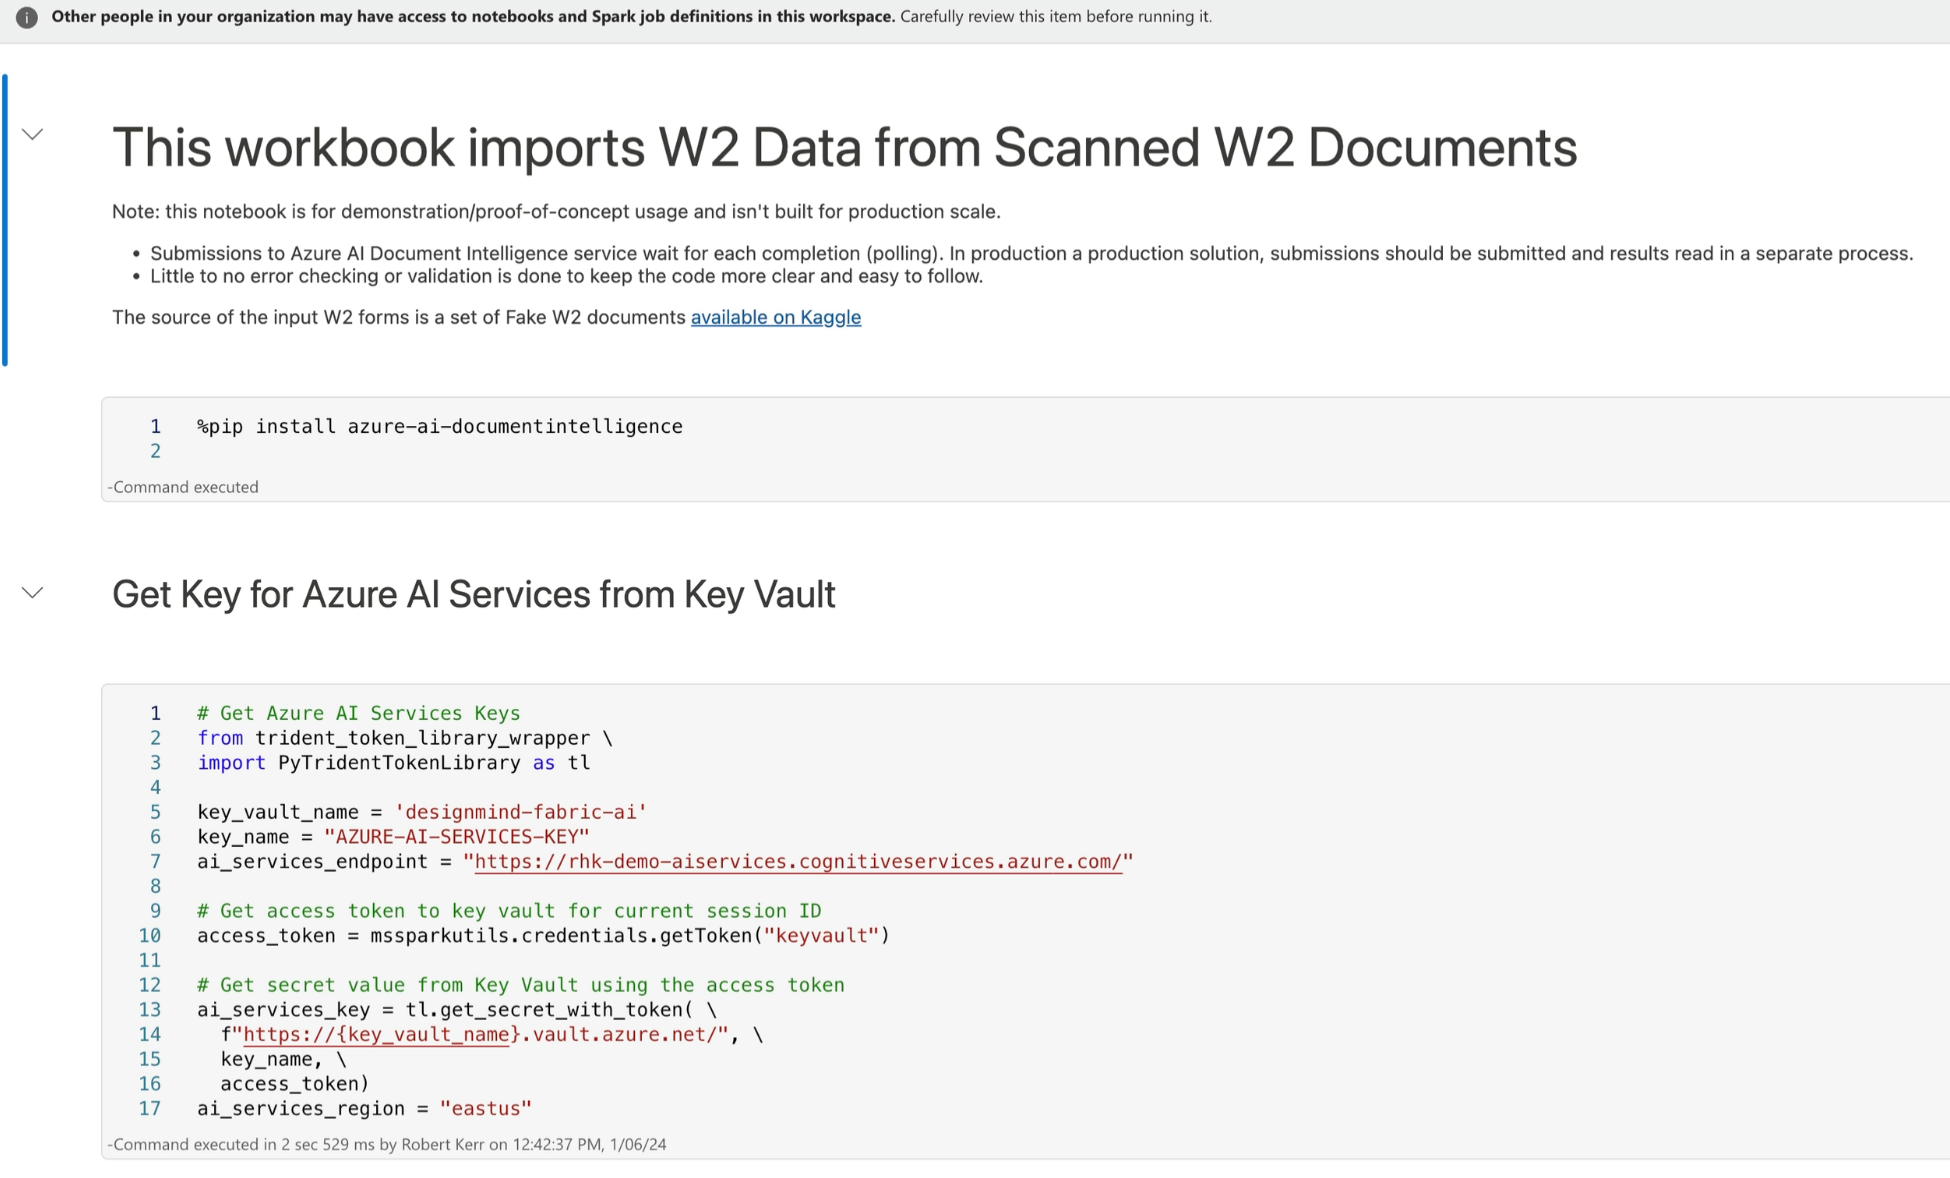
When this cell completes, the Azure AI key will be stored in ai_services_key session variable. This assignment is the result of the call to the get_secret_with_token(...) API call.
The Main Processing Loop
The main processing loop for this solution is below, along with an explanation of the key parts of the code:
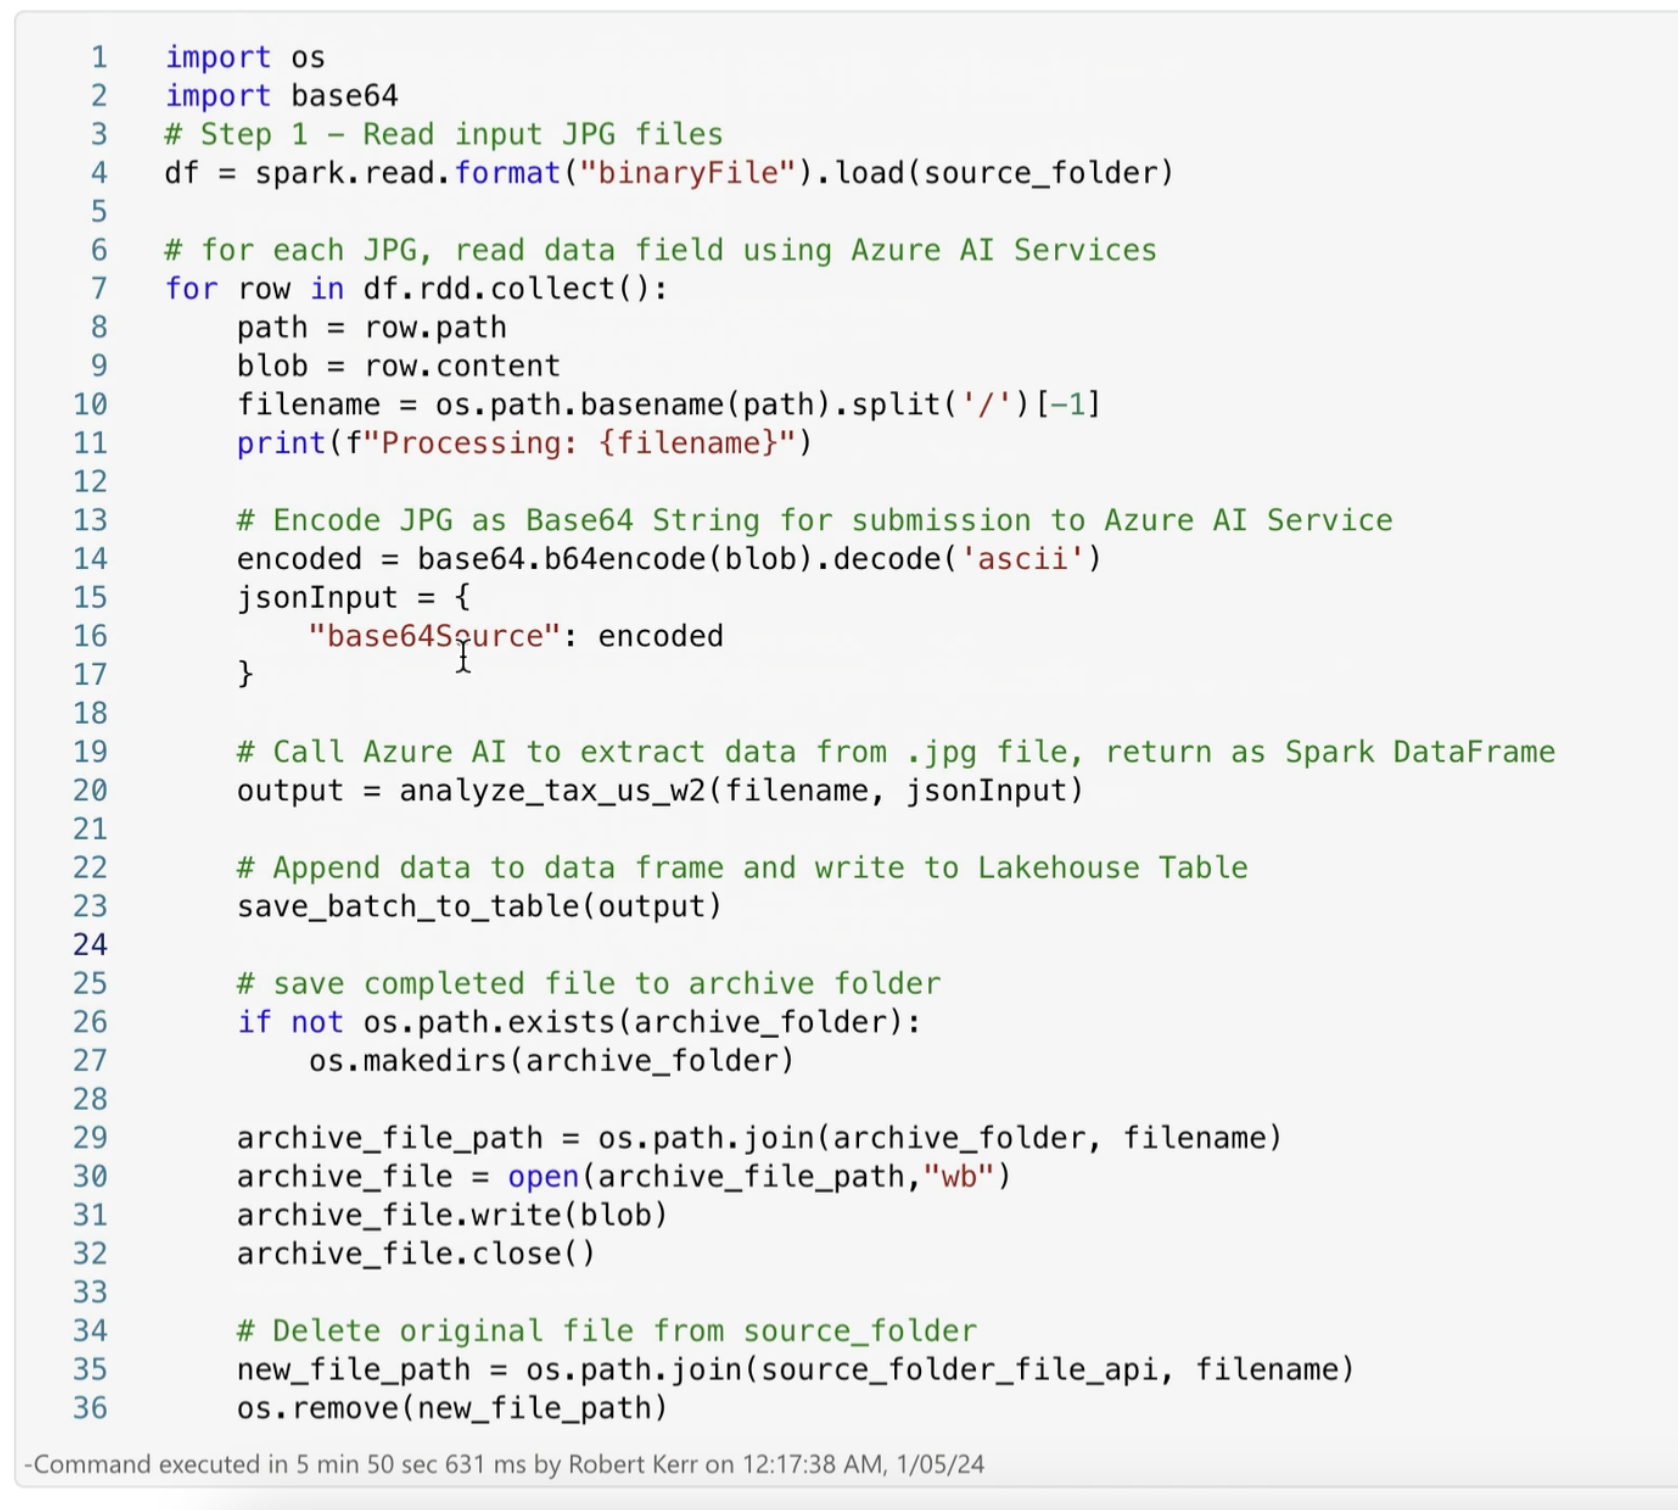
- On line 4, we load all the W-2 document images (which are JPEG files) from the source folder in the Data Lake
Filessection. The result of the load is a DataFrame having one row per image. Each row has several metadata columns, and one column with a byte array for the file contents. - Line 6 iterates over the DataFrame, processing each image one at a time.
- Lines 8 and 9 fetch the file path and the byte array (blob) from the DataFrame row.
- Line 14-17 converts the byte array (blob) to a base64 ASCII string, and embeds that string into a JSON object with a key
base64Source. This is the payload format required by the Azure AI Document Intelligenceanalyzeendpoint. - Line 20 calls a function (explained below) that sends the JSON payload to Azure AI Document Intelligence for processing, waits for a response, and then returns the data found in the image's form in
output. - Line 23 saves the form data found by Document Intelligence to the Data Lake in a Delta table.
- Lines 25-36 simply clean up processed image files in the Data Lake by moving completed files to an "archive" folder.
How We Call Azure AI Services
In the main loop (above) we call a function analyze_tax_us_w2, which is a function we wrote to do the following:
- Call Azure AI Services using the key (from key vault), the file (in base64 string format), and the identifier of the document intelligence model we want the image processed with (prebuilt-tax.us.w2).
- Read the resulting JSON response payload.
- Extract the fields from the JSON payload that we targeted for saving in the Data Lake.
The source is a bit long, so I just want to focus on the important conceptual parts. If you'd like to review the entire source file, take a look at the video, or read the Notebook source on GitHub.
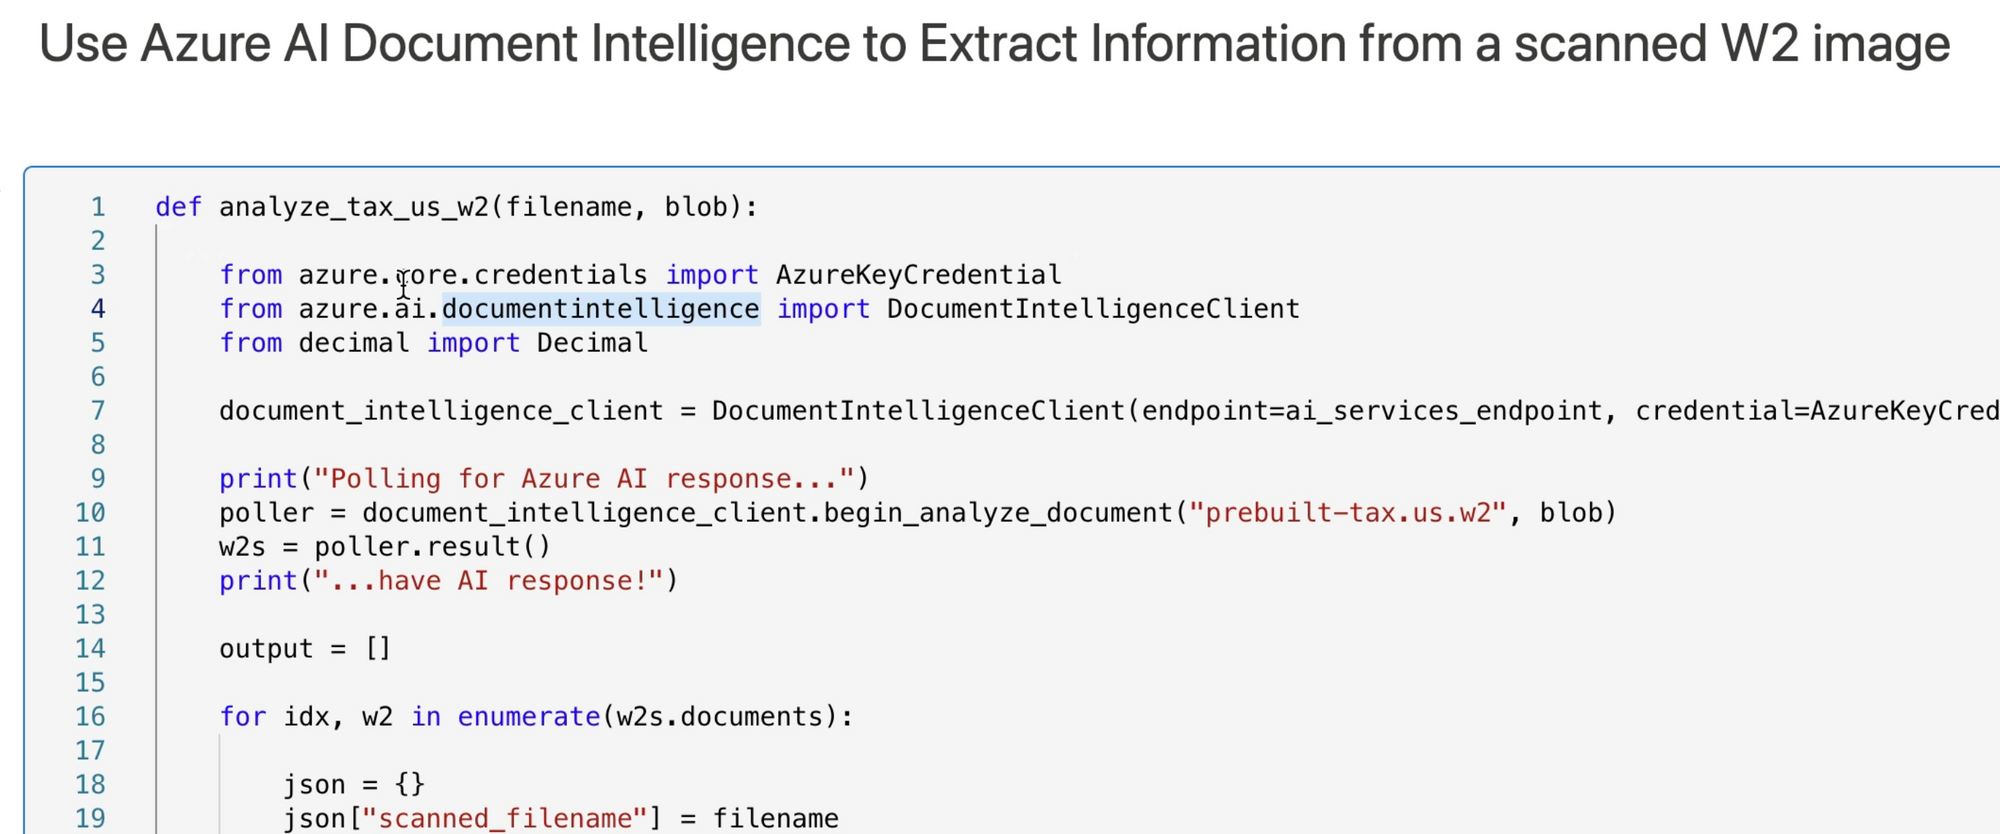
The top art of the analyze_tax_us_w2 function makes the call to Azure AI in lines 7-11. There's a lot going on in three lines of code:
- Line 7 creates a client used to make API calls to Azure AI Services. Note that the endpoint and crediential are provided. The credential was fetched from Azure Key vault.
- Line 10 invokes
begin_analyze_documentto make a POST call to Azure AI Services. Its paramters are (1) the name of the model to use when evaluating the image--prebuilt-tax.us.w2, and (2) the blob, in base64 string format. - The return from
begin_analyze_documentis a poller, which is used to poll the Azure AI GET endpoint until the image is analyzed and a final result of the call is received. - Line 11 is a synchronous wait until a final response to the request is received from Azure AI Services. The return (w2s) is a list of documents found in the image. Note that while the images in this example have only one W2 form each, an image could have more than one form.
After the JSON response is received, the function completes by parsing the nested JSON response for the fields we need for the Delta Table we're creating later in the process.

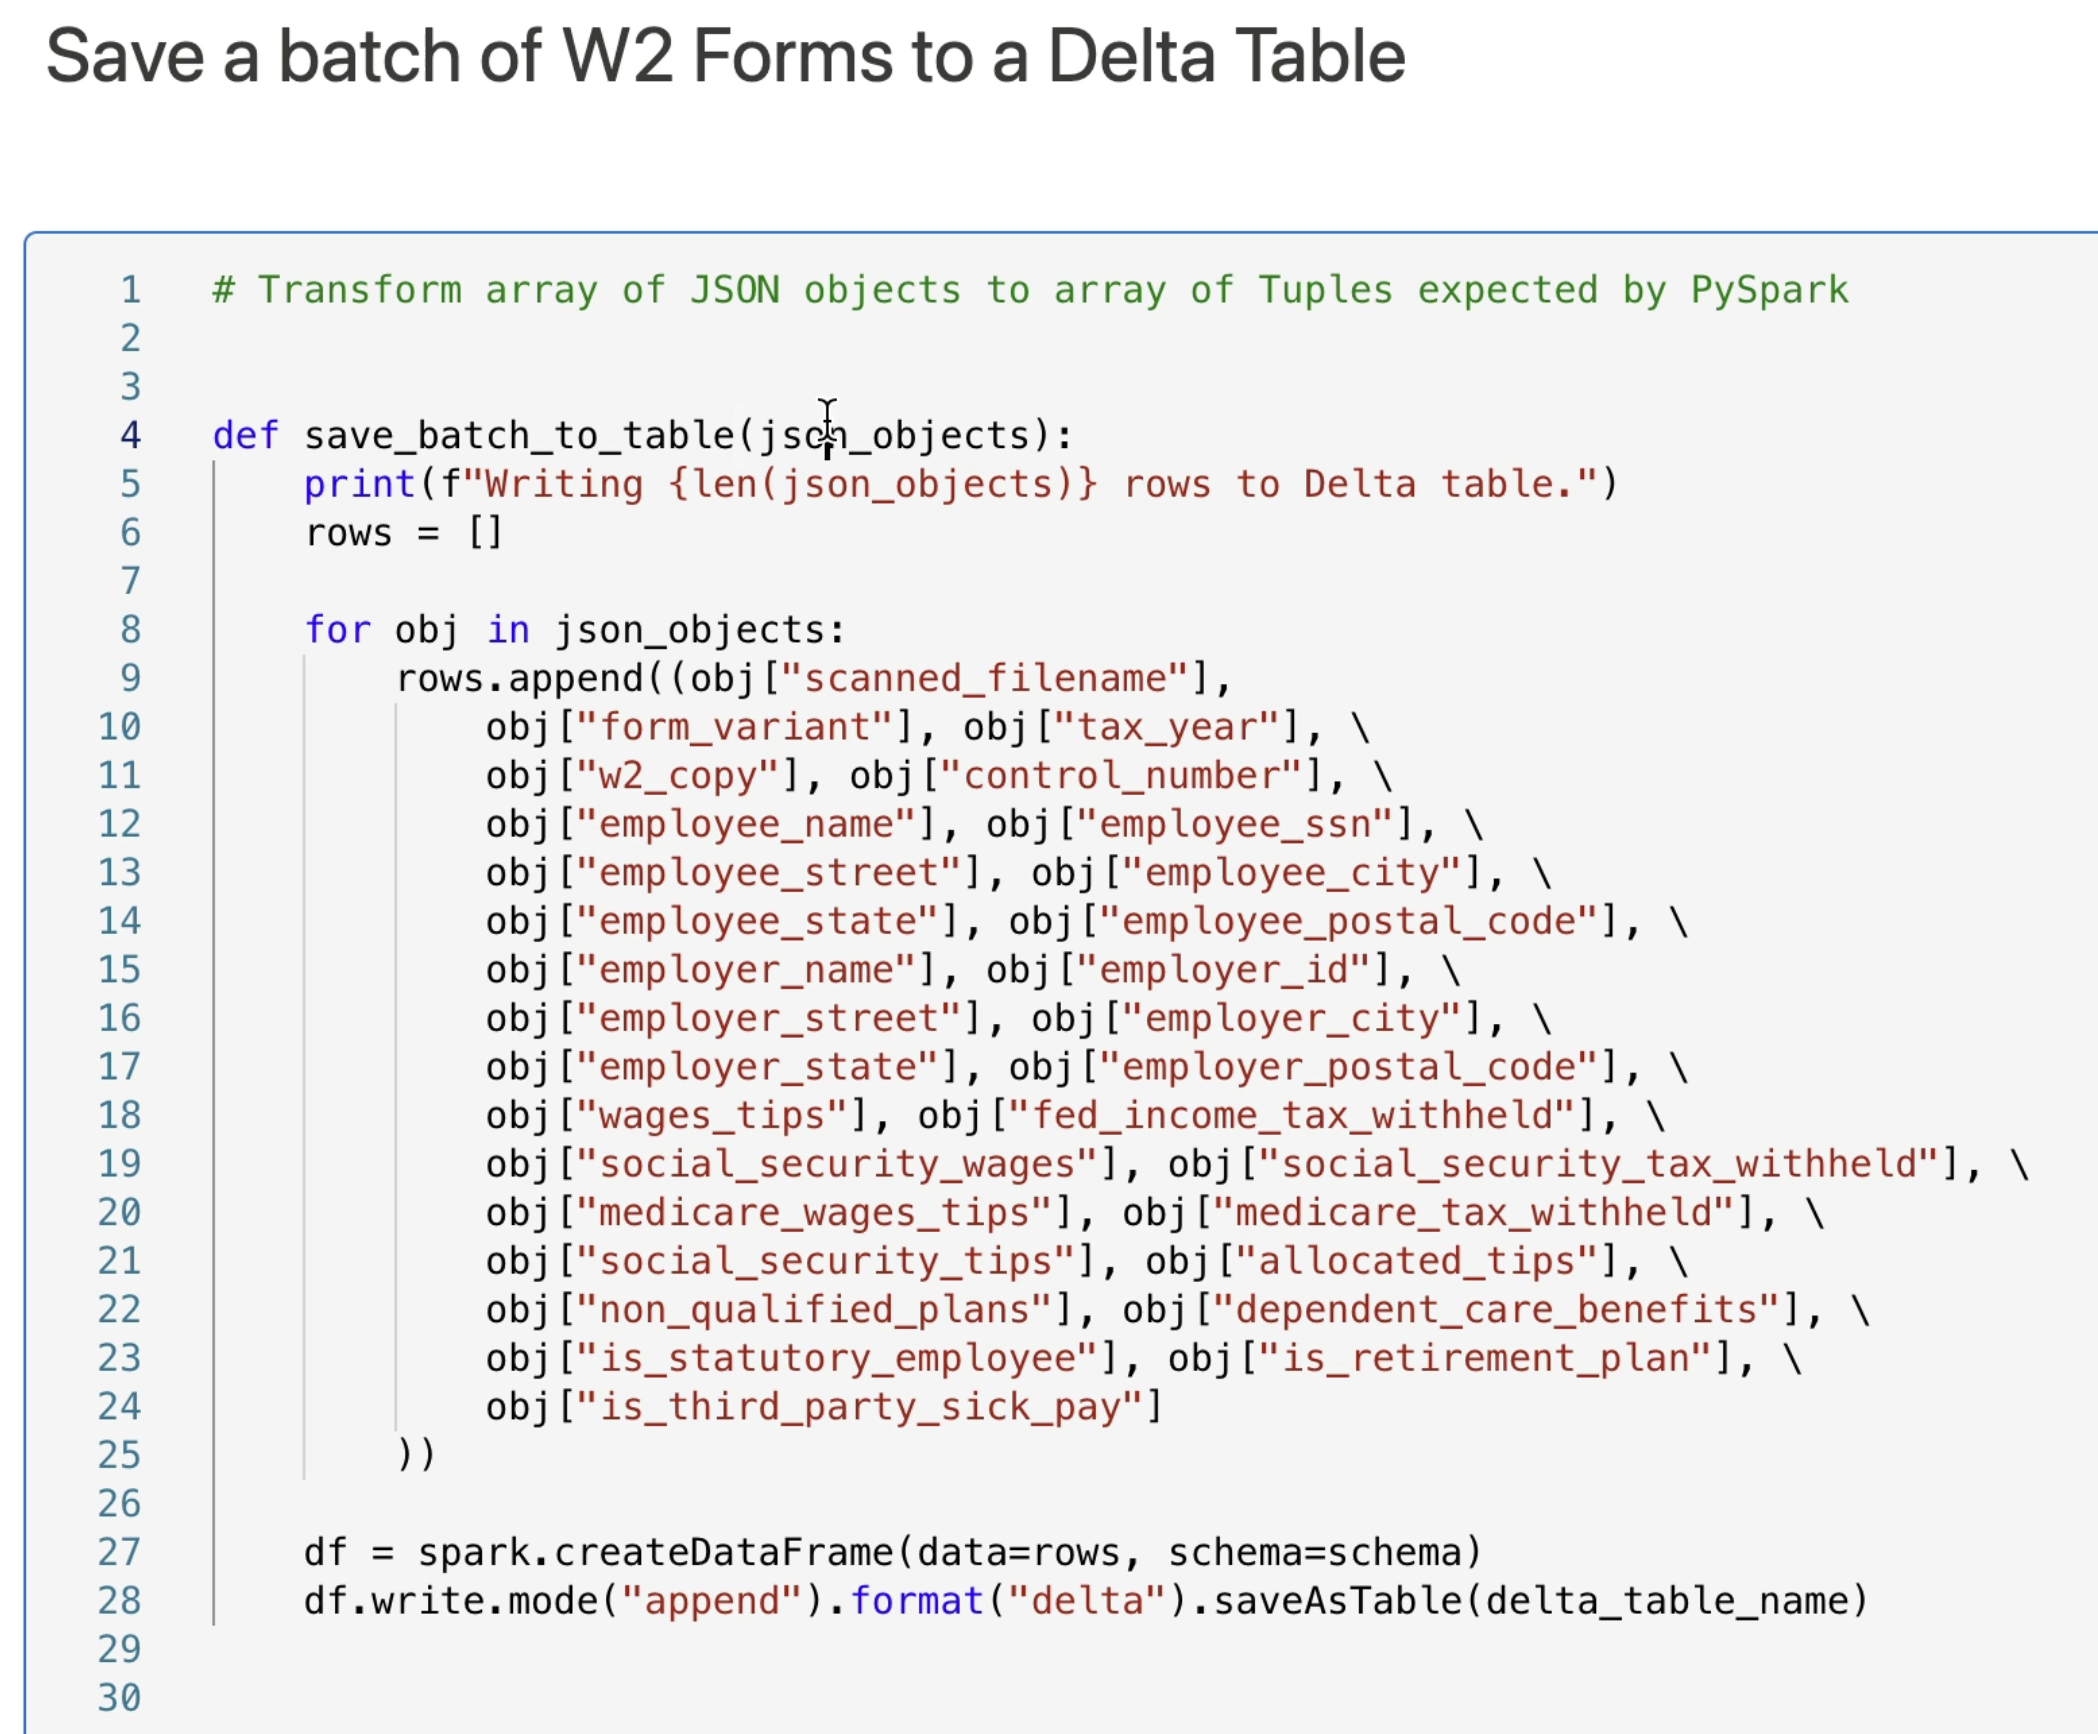
When the response is parsed into a row format, the main loop calls our save_batch_to_table function to write the data extracted from the JPEG form to a Delta Table in the Data Lake.
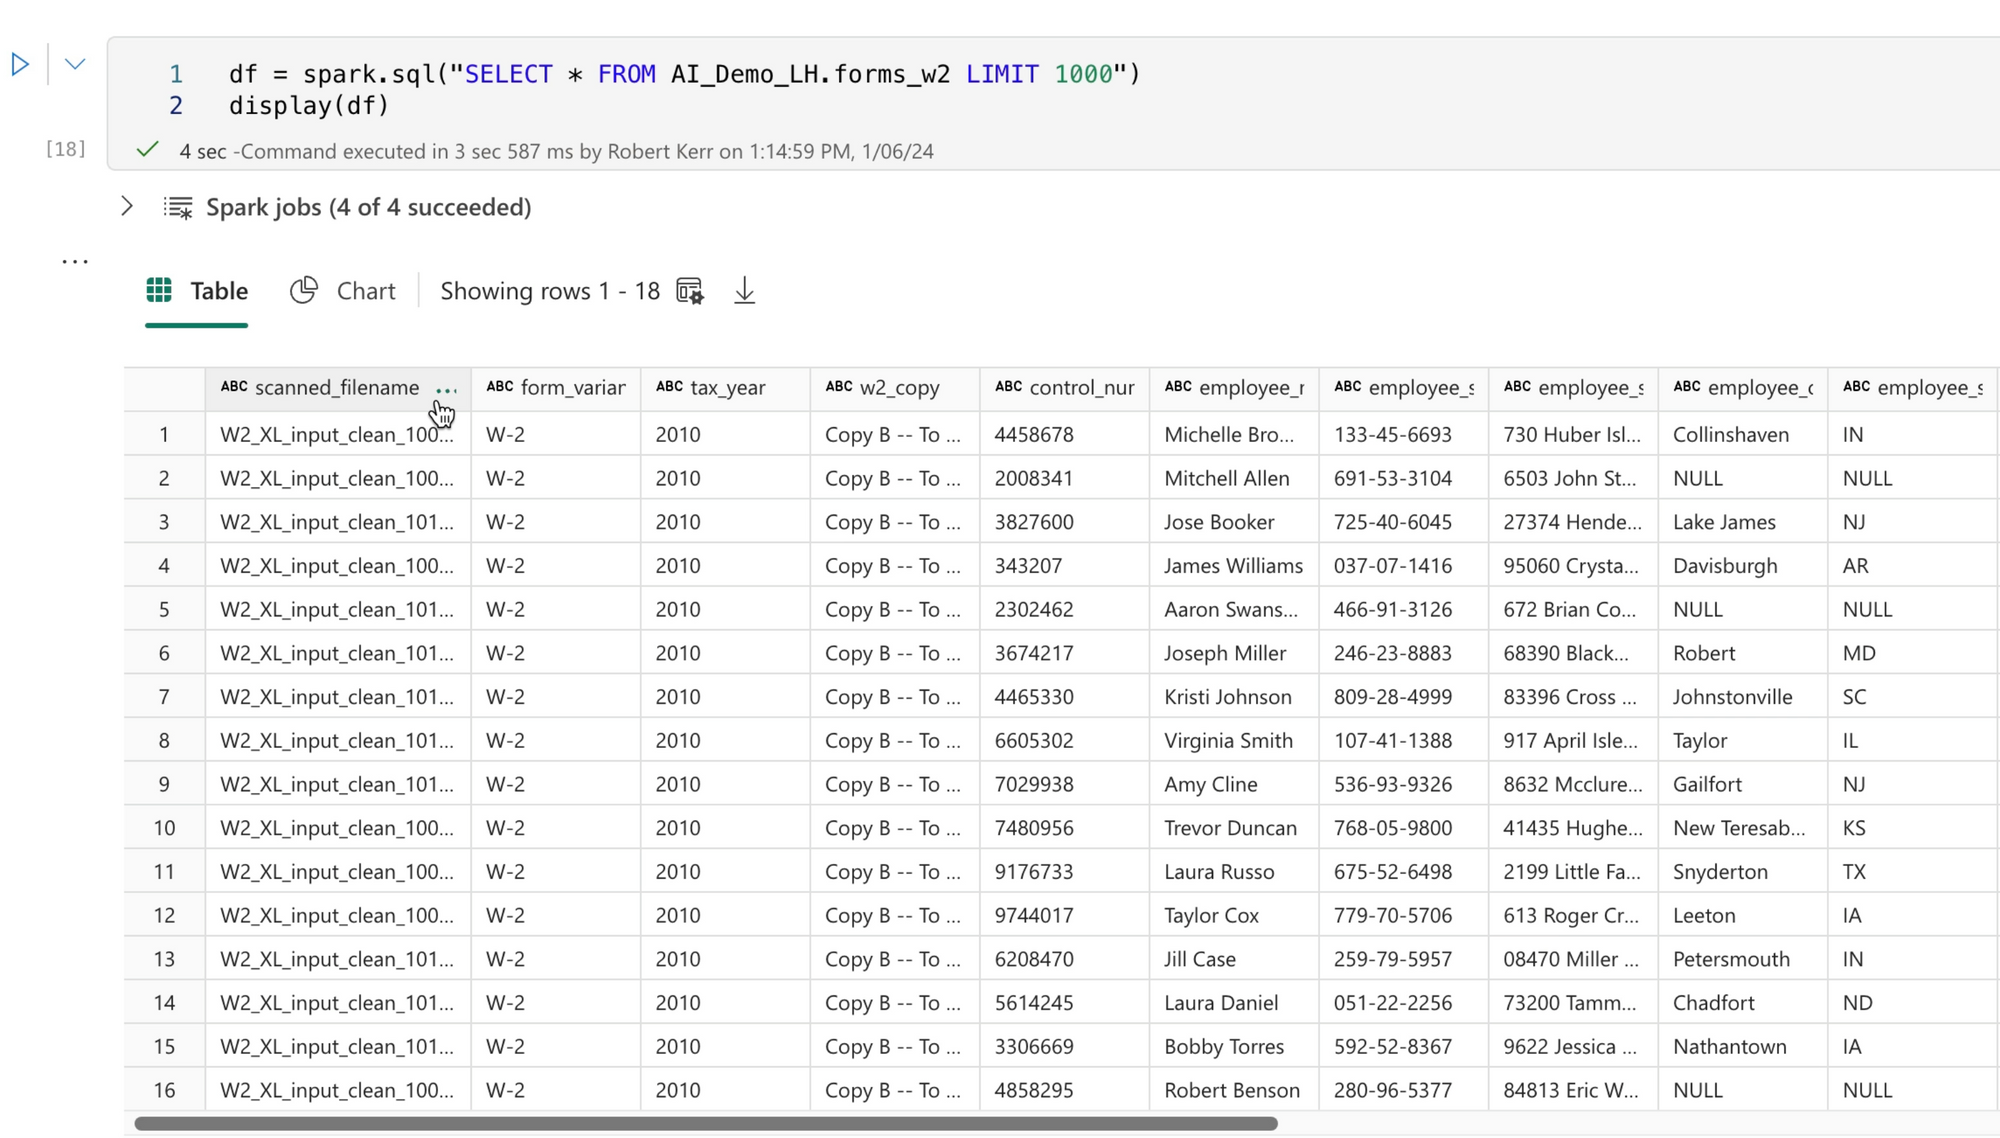
Writing the Output Table
Once all the data from all images are received from Azure AI, extracted into our format design and added to our Delta table, we can use the data and analyze it as we would any other type of data in the database.
Code Available
The Jupyter notebook used in this post is available on GitHub using this link.