


When implementing the Retrieval Augmented Generation (RAG) pattern for Generative AI solutions, the grounding data is searched to identify which content is most relevant to the user's prompt. Then the most relevant sections of content are added to the user prompt to provide a source of knowledge for the LLM to use in formulating a response.
Retrieval Augmented Generation
While keyword searches can be effective, keywords may not capture the linguistic meaning in the user's prompt. Vector embeddings are used to match the user prompt with indexed content according to the meaning.
I've covered keyword search and vector embeddings in previous posts, so take a look at them for a more detailed discussion:
- RAG with Keyword Search using Azure AI Search
- RAG with Vector Search using the Pinecone vector database
I've also discussed the basic concepts around document chunking when using vector embeddings here:
This post builds on the concepts in the three previous articles and demonstrates how the Azure AI Search integrated vector embeddings feature can be used to hide the vectorization details within the Azure AI Search service.
Azure AI Search Integrated Embeddings
The integrated embeddings feature integrates the following two vector embedding processes into Azure AI Search as a skillset, using skills provided by Microsoft:
- Text splitting - the process of breaking a large document (e.g. a PDF) into smaller chunks that can be represented by a fixed vector size, typically 1536 bytes.
- Embeddings - the mathematical process of analyzing a chunk of text and converting it to a vector (array) of floating-point numbers.
By integrating text splitting and vector calculations into AI Search, we can use the index configuration (rather than code) to implement a powerful and high-performance vector search data source to use with generative AI solutions.
Service Limitations
Azure AI Search integrated vector embeddings will satisfy a large number of RAG requirements, but there are limitations to be aware of:
- At this writing (November 2023), only text embeddings are supported by the integrating embedding skills. Other media types (e.g. images and video) will need a different embedding solution --but the resulting vectors could still be added to Azure AI Search.
- The documents to be indexed would need to be supported by the Azure AI Search Indexers. Common files such as PDF, Word, Text, etc., are supported, but be sure to check document type support.
- Azure AI Search indexes and indexers have file size and vector size limitations depending on the service tier. Limitations and sizing maximums are documented by service tier.
The remainder of this post walks through the process of building a vector index to use as a RAG data source for a web-based Generative AI question/answer application. The walk-through is also available in a video format on YouTube.
Building a Solution
In this section we'll walk through the process of building a vector embedding index, and then integrating it with a Question/Answer application using Azure OpenAI GPT3.5-Turbo as the backend Large Language Model (LLM).
I'll be using the Azure CLI and REST interfaces to build the indexes. All of the configurations done here can be done in the Azure Portal web UI if you prefer.
Create the Azure AI Search Service
To create an index that contains vectors, first we need to create a search service in Azure. AI Search Service is available in multiple tiers--from Free to very large. For this demo, we can use the Free tier since our capacity requirements are low.
Let's create the service using the Azure CLI:
# create a new resource group in the default Azure subscription
az group create -n robkerrai-demo-rg

# create a search service in the resource group
az search service create --name robkerrai-demo \
--resource-group robkerrai-demo-rg \
--sku Free \
--partition-count 1 --replica-count 1
To create the index and related objects in the search service, we'll need an admin key from the new service. We'll use the CLI to fetch the key:
az search admin-key show \
-g robkerrai-demo-rg \
--service-name robkerrai-demo
The output from the admin-key show command will be a hexadecimal string which is added to the HTTP headers for REST calls in the next section.
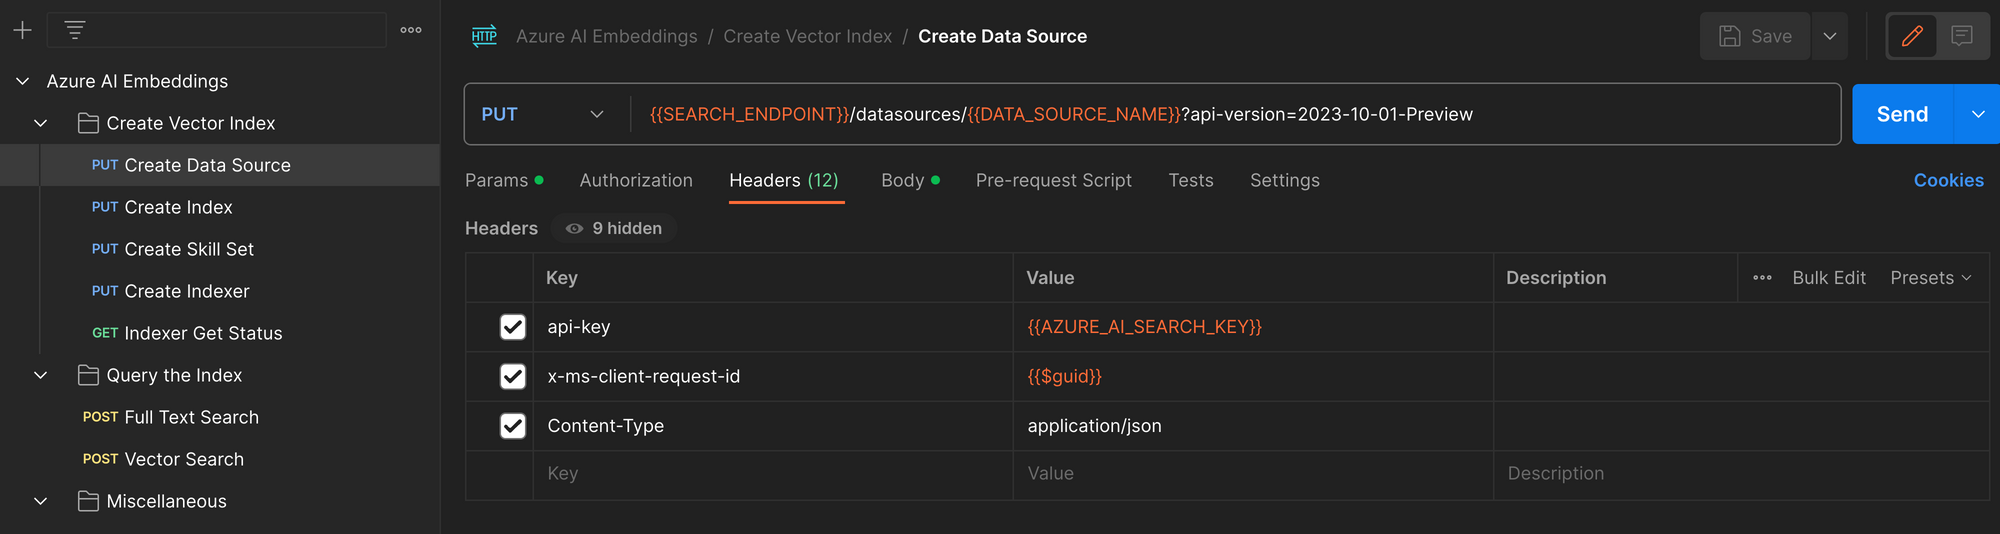
Create the Data Source
For files to be indexed by an Azure AI Search Indexer, we need to create a data source within the search service. The data source is just a way to associate a name for external data with a connection string authorizing the indexer to access the data.
In this scenario the external data source is an Azure BLOB container with a collection of PDF files.
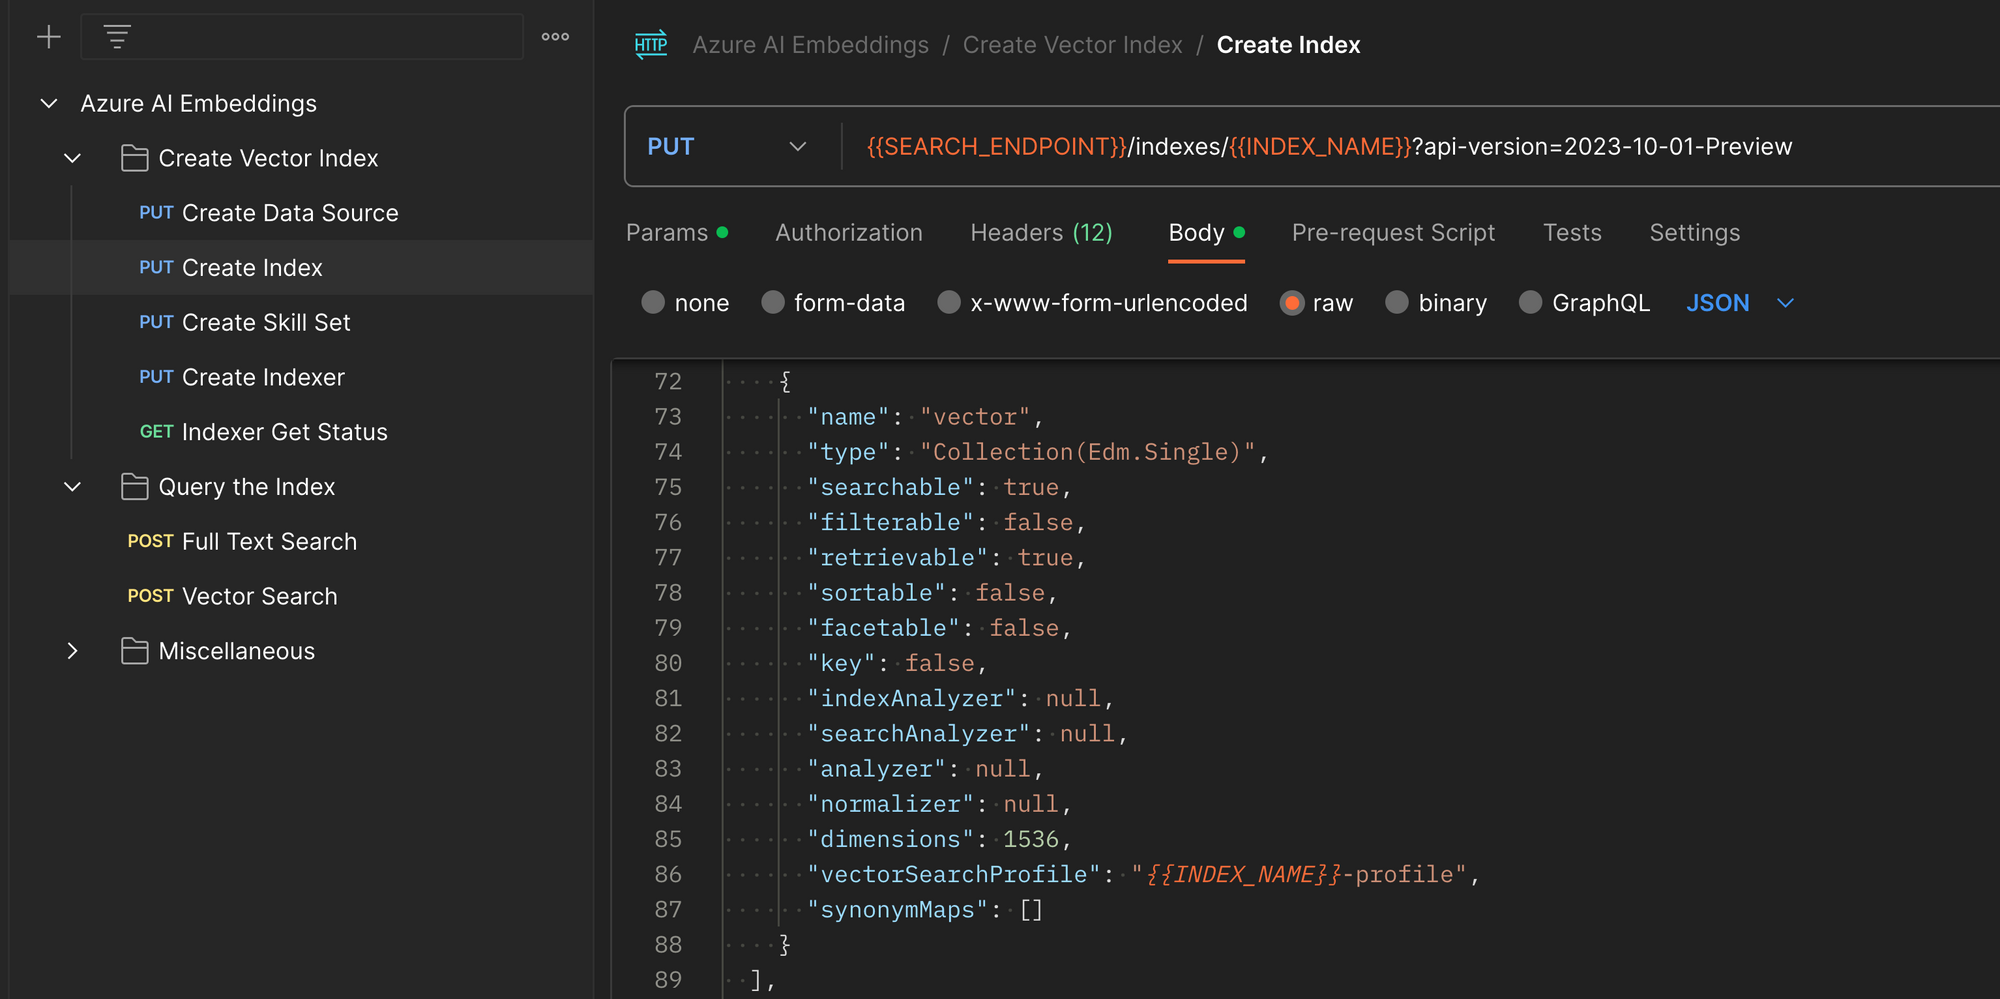
Create the Index
An index can be thought of as a database table, and in the case of a vector index the columns include:
- Chunk - as a PDF file is split into chunks, each chunk's raw text is stored inthe index. Since we won't search the index with text, the chunk text becomes the result of the index search.
- Vector - Azure AI Search will use OpenAI's
text-embedding-ada-002model to create embeddings on our behalf, and the resulting vectors are stored in the index. - Chunk Source - we store the source file for the chunk. This allows apps using the index to know what document they could offer to the user when asked for the original source of knowledge used to create the LLM response.
To create the index, we call the following REST call, with a JSON body describing the index details.
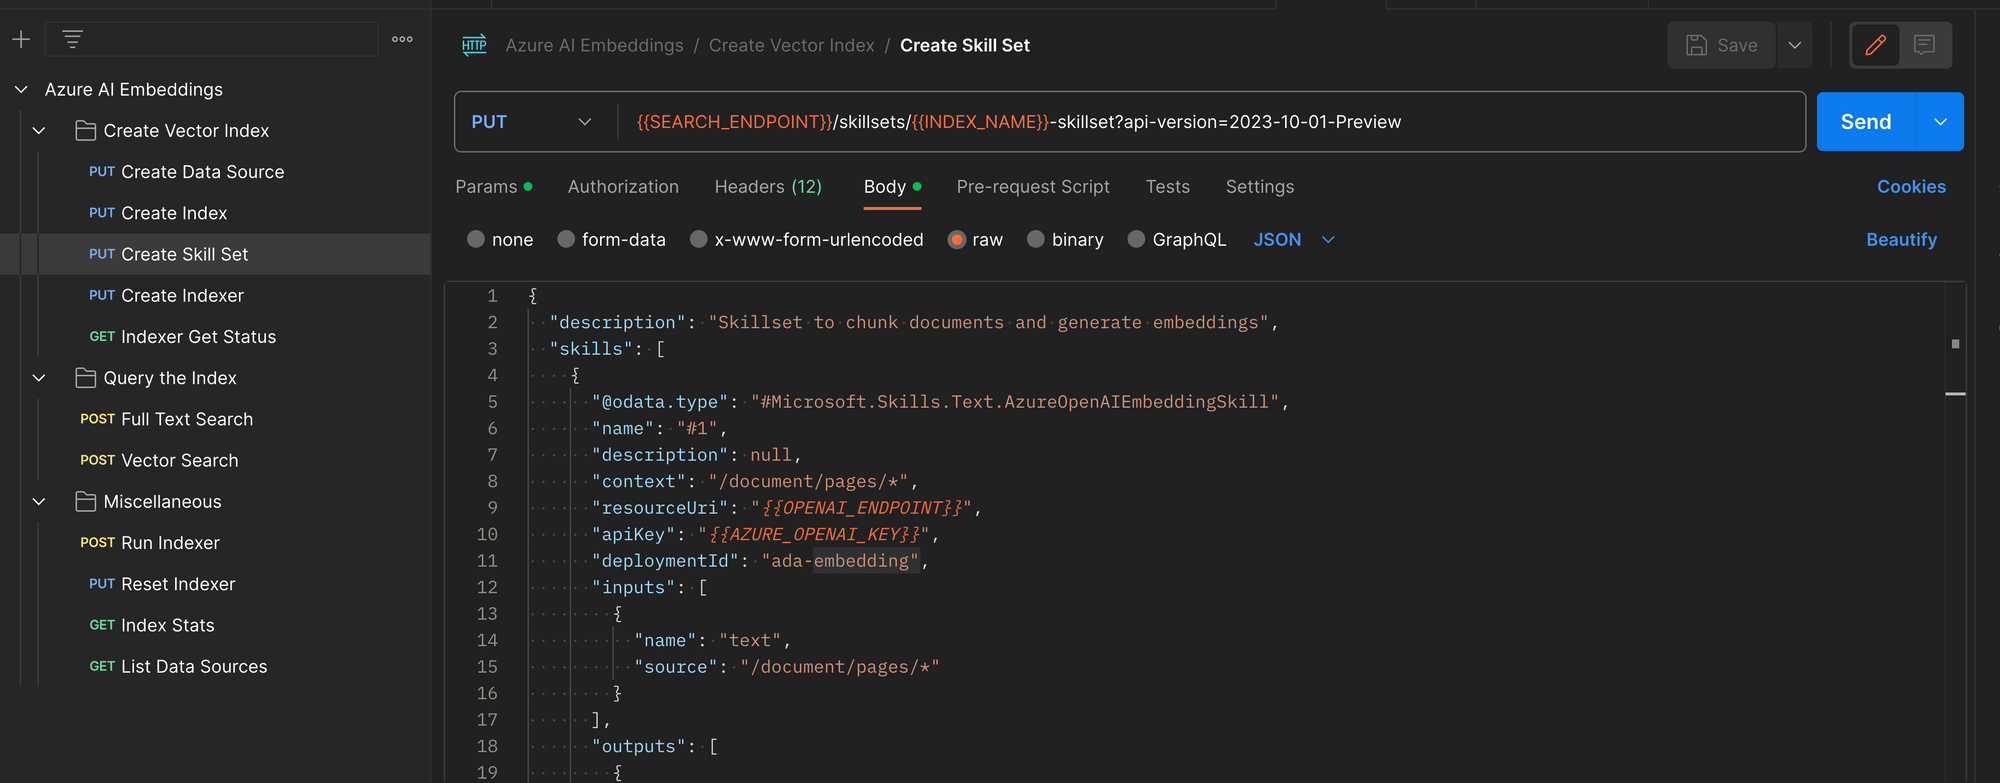
Create the Skillset
As the Indexer crawls our PDF files, splits them into chunks, and creates vector embeddings for each chunk, it uses a set of instructions called a skill. An indexer can have many skills, and the set of skills provided to it is called a skillset.
We create the Skillset via REST. This skill combines the knowledge of how to split files into chunks, and how to create vector embeddings for each chunk split from the file.
Each embedding is stored in the index along with the chunk that was used to create it. When users search the index, the index uses the same embedding logic to embed prompts, and then finds the chunks which are closest in meaning to the input prompt. In the end, it's all all math!
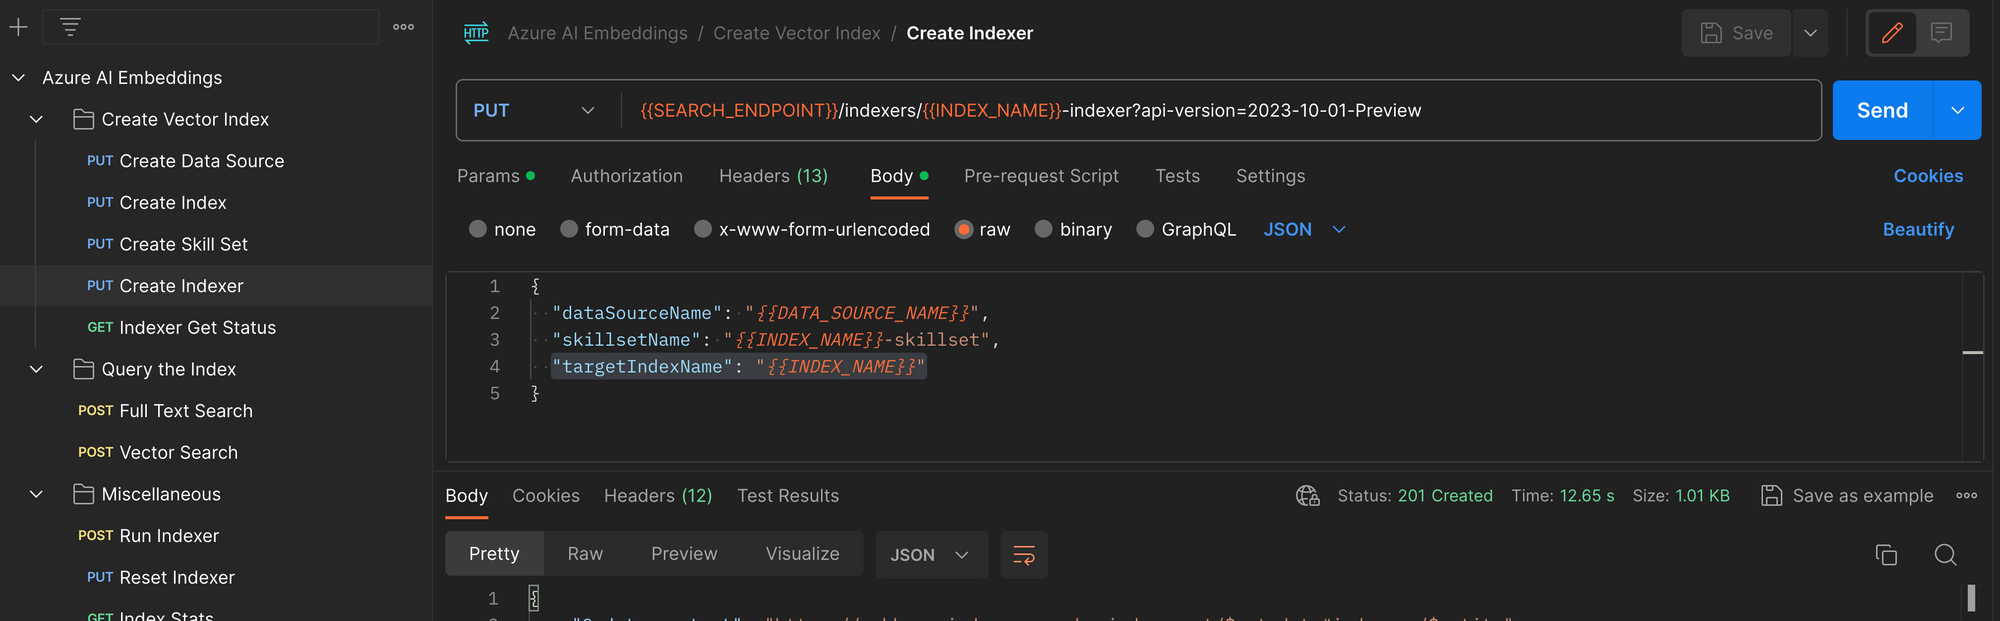
Create the Indexer
The final step in creating the vector index is to create the indexer. An indexer is similar to a web crawler in a web search engine--it reads each file in the source knowledge base, processes the data in the file, and adds entries to the index.
In the case of a vector embedding index, the following steps are performed for each file:
- Read a source file (PDF)
- Split the PDF into chunks of some maximum size (size depends on how much text can be processed in to the fixed embedding size).
- Create a vector for each chunk
- Create an entry in the index for each chunk/vector pair
Examine the Vector Index
Before moving on to using the index in our Generative AI application, let's look at the contents of the index to reinforce understanding of just what a vector index is:
We can query the vector index for some text by sending a POST /indexes/{index name}/docs/search REST call to the search service with payload such as this:
{
    "select": "title, chunk, vector",
    "vectorQueries": [
        {
            "kind": "text",
            "text": "What is the aviation authority for The United States?",
            "fields": "vector",
            "k": 5
        }
    ]
}
The response will include a list of vectors that are similar in meaning to the input text in the query. The following object is an example of a single match returned in the set of highest-ranking index matches.
{
  "@search.score": 0.8525164,
  "chunk": "searching existing data sources, gathering...",
  "title": "2021-05-52_Emergency.pdf",
  "vector": [
     -0.009808622,
     -0.015937282,
     -0.029522708,
     .
     .
     .
  ]
}
Run the Demo App
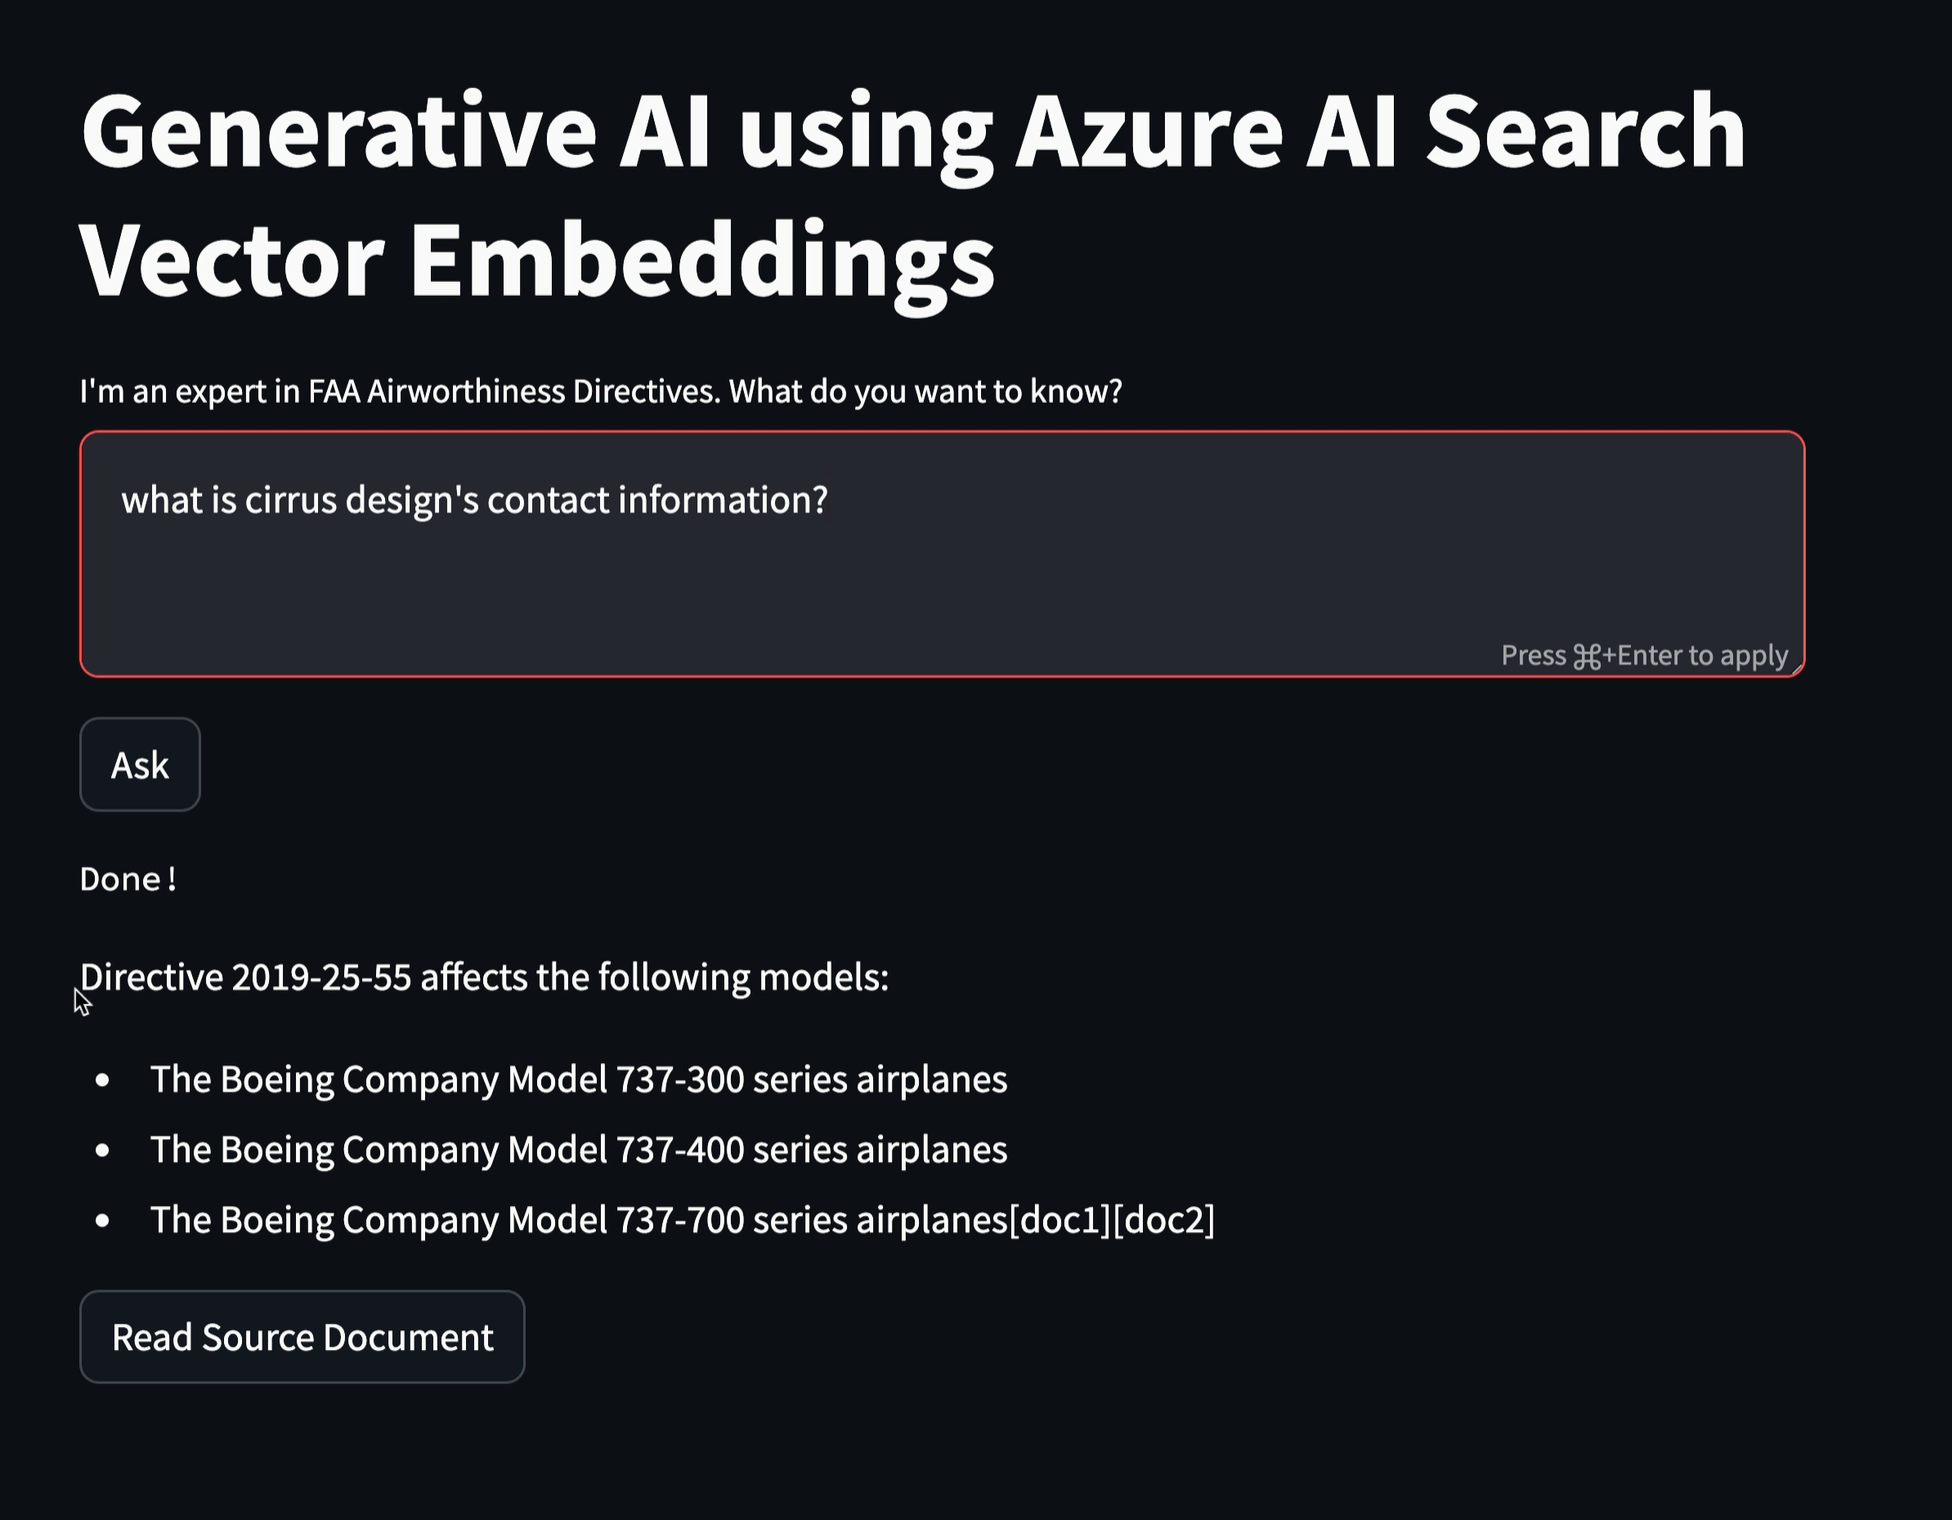
To test the end-to-end solution, we create a Streamlit web app using Python. The app allows a user to enter some prompt text and returns a response from the OpenAI LLM.
The overall process that supports the user experience is as follows:
- User enters text prompt and presses the "Ask" button
- The Streamlit app sends the user prompt to the Azure OpenAI service, along with a request that the service uses the index we created above to search for PDF chunks that contain knowledge to answer the user prompt.
- Azure OpenAI service uses the embedding model to create a vector embedding of the user prompt.
- The OpenAI Service queries the Azure AI Search index for chunks of text close in meaning to the user prompt (this is a vector search that produces text as a n output).
- Azure OpenAI Service adds the chunk text to the prompt ("using this information, answer this user prompt").
- Azure Open AI Service returns the LLM response to the application, which displays it for the user.
- The application also receives the filename of the file(s) that were used to answer the question, and presents a button the user can press to open the original file.
The demo app is shown in detail in the YouTube video.