


Microsoft provides a local emulator that can be used during development when it's either undesirable or not possible to use cloud-based Blob, Queue and Table storage assets within an Azure Storage account.
Let's look at how to add and use Azurite support to an existing Function App project developed in Visual Studio Code.
This walk-through is based on the Microsoft Learn Documentation which describes Azurite in more detail and is a read I recommend.
Install Azurite
If you're developing a Function App, you probably have Azurite installed already (it's also used as a local emulator for Function Apps).
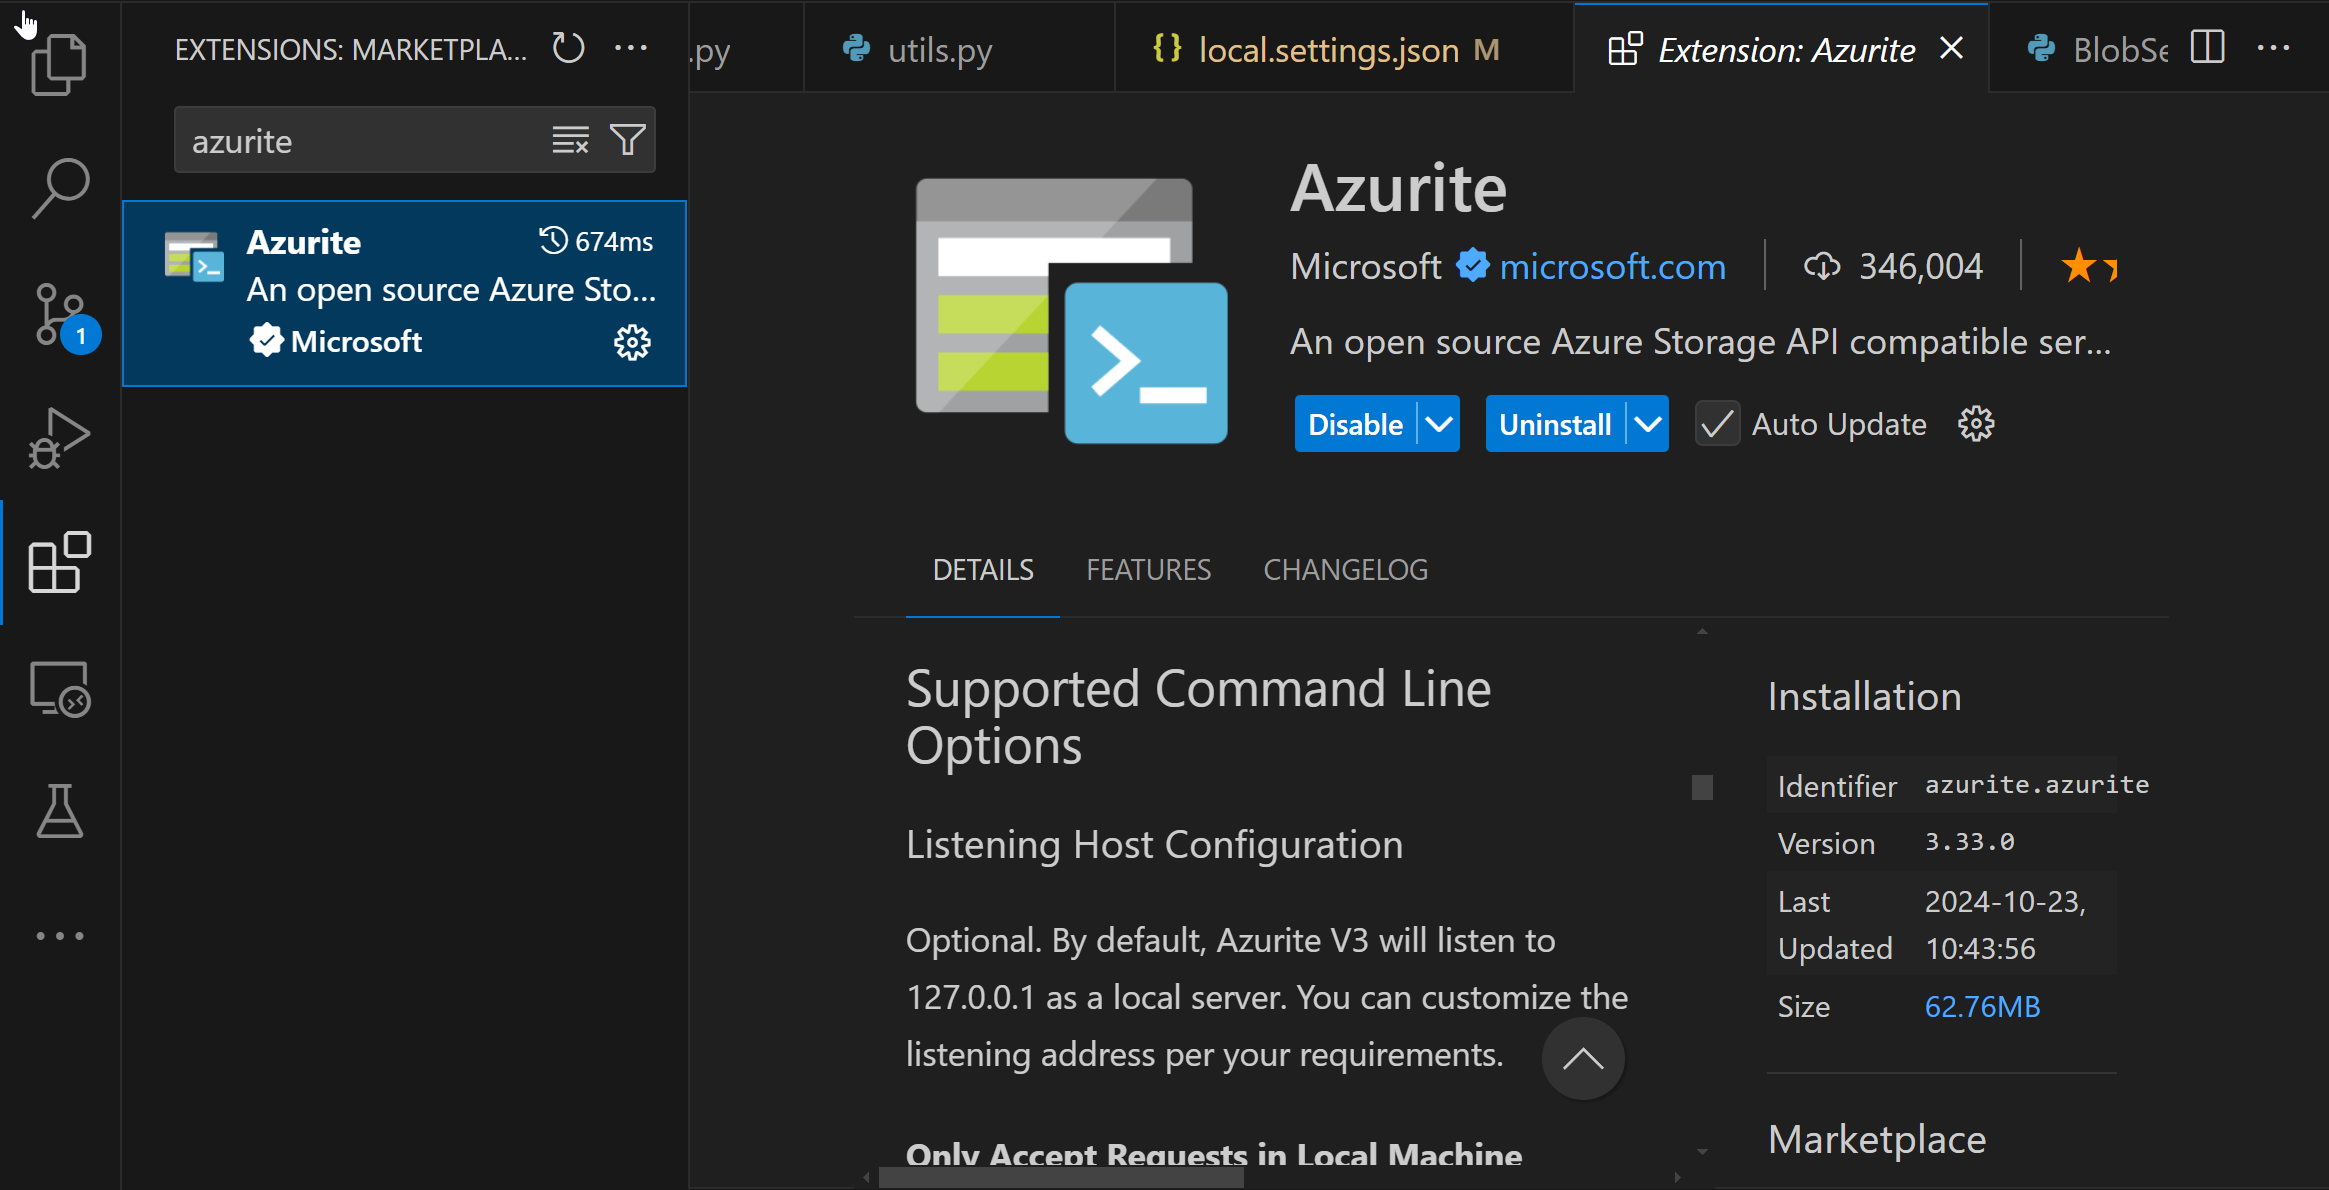
Confirm Azurite is installed from the extension marketplace. If it's not, install it first.
Configure Azurite
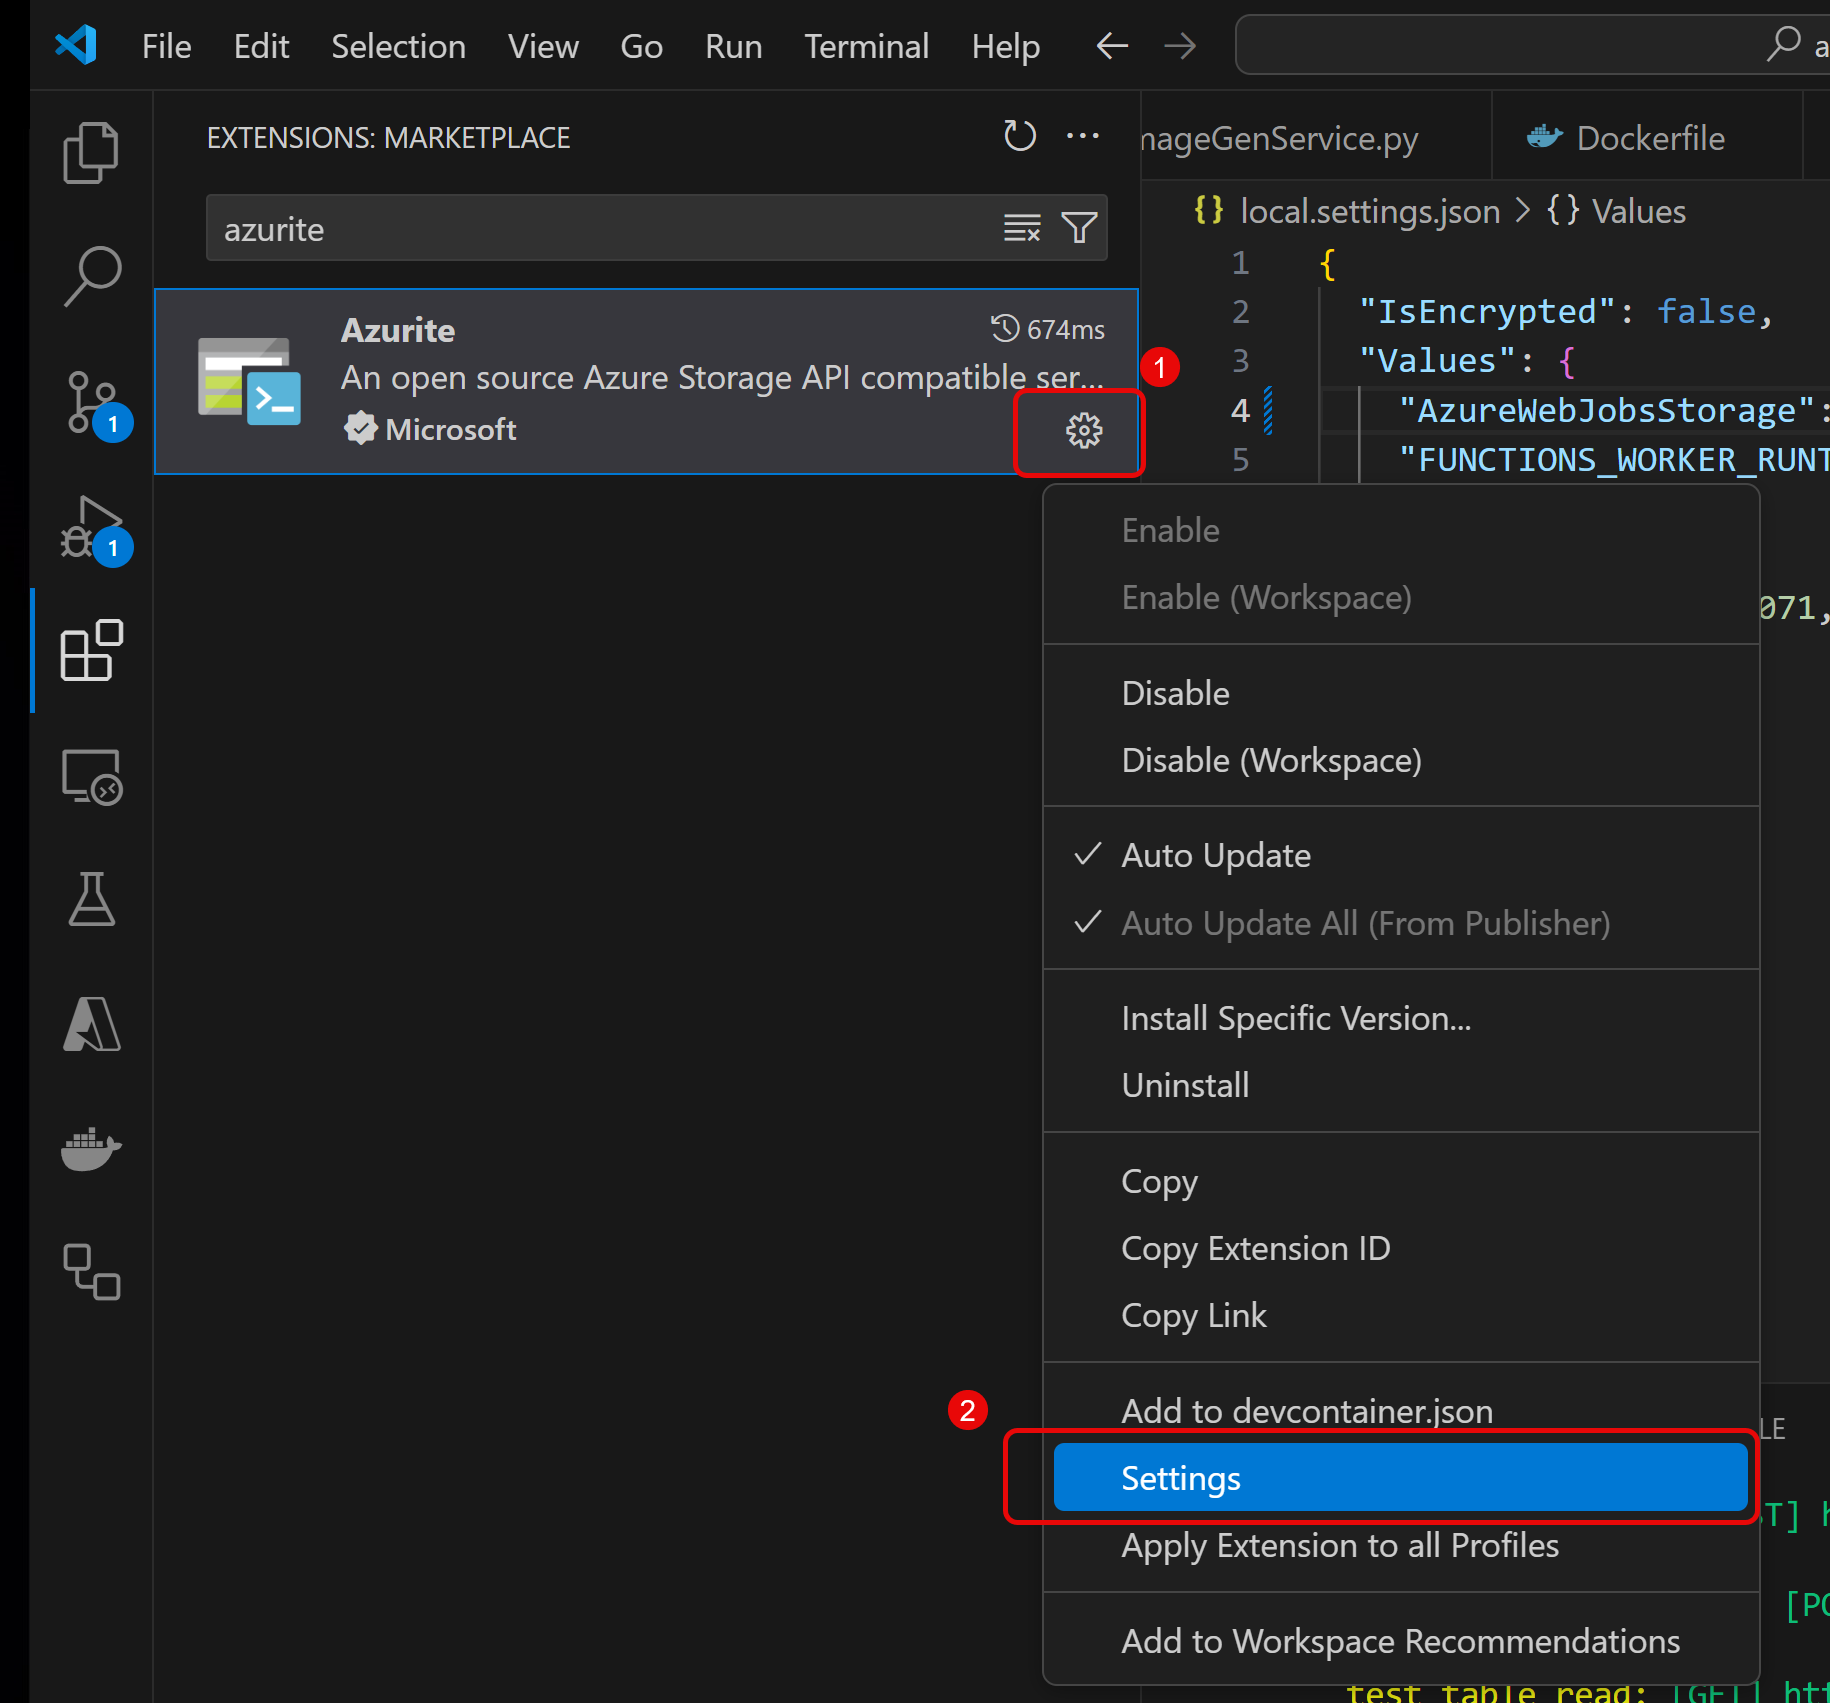
Next configure Azurite by selecting the settings gear from the Azurite entry in the extension panel, then select Settings.
Confirm the local IP Address is set for each of the services desired (e.g. Blob, Table, Queue)
The default settings:
- Blob storage: 127.0.0.1:10000
- Table storage: 127.0.0.1:10001
- Queue storage: 127.0.0.1:10002
Use the defaults unless there are port conflicts with other local services.

Start the Storage Emulators
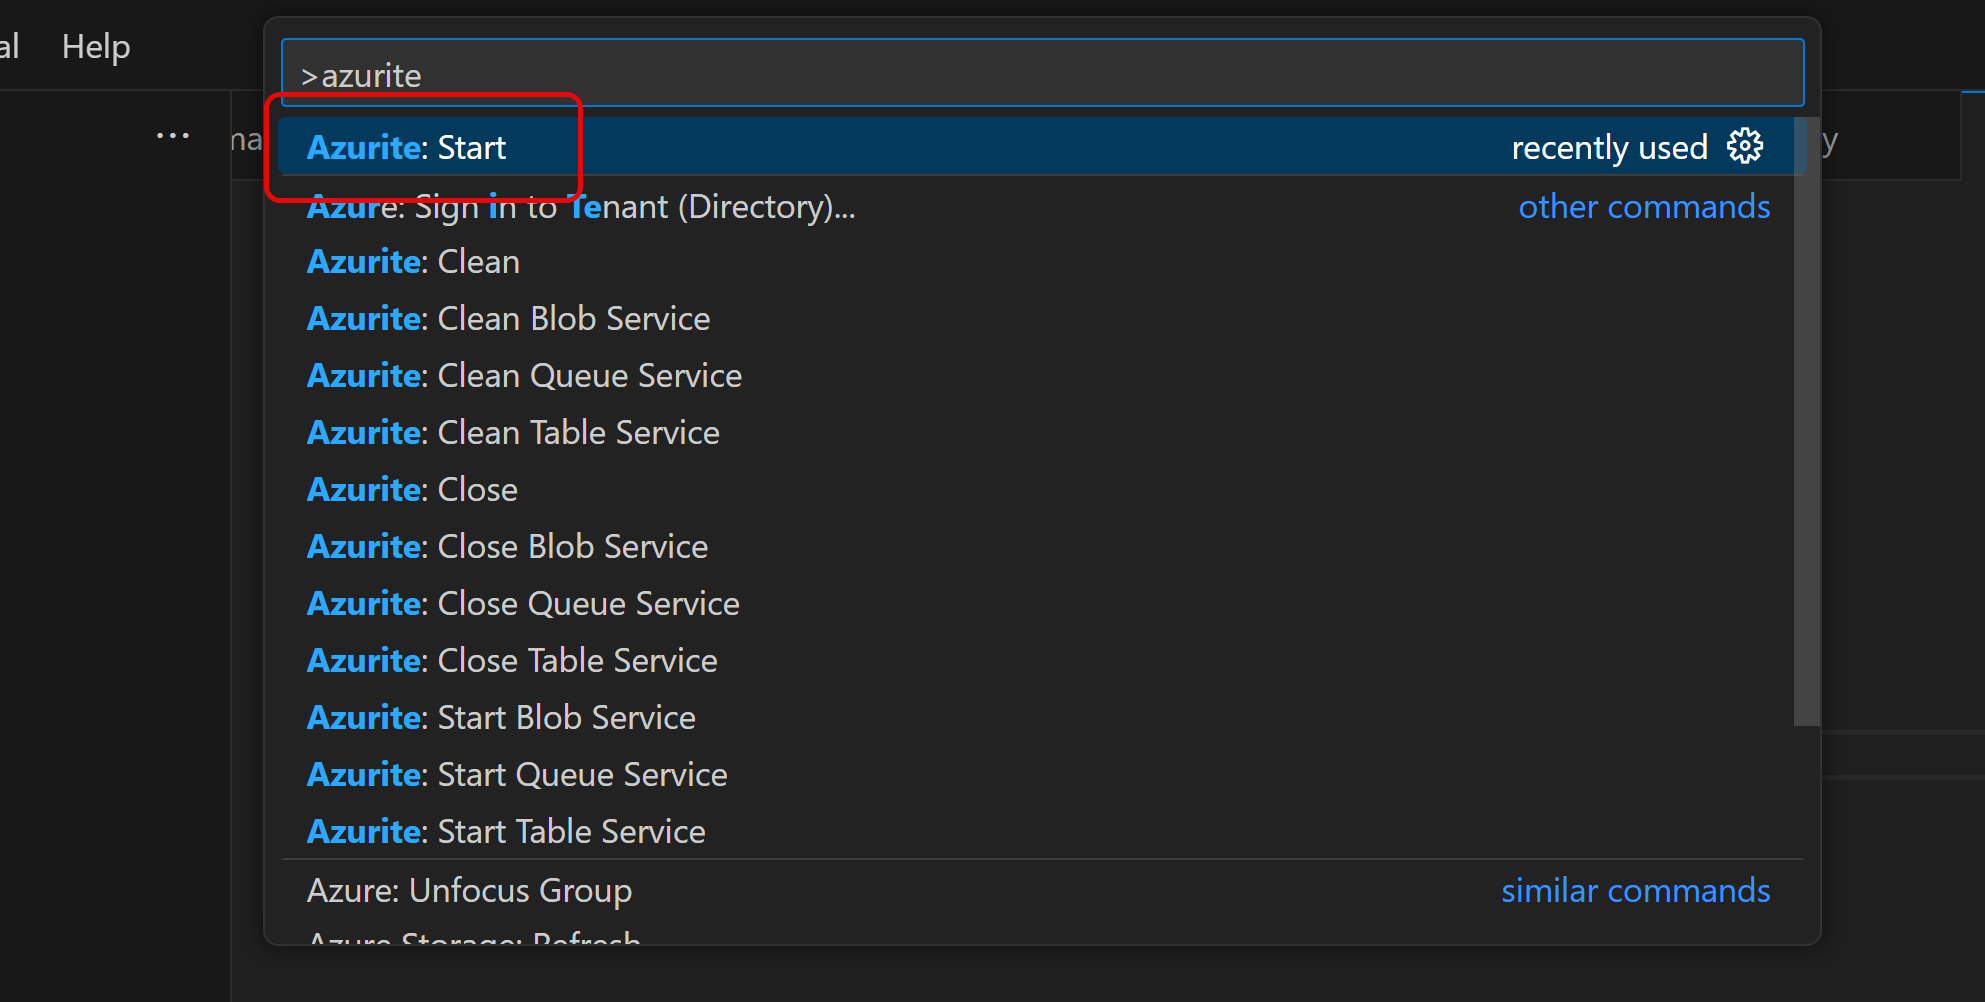
In Visual Studio Code, you can start the Azurite storage emulators via the command palette.
Open the command palette (Ctrl-Shift-P), and
At this point there are local services running on localhost for the services you configured (Blob, Table and/or Queue).
Configure Storage Explorer
Before changing code, let's look at the local storage resources Azurite manages using Azure Storage Explorer.
If you haven't already, download the Azure Storage Explorer and install it on your local system, then run Storage Explorer.
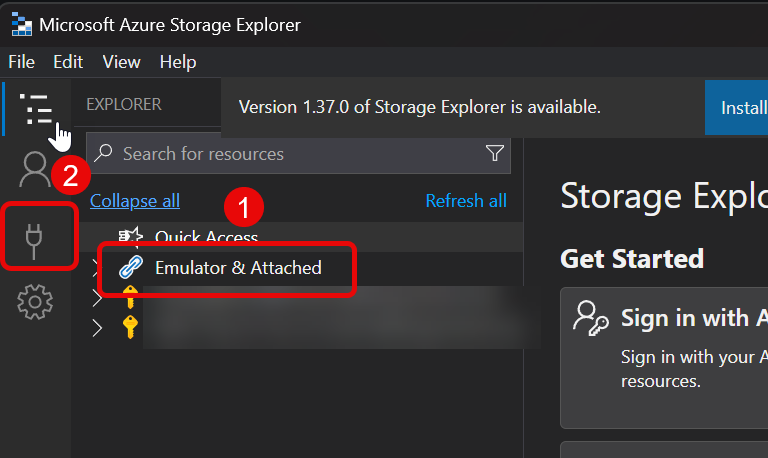
Next, note that the connected services panel includes a folder for Emulator & Attached storage resources (1), which is where we'll be accessing account objects once configured.
Select the Plug icon from the vertical navigation to connect to a new resource (2).
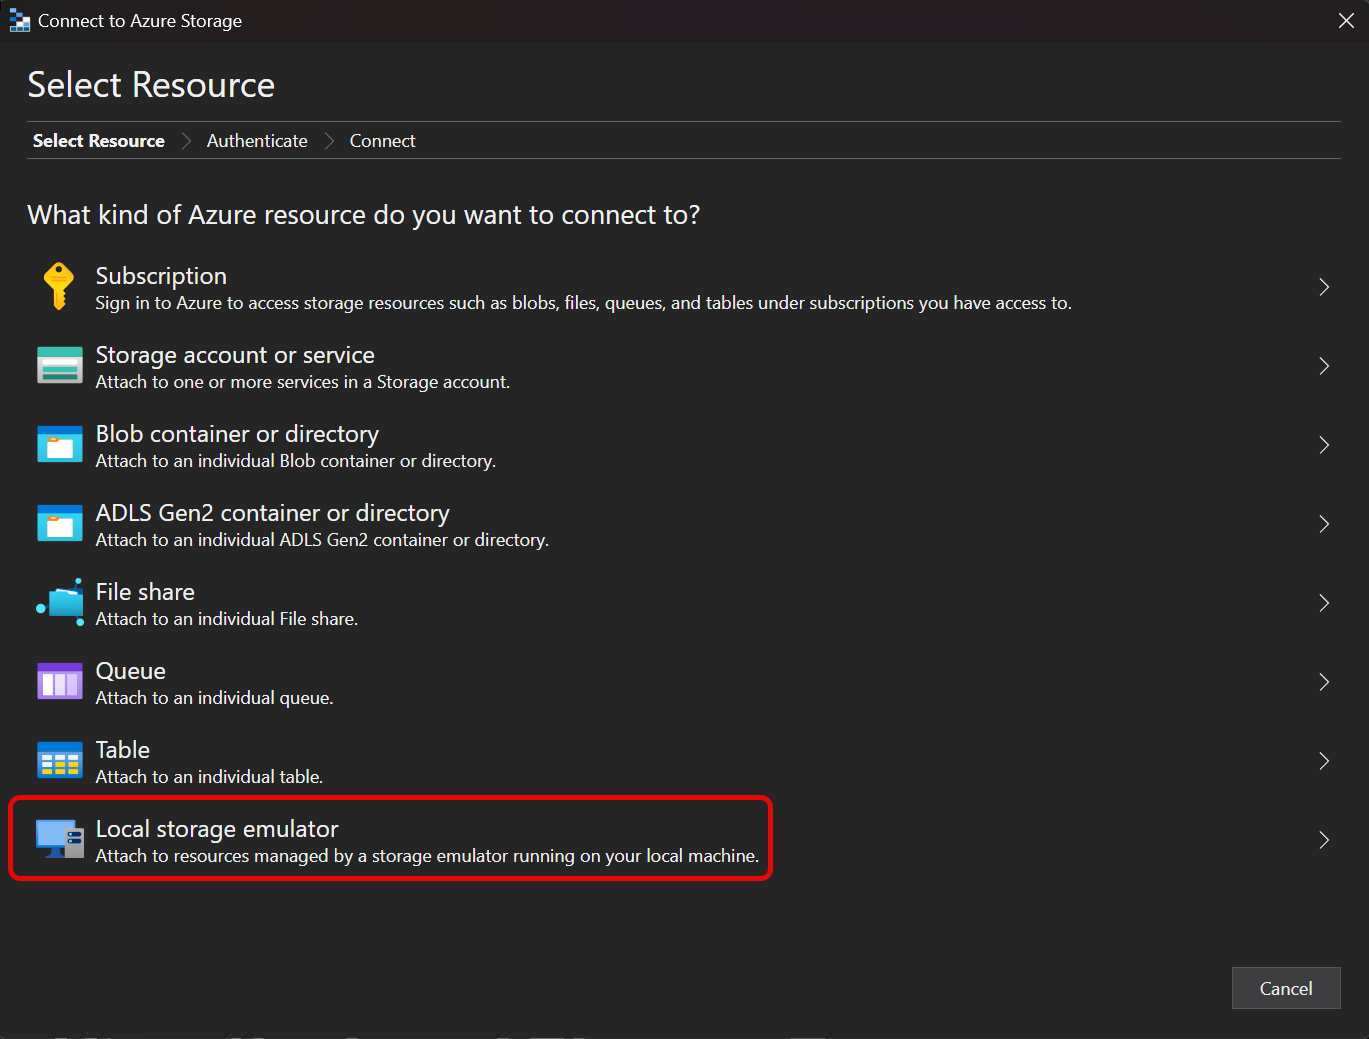
Select the Local storage emulator option from the available types of storage accounts.
Confirm the default settings. These values should match the settings you used in setting up Azurite in Visual Studio Code.
View Accounts in Storage Explorer
Once configured, you will be able to browse and change the content of the storage account.
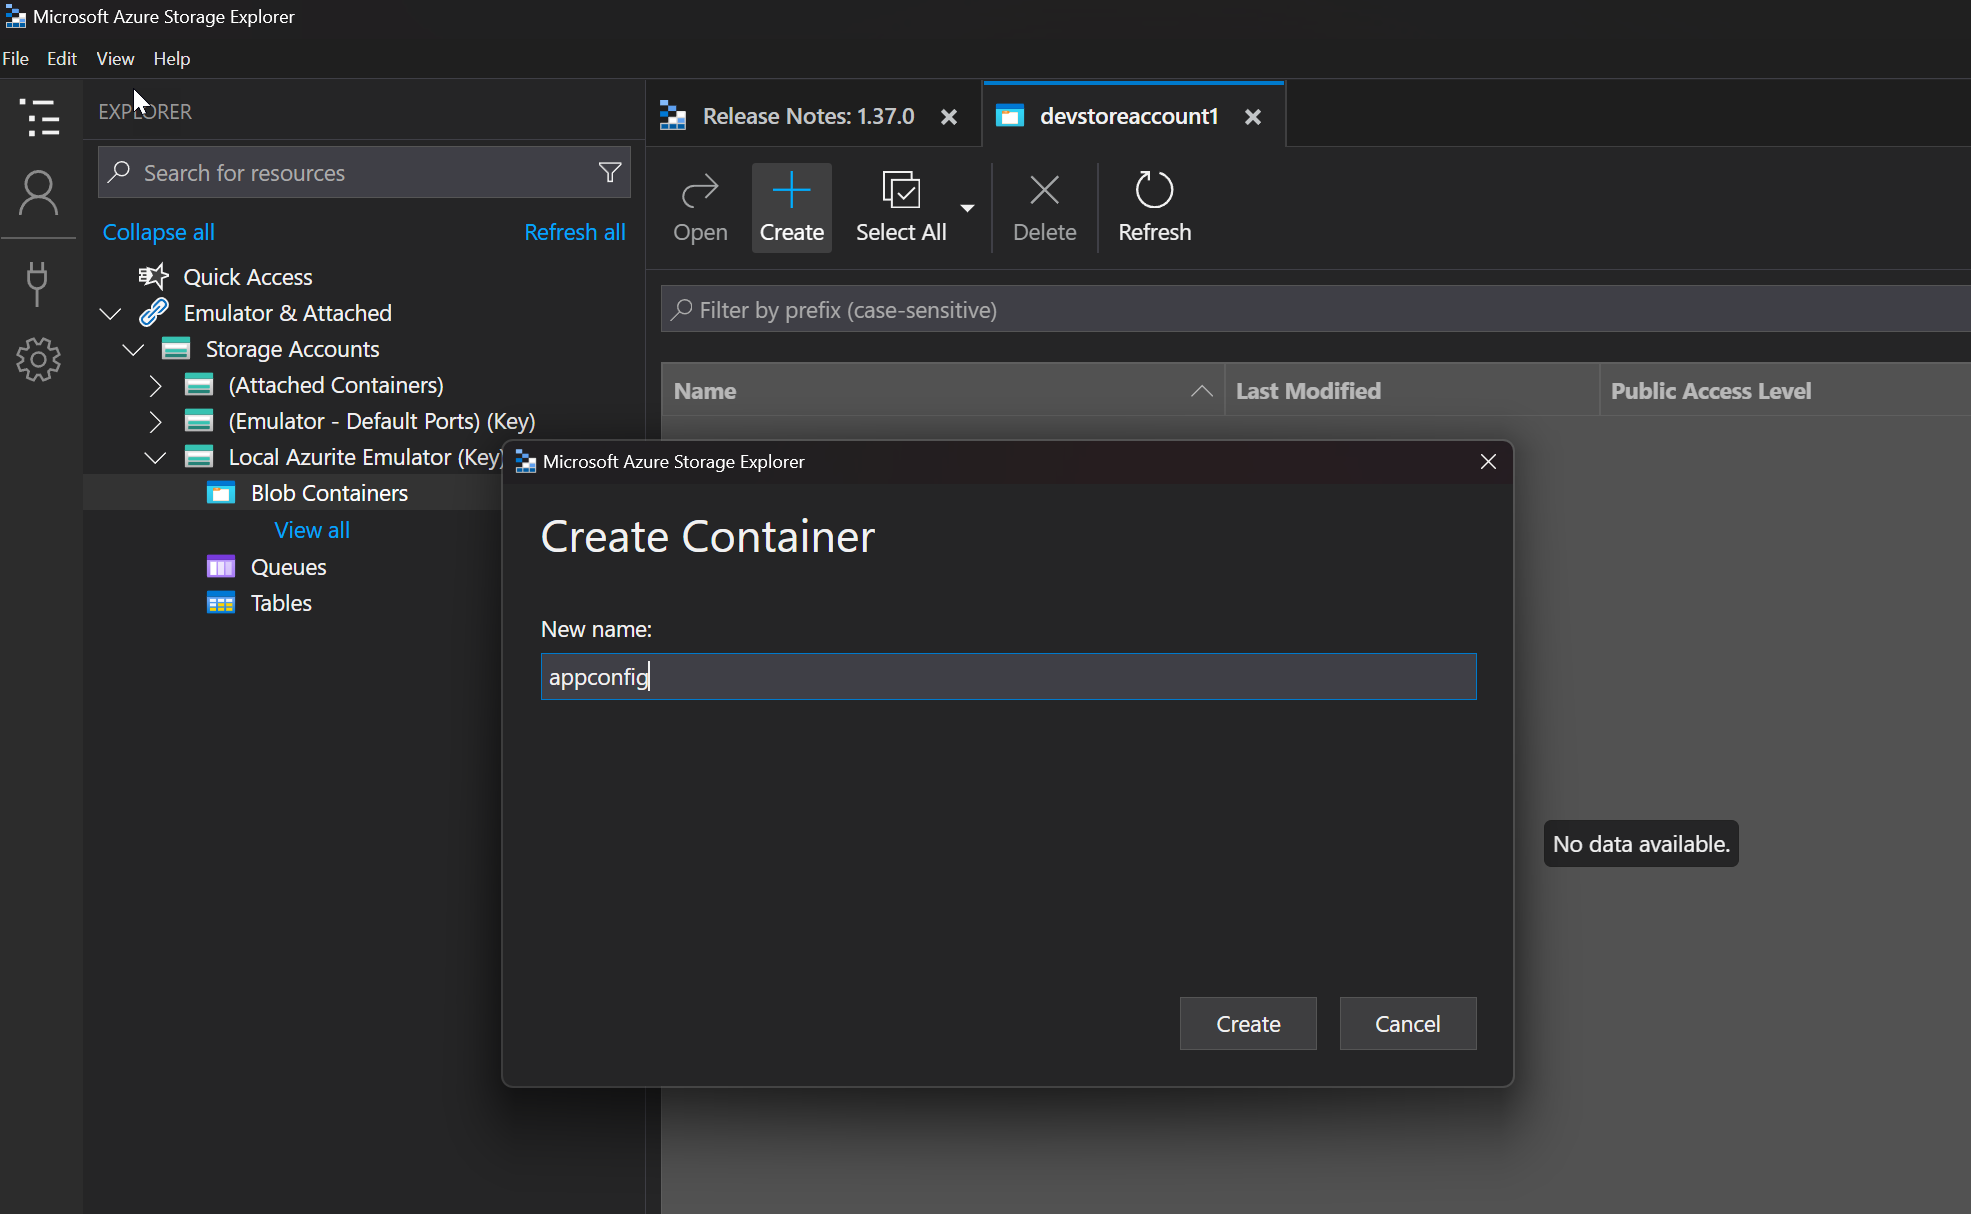
For my test, I'm going to upload a .docx file to a blob container called appconfig. I'll create that container in Storage Explorer.
Test the Blob Container
I'll test Azurite by modifying a Python Function App function so that it uploads a blob file (test.docx) to Azurite rather than to an Azure storage account.
Create a Connection String
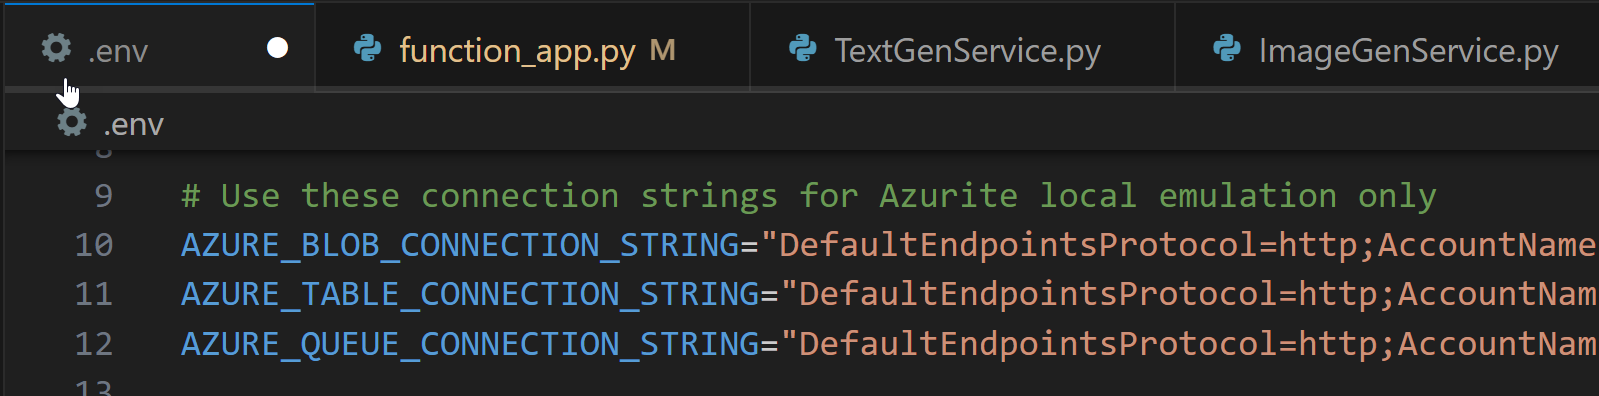
To connect to the local Azurite storage account, I'll use connection strings. Since I used the default Azurite configuration, the connection strings are "well known", as follows:
Blob Connection String
AZURE_BLOB_CONNECTION_STRING="DefaultEndpointsProtocol=http;AccountName=devstoreaccount1;AccountKey=Eby8vdM02xNOcqFlqUwJPLlmEtlCDXJ1OUzFT50uSRZ6IFsuFq2UVErCz4I6tq/K1SZFPTOtr/KBHBeksoGMGw==;BlobEndpoint=http://127.0.0.1:10000/devstoreaccount1"Table Connection String
AZURE_TABLE_CONNECTION_STRING="DefaultEndpointsProtocol=http;AccountName=devstoreaccount1;AccountKey=Eby8vdM02xNOcqFlqUwJPLlmEtlCDXJ1OUzFT50uSRZ6IFsuFq2UVErCz4I6tq/K1SZFPTOtr/KBHBeksoGMGw==;TableEndpoint=http://127.0.0.1:10002/devstoreaccount1;"Queue Connection String
AZURE_QUEUE_CONNECTION_STRING="DefaultEndpointsProtocol=http;AccountName=devstoreaccount1;AccountKey=Eby8vdM02xNOcqFlqUwJPLlmEtlCDXJ1OUzFT50uSRZ6IFsuFq2UVErCz4I6tq/K1SZFPTOtr/KBHBeksoGMGw==;QueueEndpoint=http://127.0.0.1:10001/devstoreaccount1;"To use these values in code, I'll add all of them to my local .env file:
Upload a Blob from Code
In this solution, we don't use connection strings in production – instead we use Managed Identities and IAM Roles to grant permissions to Entra identities. To use connection strings, I'll add some branching in my code.
In the code below, if the connection strings are found in the environment, then they are used to connect to the storage account. Otherwise Entra credentials are used.
Fetch the connection string
We attempt to resolve the connection string from the runtime environment (which only exists when running from VS Code).
blob_connection_string = os.getenv("AZURE_STORAGE_CONNECTION_STRING")Connect to the Storage Account
If the connection string is found in the environment, we'll use it to connect to the storage account; if not, then we'll use the credential associated with the identity running the code.
# Extracted most relevant code from Azure Function App
container_name = "userdata"
doc_filename = ... # provided in POST payload
file_bytes = ... # provided in POST payload

blob_connection_string = os.getenv("AZURE_BLOB_CONNECTION_STRING")

if blob_connection_string is not None:
  service_client =
      BlobServiceClient.from_connection_string(blob_connection_string)
else:
  storage_account = os.getenv("AZURE_BLOB_ACCOUNT")
  storage_blob_endpoint = f"https://{storage_account}.blob.core.windows.net"
  credential = DefaultAzureCredential()
  service_client = BlobServiceClient(storage_blob_endpoint,
                credential=credential)

container_client = service_client.get_container_client(container_name)
blob_client = container_client.get_blob_client(doc_filename)

blob_client.upload_blob(file_bytes, blob_type="BlockBlob")
Now, when we run the function and test it, a file is uploaded to the blob storage account and can be viewed in Azure Storage Explorer.

Emulated Table Storage
The code to use emulated table storage is very similar to blobs. Here's an example:
table_connection_string = os.getenv("AZURE_TABLE_CONNECTION_STRING")
table_name = "mytable"
event = { "hello": "world" }

if table_connection_string is not None:
  service_client =
     TableServiceClient.from_connection_string(
       table_connection_string
     )
else:
  storage_account = os.getenv("AZURE_STORAGE_ACCOUNT")
  storage_table_endpoint = f"https://{storage_account}.table.core.windows.net"
  credential = DefaultAzureCredential()

  service_client = TableServiceClient(
     storage_table_endpoint,
     credential=credential)

table_client = service_client.get_table_client(table_name=table_name)
table_client.upsert_entity(entity=event)
Summary
Using Azurite for local storage account emulation is an effective way to develop Azure Function Apps (and other types of Azure apps) without having privileged access to cloud-based storage accounts. This can be useful in experimenting with new configurations and even enable development in environments where Internet connections are unavailable.