

What's the On-premises data gateway?
The on-premises data gateway has been available for quite some time and is frequently used to refresh Power BI cloud-based semantic models from on-premises data sources.
As of March 2024, the on-premises gateway supports Fabric data integration tools as gateway data consumers. This essentially means we can connect to on-premises data via a secure connection and pull data into the Fabric OneLake environment as part of scheduled jobs.
The Microsoft gateway deployment documentation is comprehensive, so I'll skip the detailed setup instructions. Instead, I'll walk through how I tested it, some observations about how to best use it, and wrap up with some thoughts about the feature as it currently exists.
On-Premises Setup
To test the gateway, I setup a VM-based on-premises lab environment with an Active Directory controller, a single SQL Server 2022 Enterprise instance, and a dedicated VM to run the on-premises data connector.

In this scenario, the on-premises data gateway listens for requests from Data Pipelines and Data Flows, queries data from the remote source (in this case a SQL Server default instance on server SQL1) and send query results back from the on-prem network to the Fabric environment.
Essentially on-premises gateway is a proxy server Fabric and other cloud-based services can use to incorporate on-premises data.
Configuring the On-premises Gateway
Fundamentally, the on-prem gateway is a Windows service that's installed using a Windows installer on the machine that will serve as the data gateway.
While the gateway service can be installed on virtually any machine (except domain controllers), I'd generally recommend dedicating a machine (or VM) to this process to isolate it and limit resource contention and configuration conflicts with other services running on the same host.
To install the gateway, follow Microsoft's documentation script, which includes a link to the gateway installer (or download it from this link).
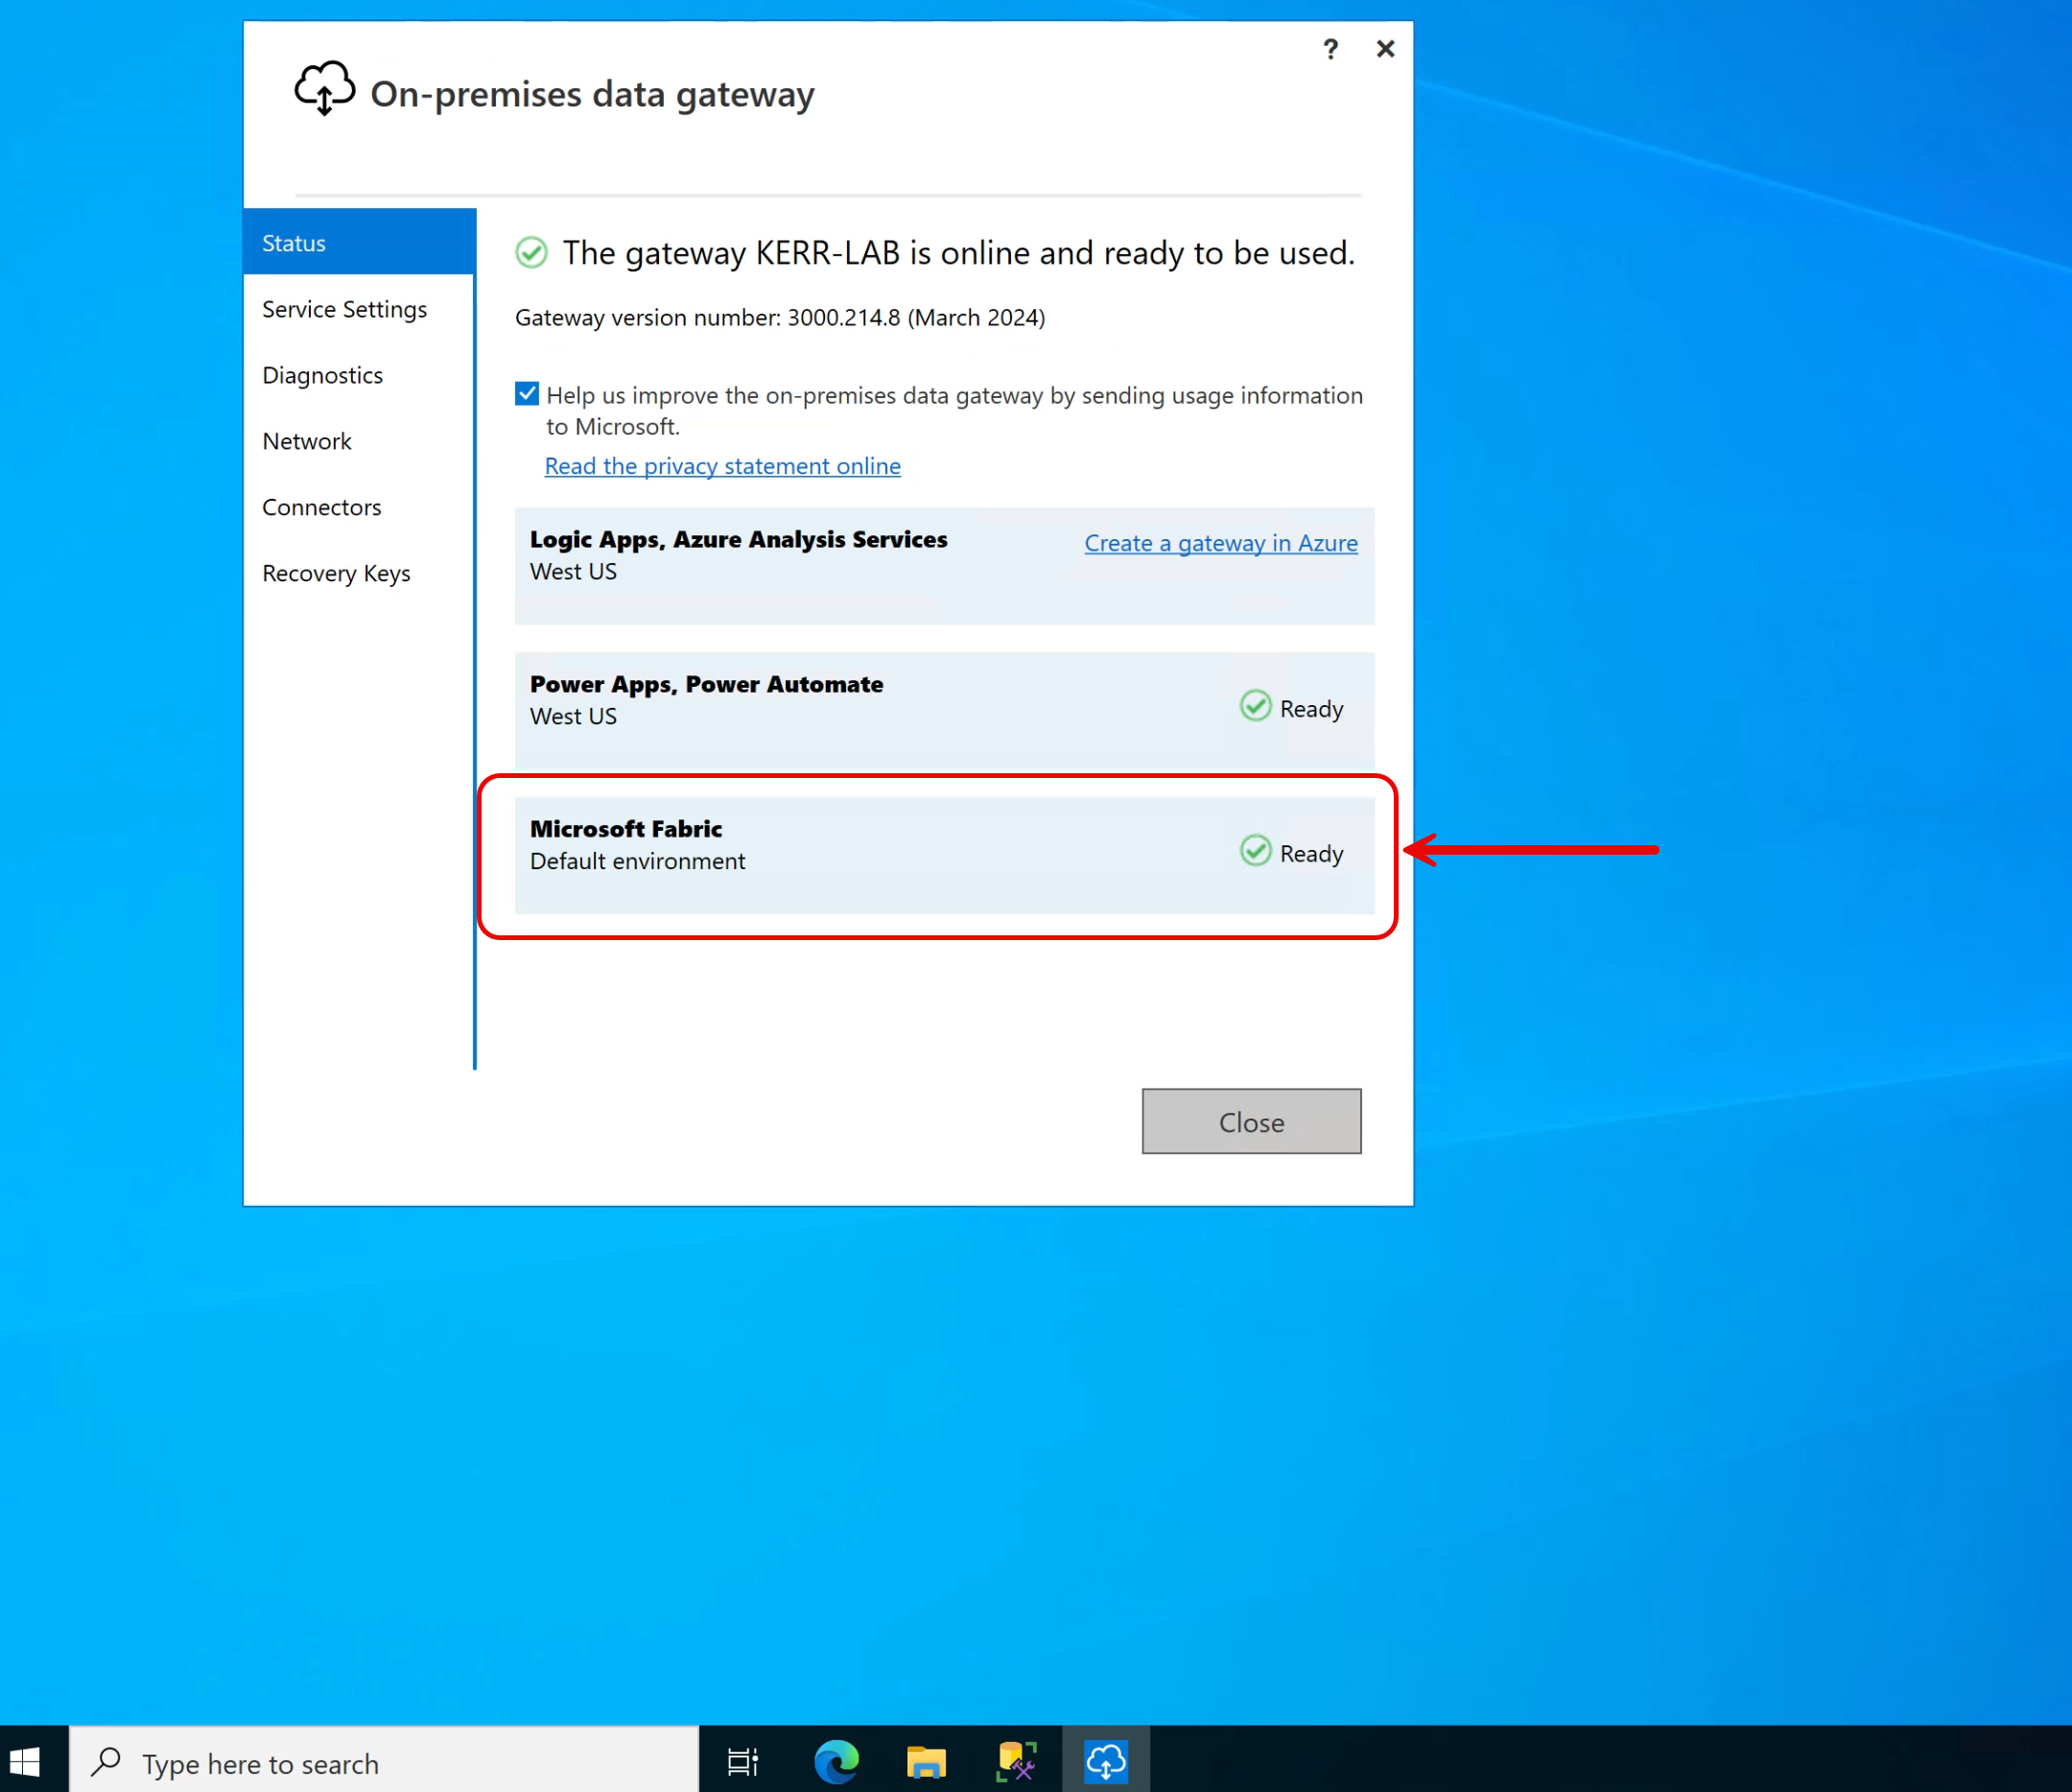
After installing the gateway and authenticating with Microsoft Fabric (typically using an Entra account that has appropriate permissions in the Fabric environment), the gateway is configured, and the Microsoft Fabric support should be in "Ready" status.
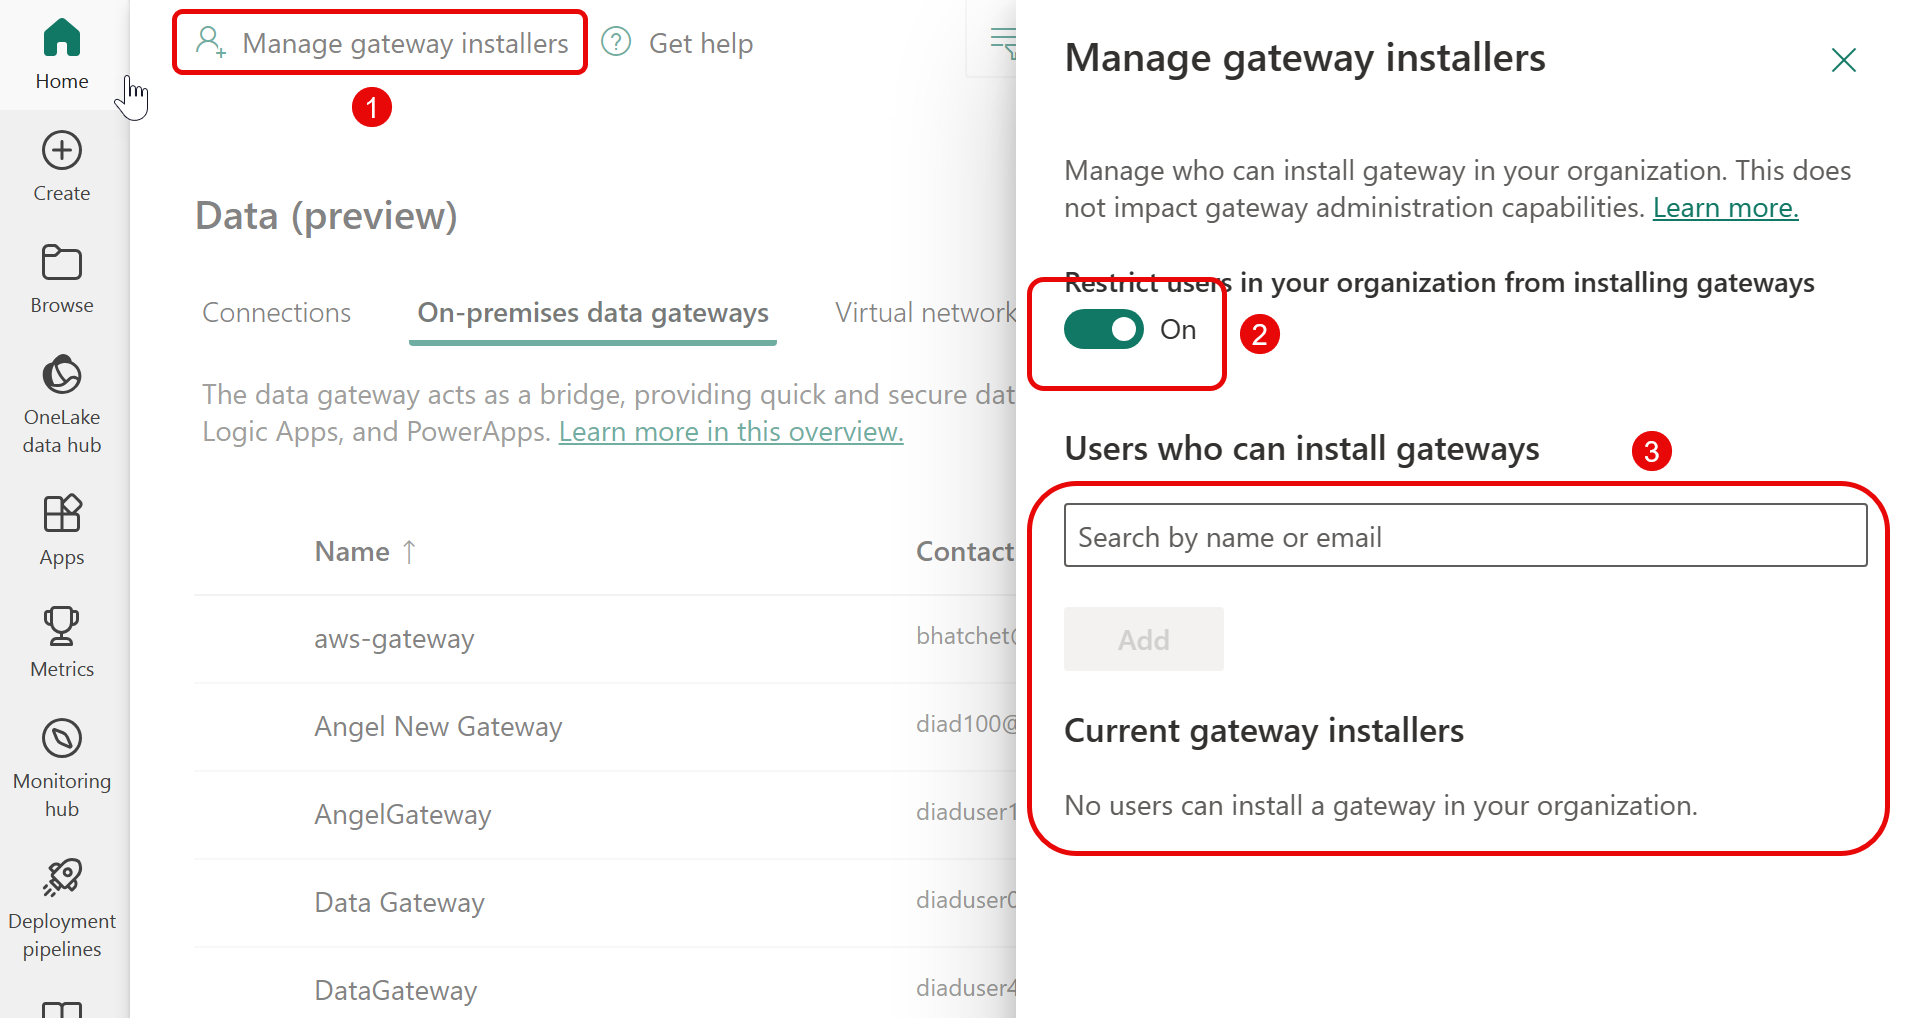
Control Who Can Create Gateway Connections
Your Fabric tenant can be configured to allow all users to create their own connections to gateways, or this permission can be restricted by default and authorized to users explicitely.
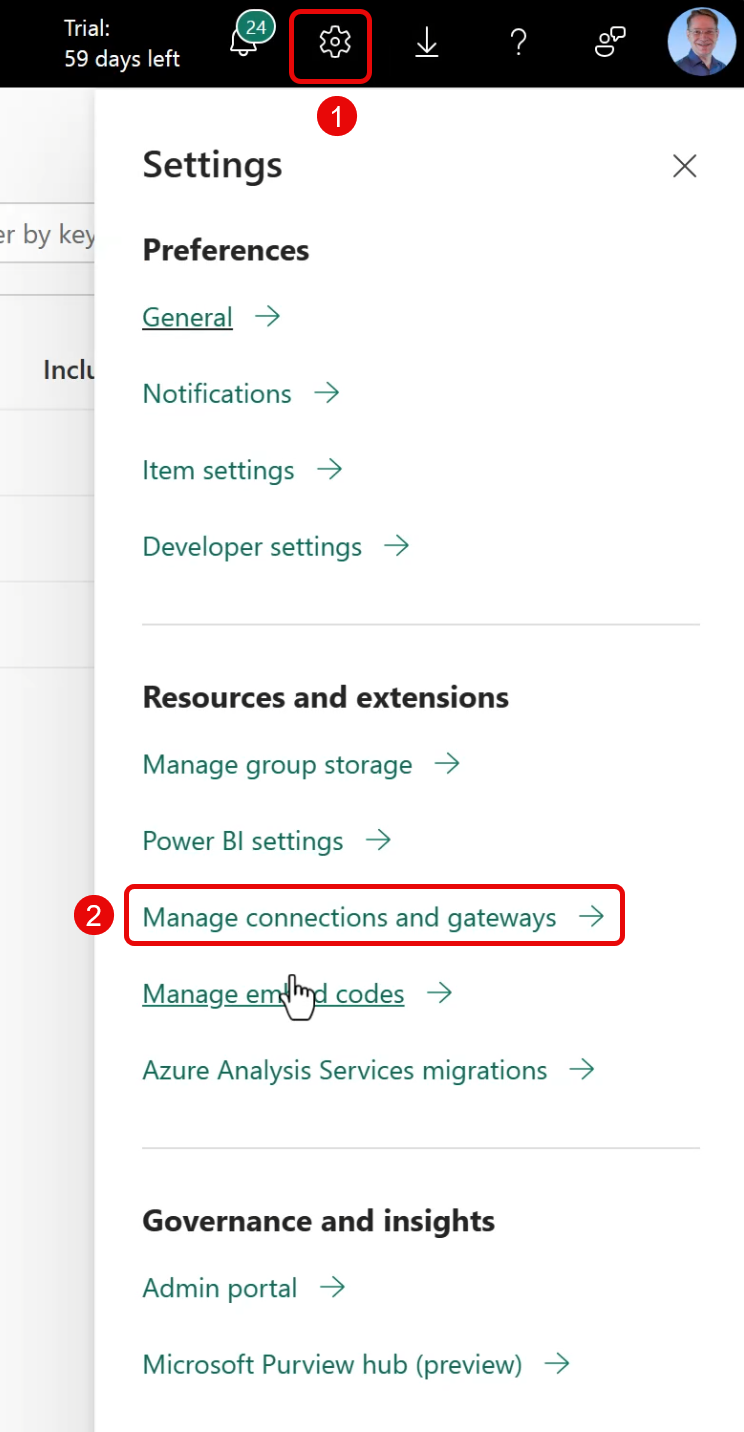
Browse to the Connections Configuration Settings Panel
If you're authorized to create connections, browse to the connection list under the settings cog to get started.
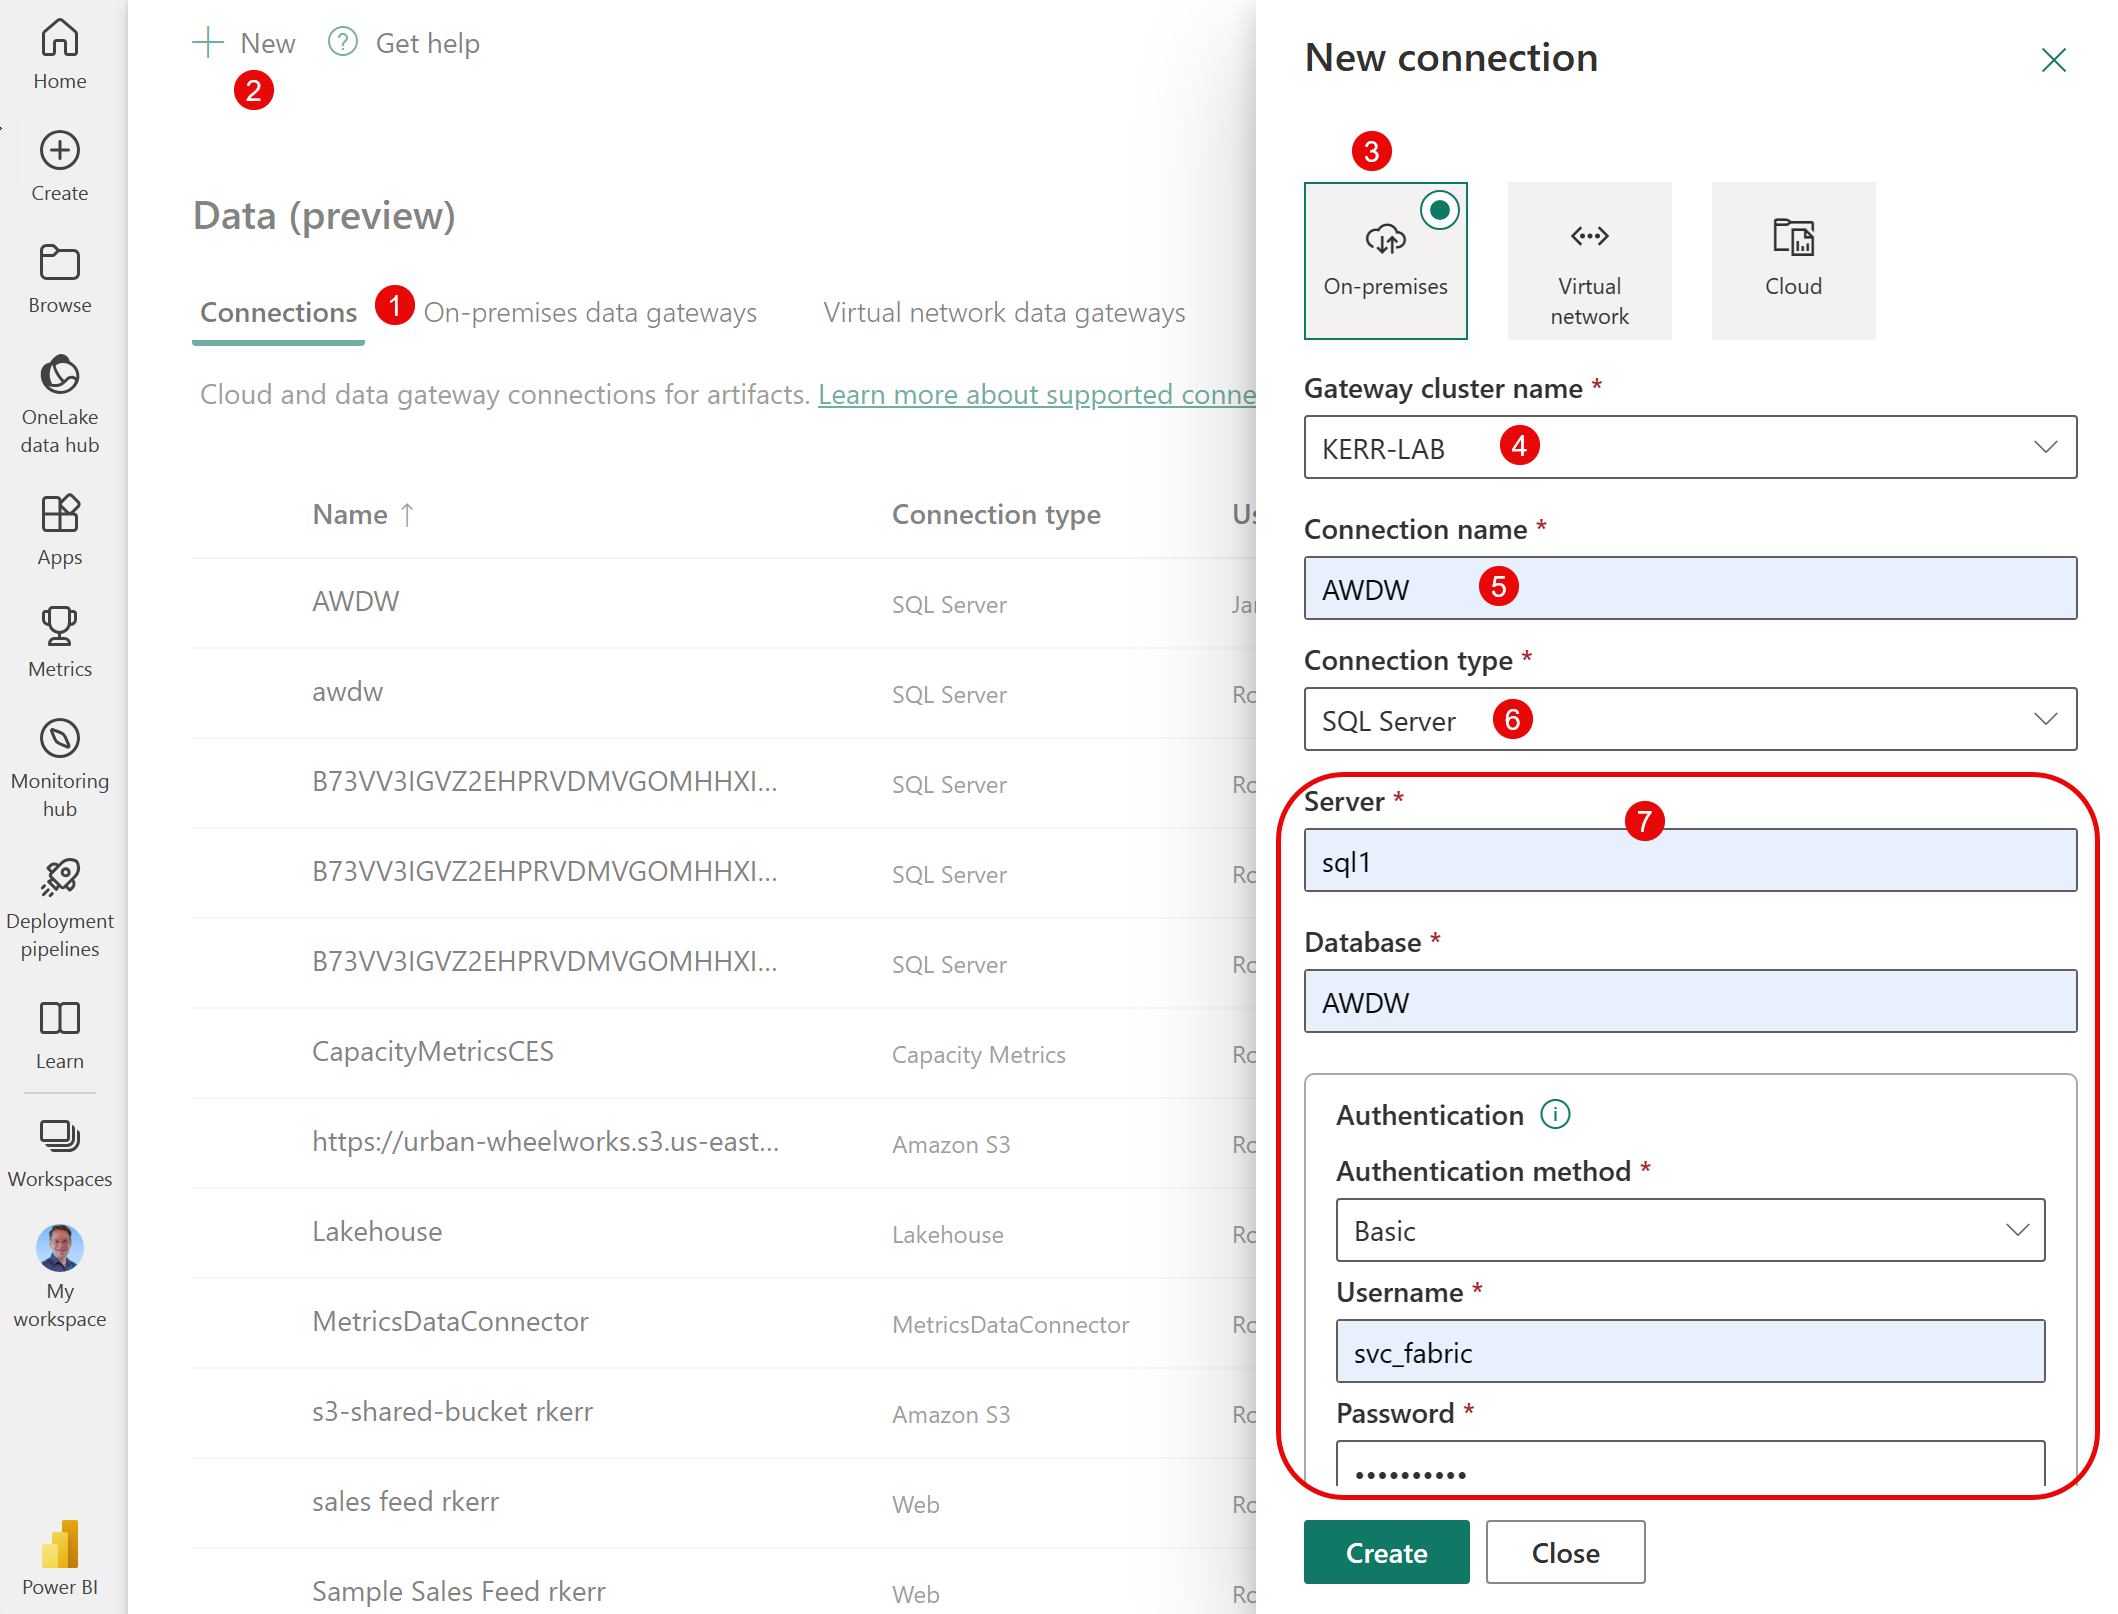
Create a New Connection
From the Connection List form:
- Select the
Connectionstab - Tap the
Newbutton - Select
On-premisesin the New connection dialog - Select the name of the on-premises gateway (the name you gave it when you installed the software on the gateway machine in your on-prem environment).
- Provide a name for the new connection (which users will use to select the gateway when connecting to data).
- Select the Connection type – in this example an on-prem SQL Server 2022 instance.
- Complete the connection information that will be passed to the gateway as it makes connections to the on-premises data.
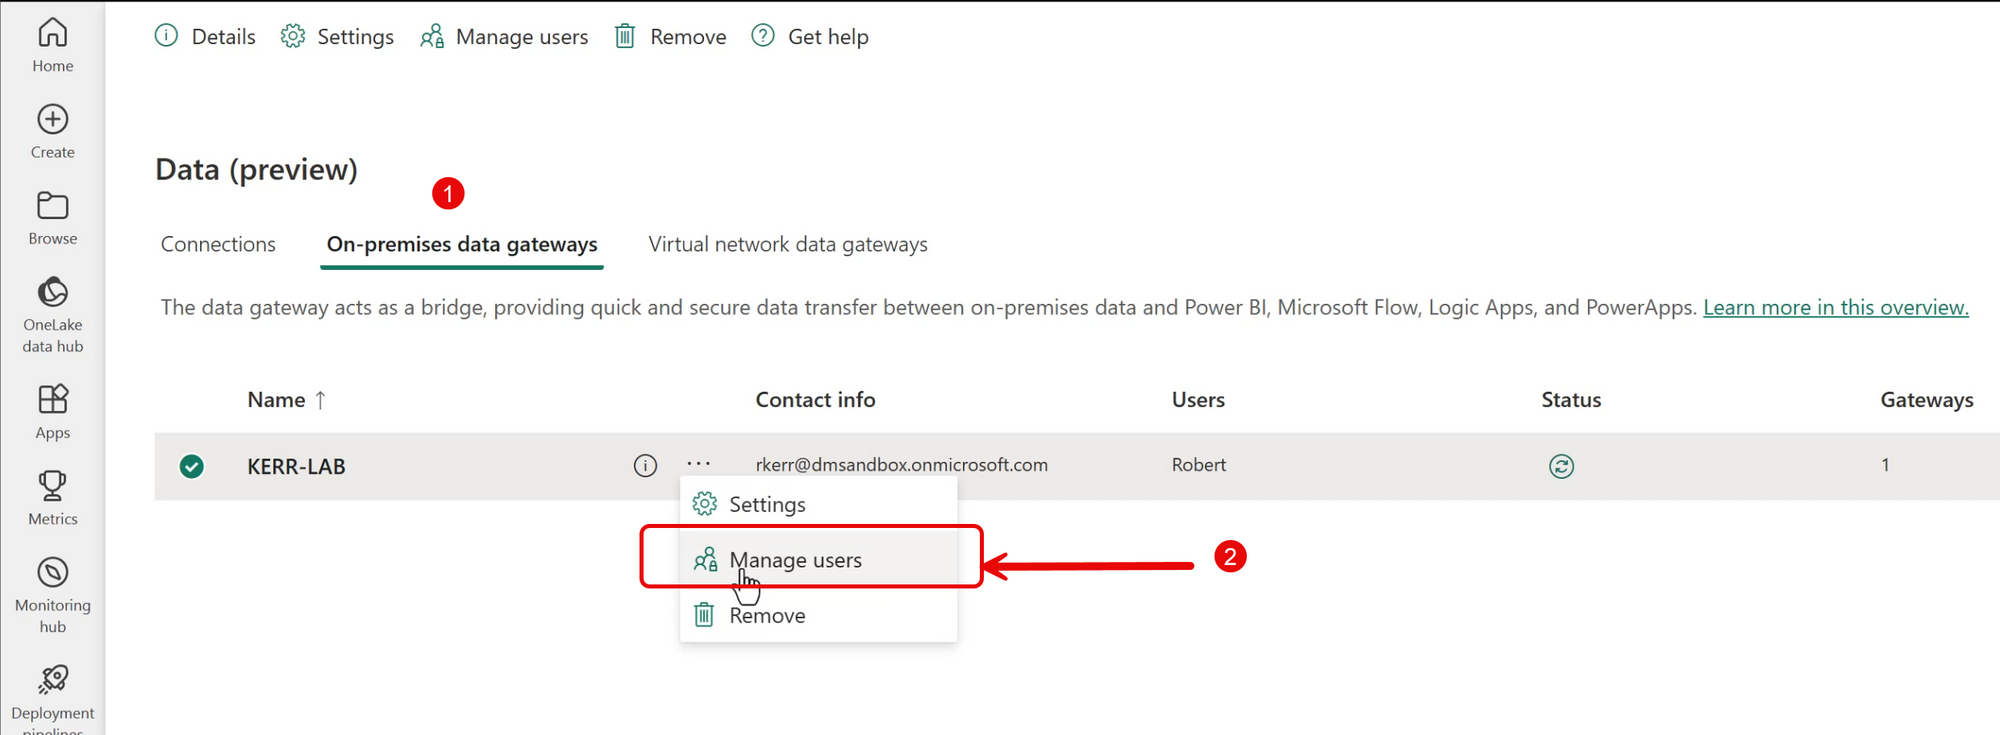
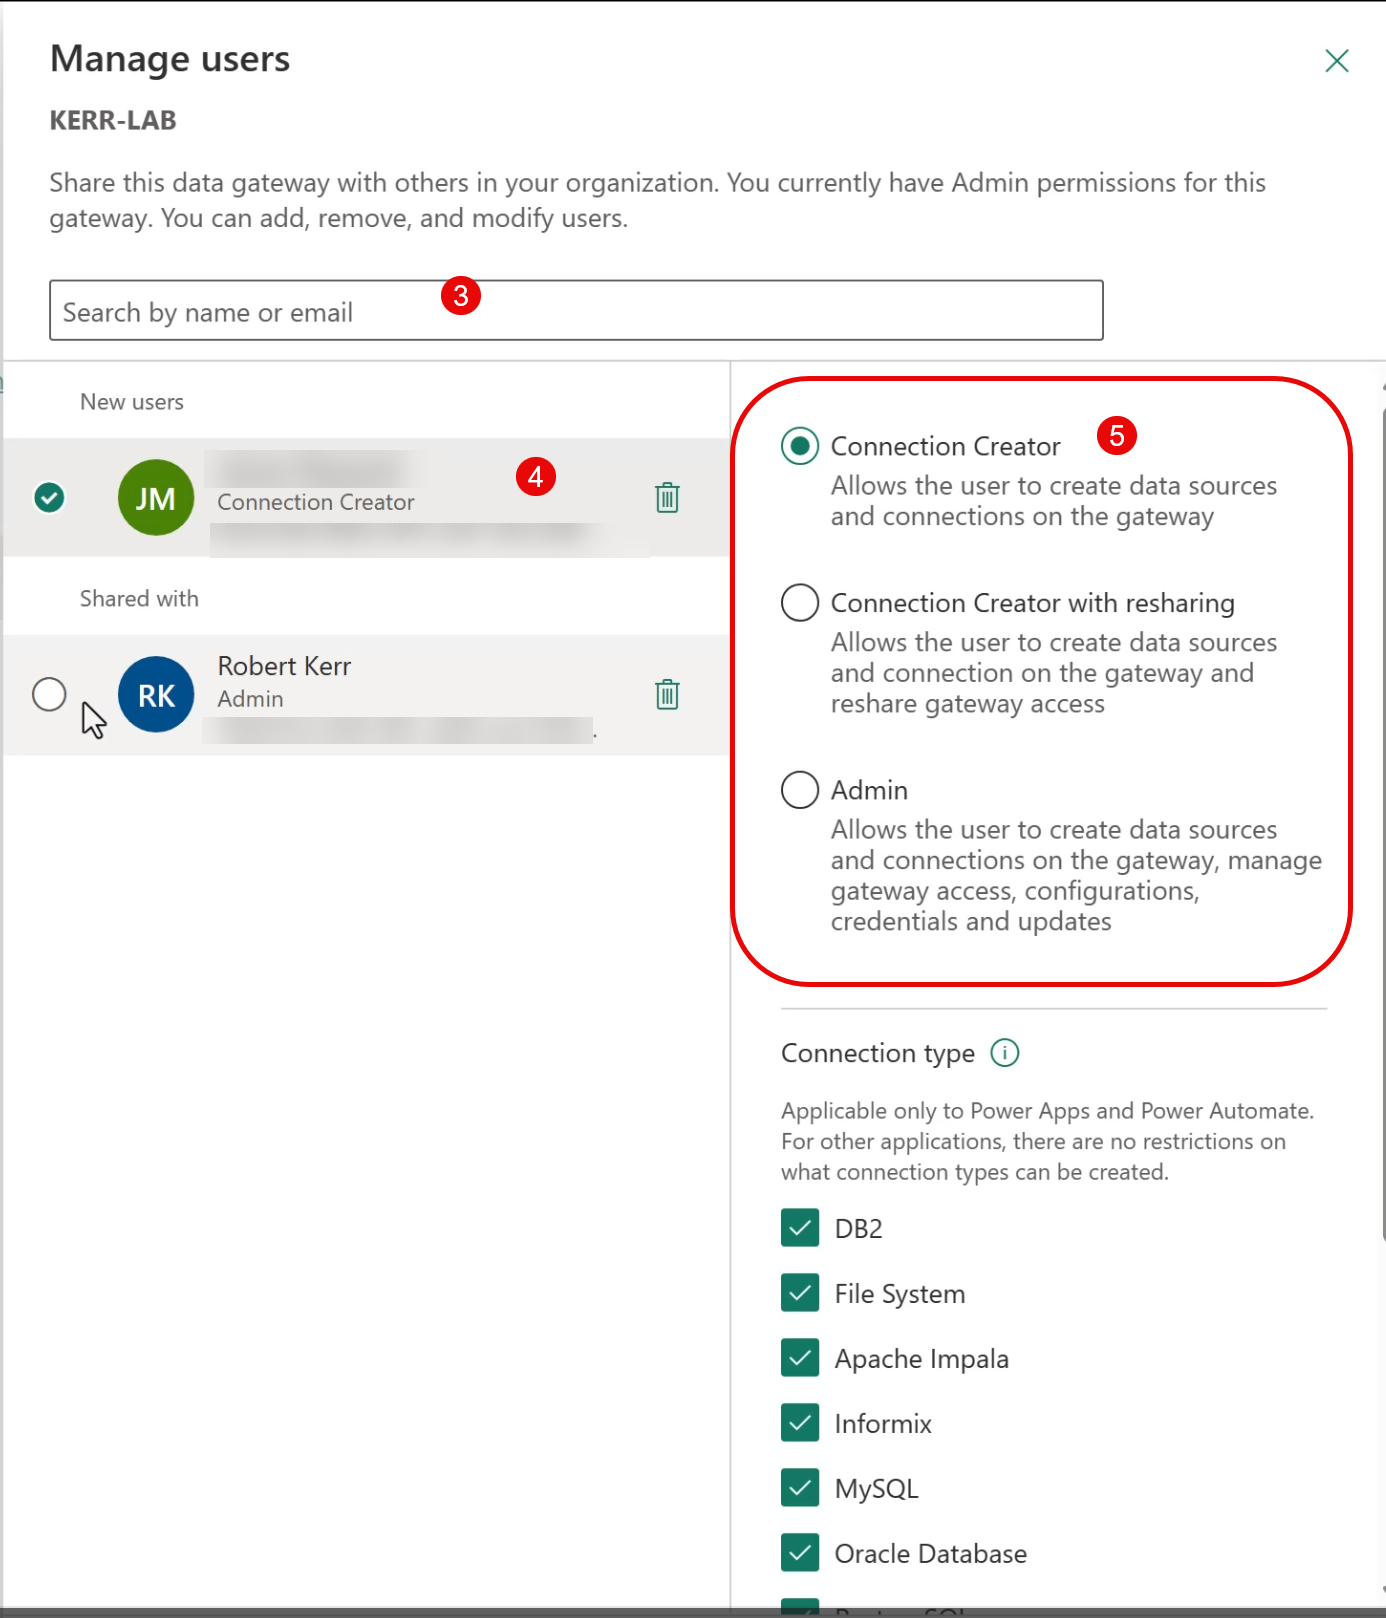
Authorize Users to the Connection
In this scenario, I created the connection to my on-prem environment, but I want to authorize others in my company to use the connection without knowing the SQL user credential or needing to create their own connections.
- Select the
On-premises data gatewaystab - From the
...menu, selectManage users - Search for a user or security group to authorize to access the gateway
- Select the user or group just added to the ACL
- Select the appropriate level of authorization for them.
Using the Gateway from a Data Pipeline
Installing the gateway on prem and creating a connection to it from Fabric has some complexity, though is relatively easy. Using the gateway is quite straightforward!
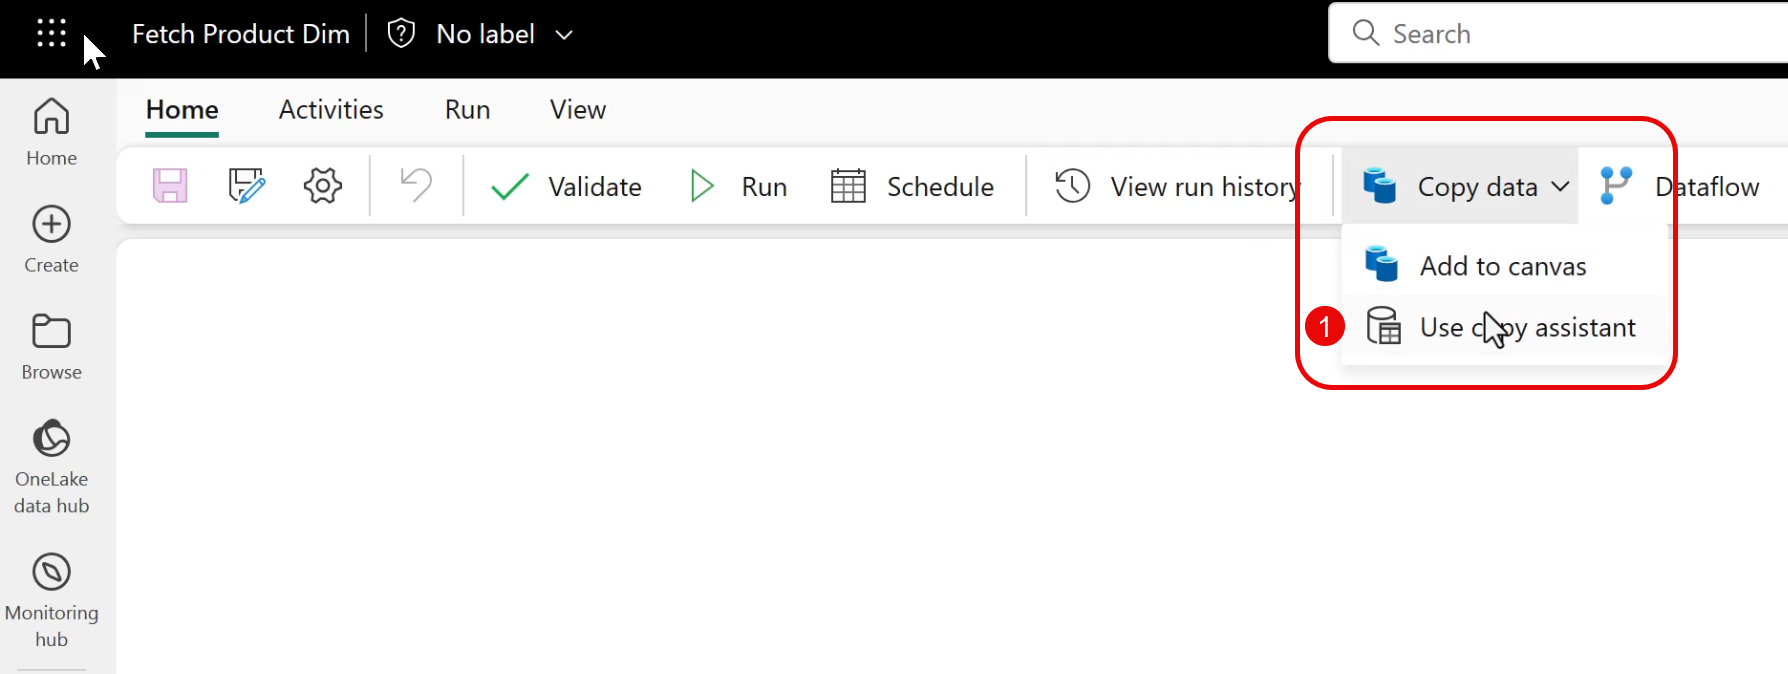
Add a Copy Data Task
- Add a
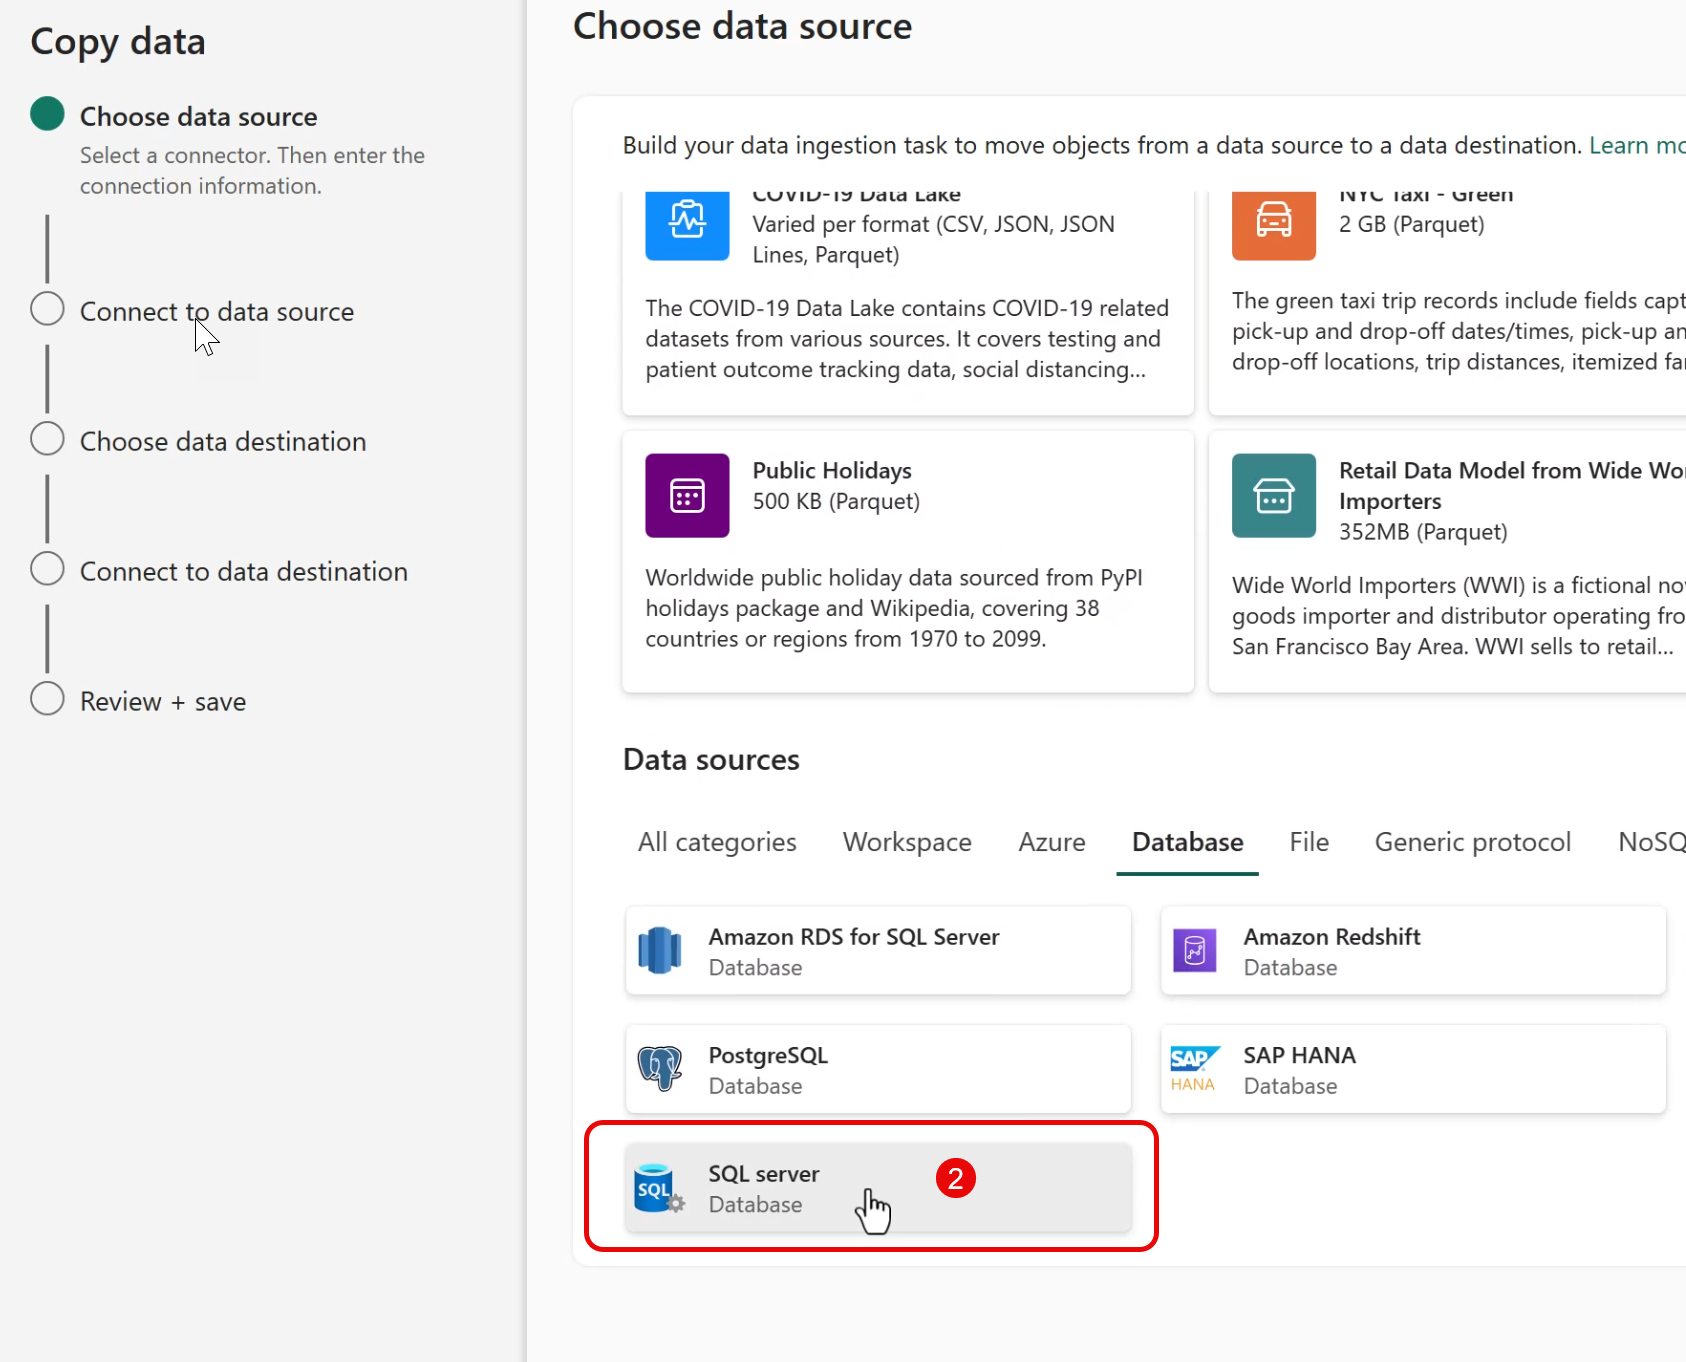
Copy Datatask using thecopy assistant. - Select the appropriate data source type (in this example
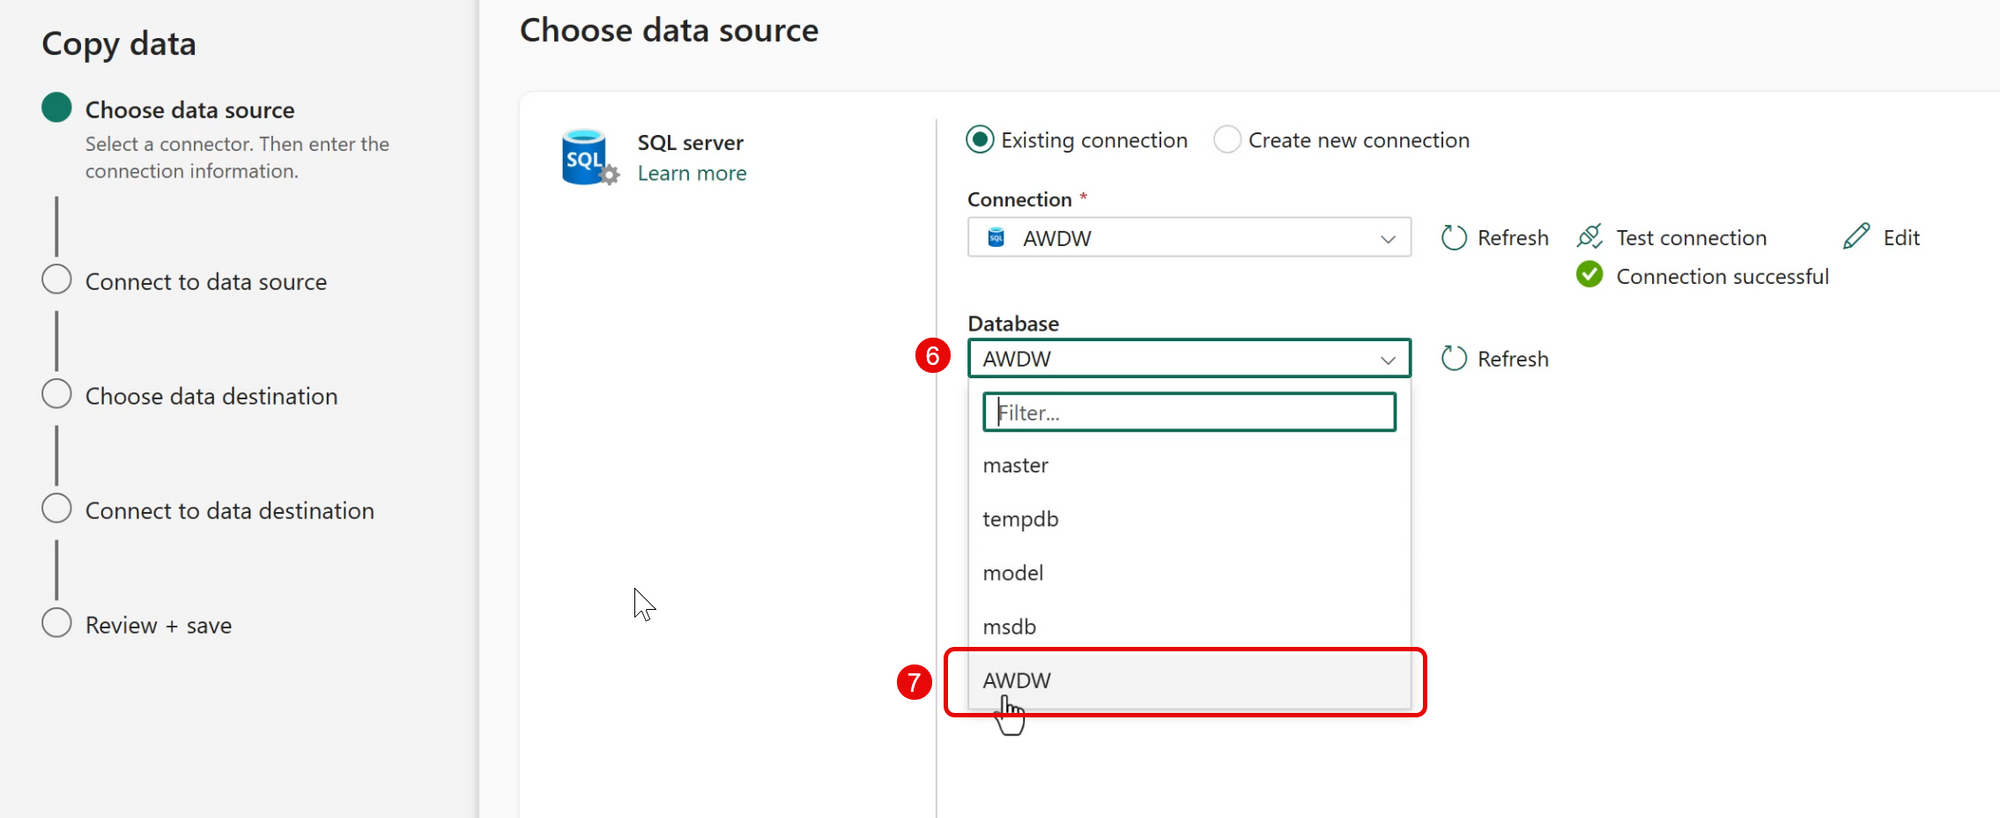
SQL Server), then tapNext. - Select
existing connection. - Open the drop-down to view existing connections.
- Choose the name of the connection to the gateway (Created in the last section), then tap
Next. - Tap the
databasedrop-down. - Select the desired source Database (on the remote SQL1 server in this case), then click
Next.

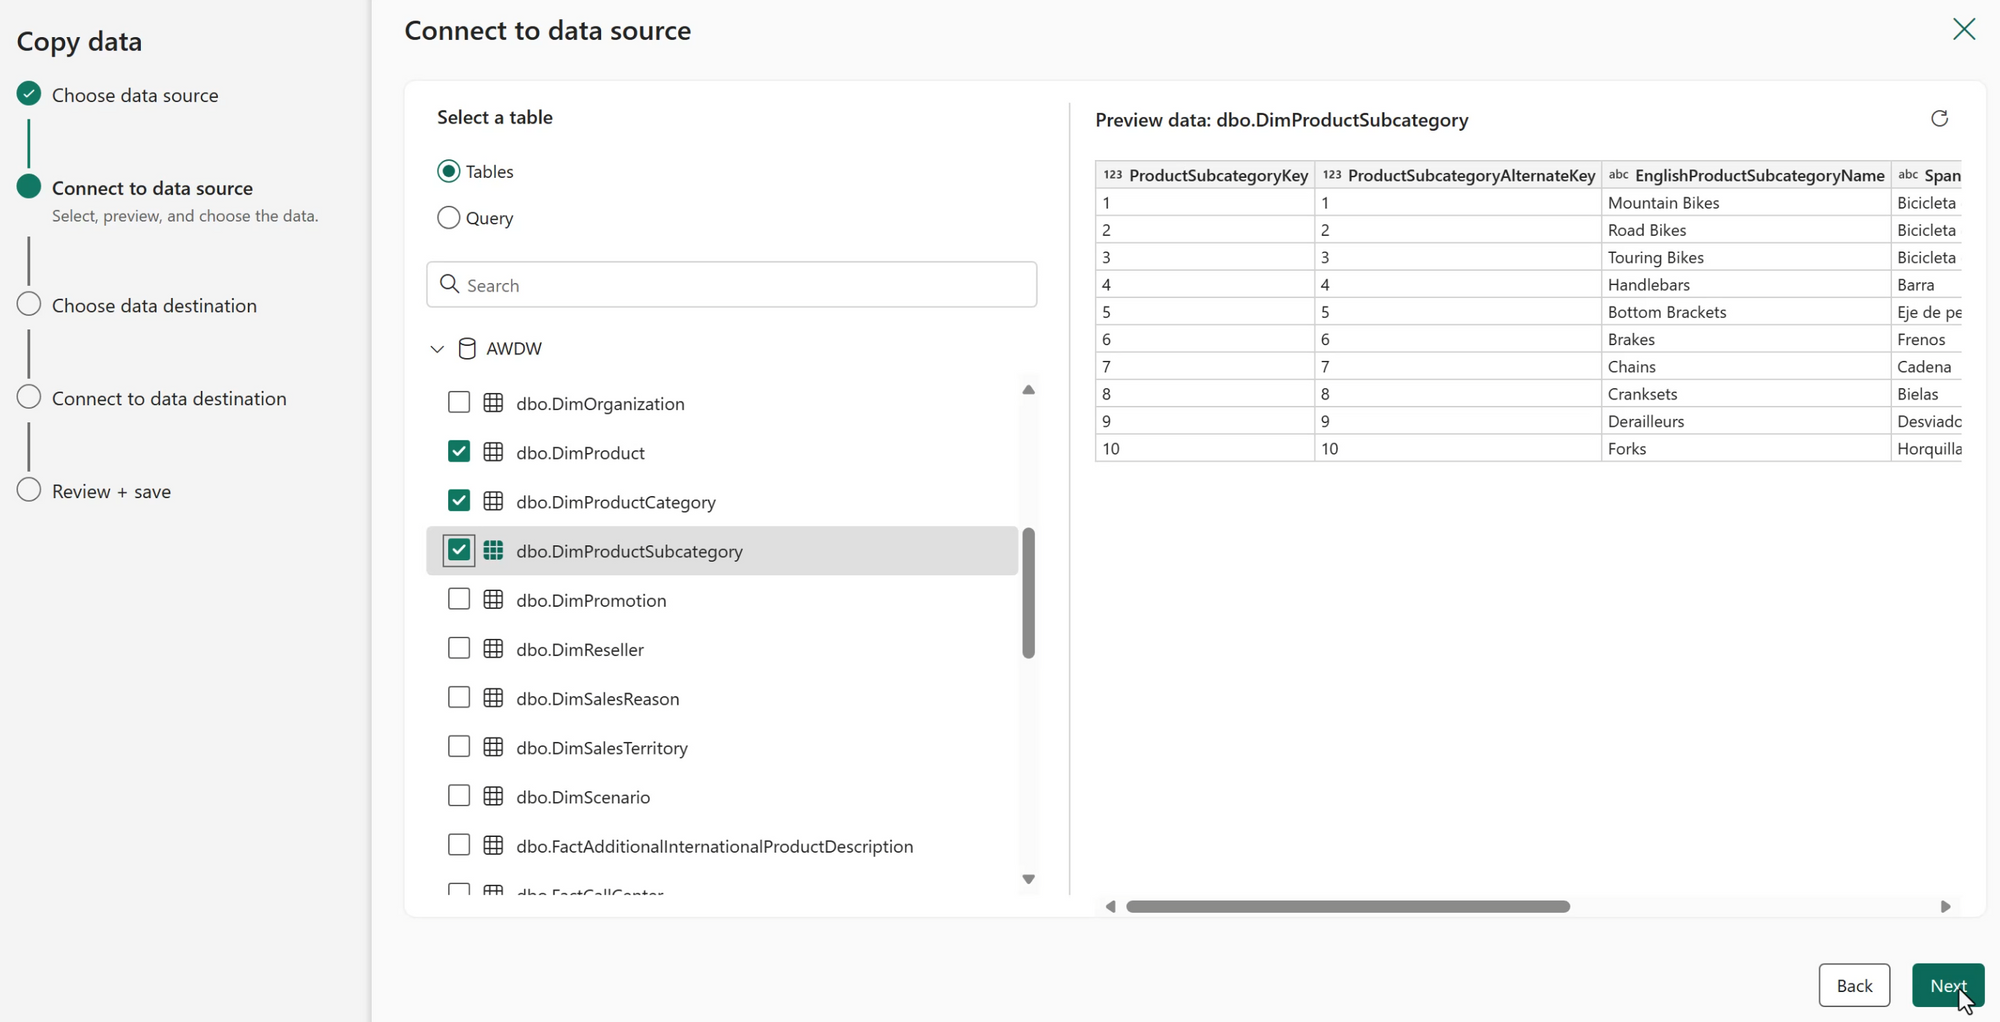
Select the Desired Tables or Create a Query
Fabric will query the remote data source's metadata (SQL Server in this case), listing available tables. Alternately, you can write a query.
Once the desired source data is specified, tap the Next button.
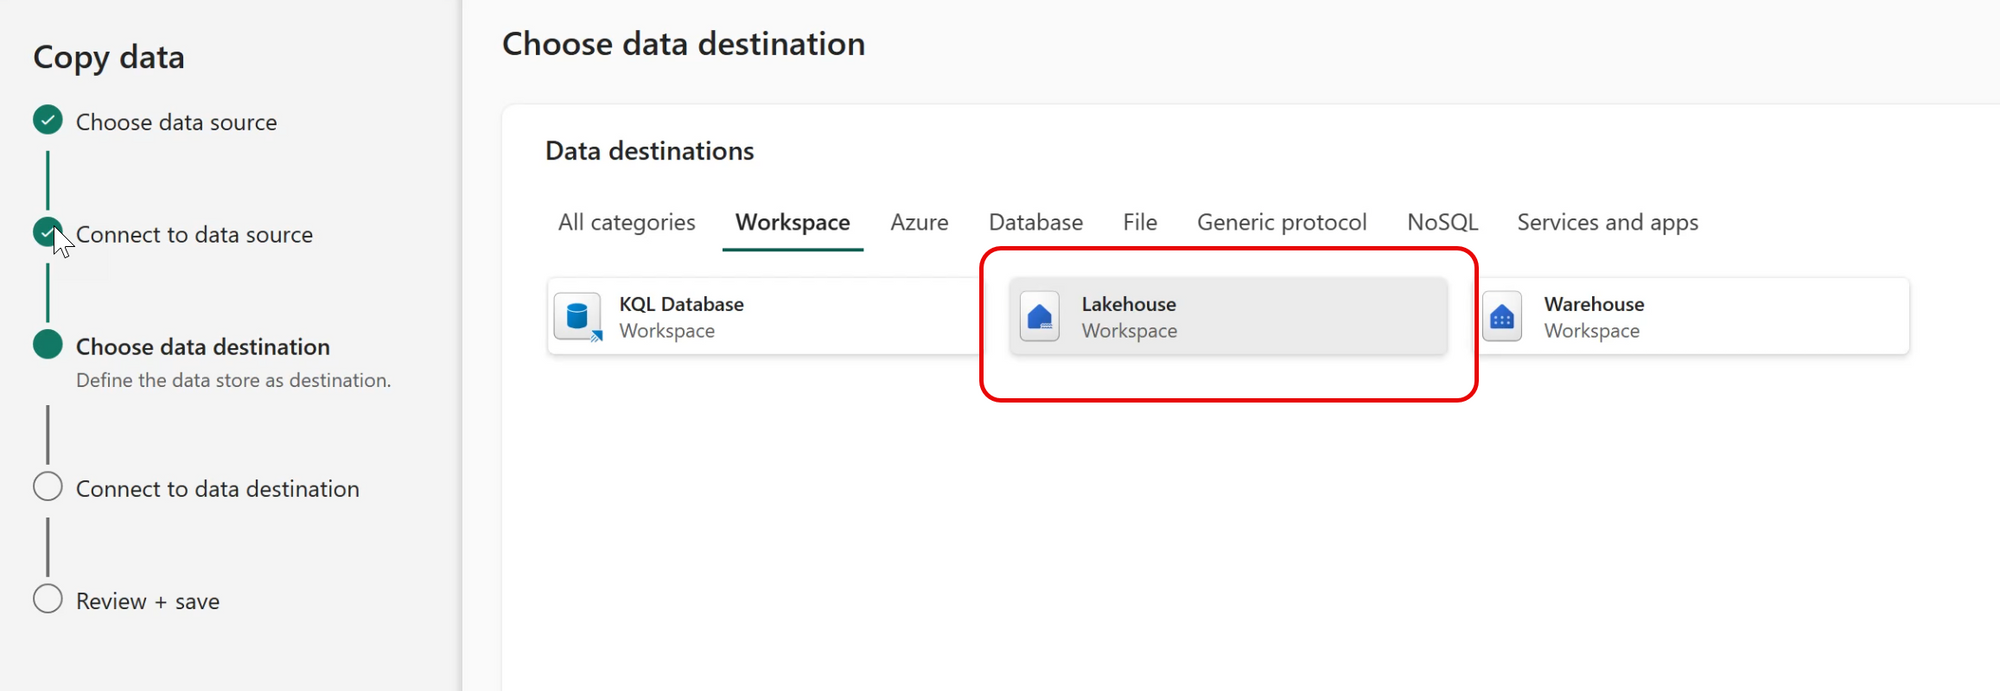
Select the Target Lakehouse
In this case, we'll copy the source data to a Lakehouse table, so select Lakehouse and tap the Next button.
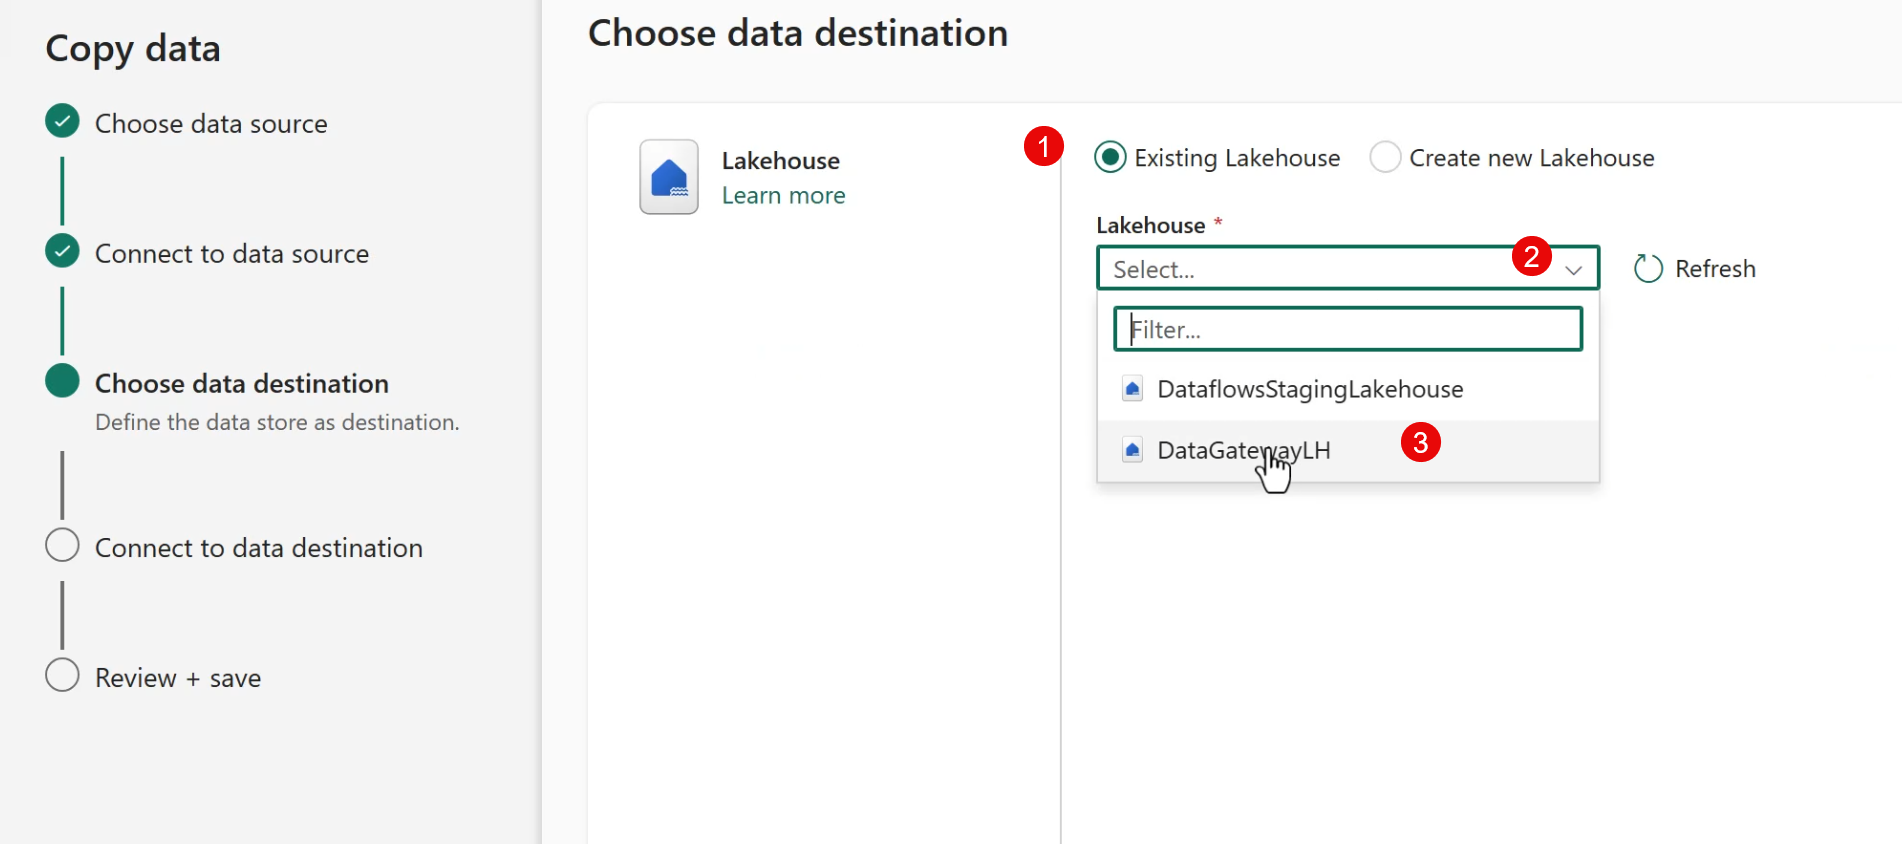
Then select the destination for the data in the Lakehouse:
- Select
Existing Lakehouse. - Tap the
Lakehousedrop-down. - Select the desired destination Lakehouse from the list.
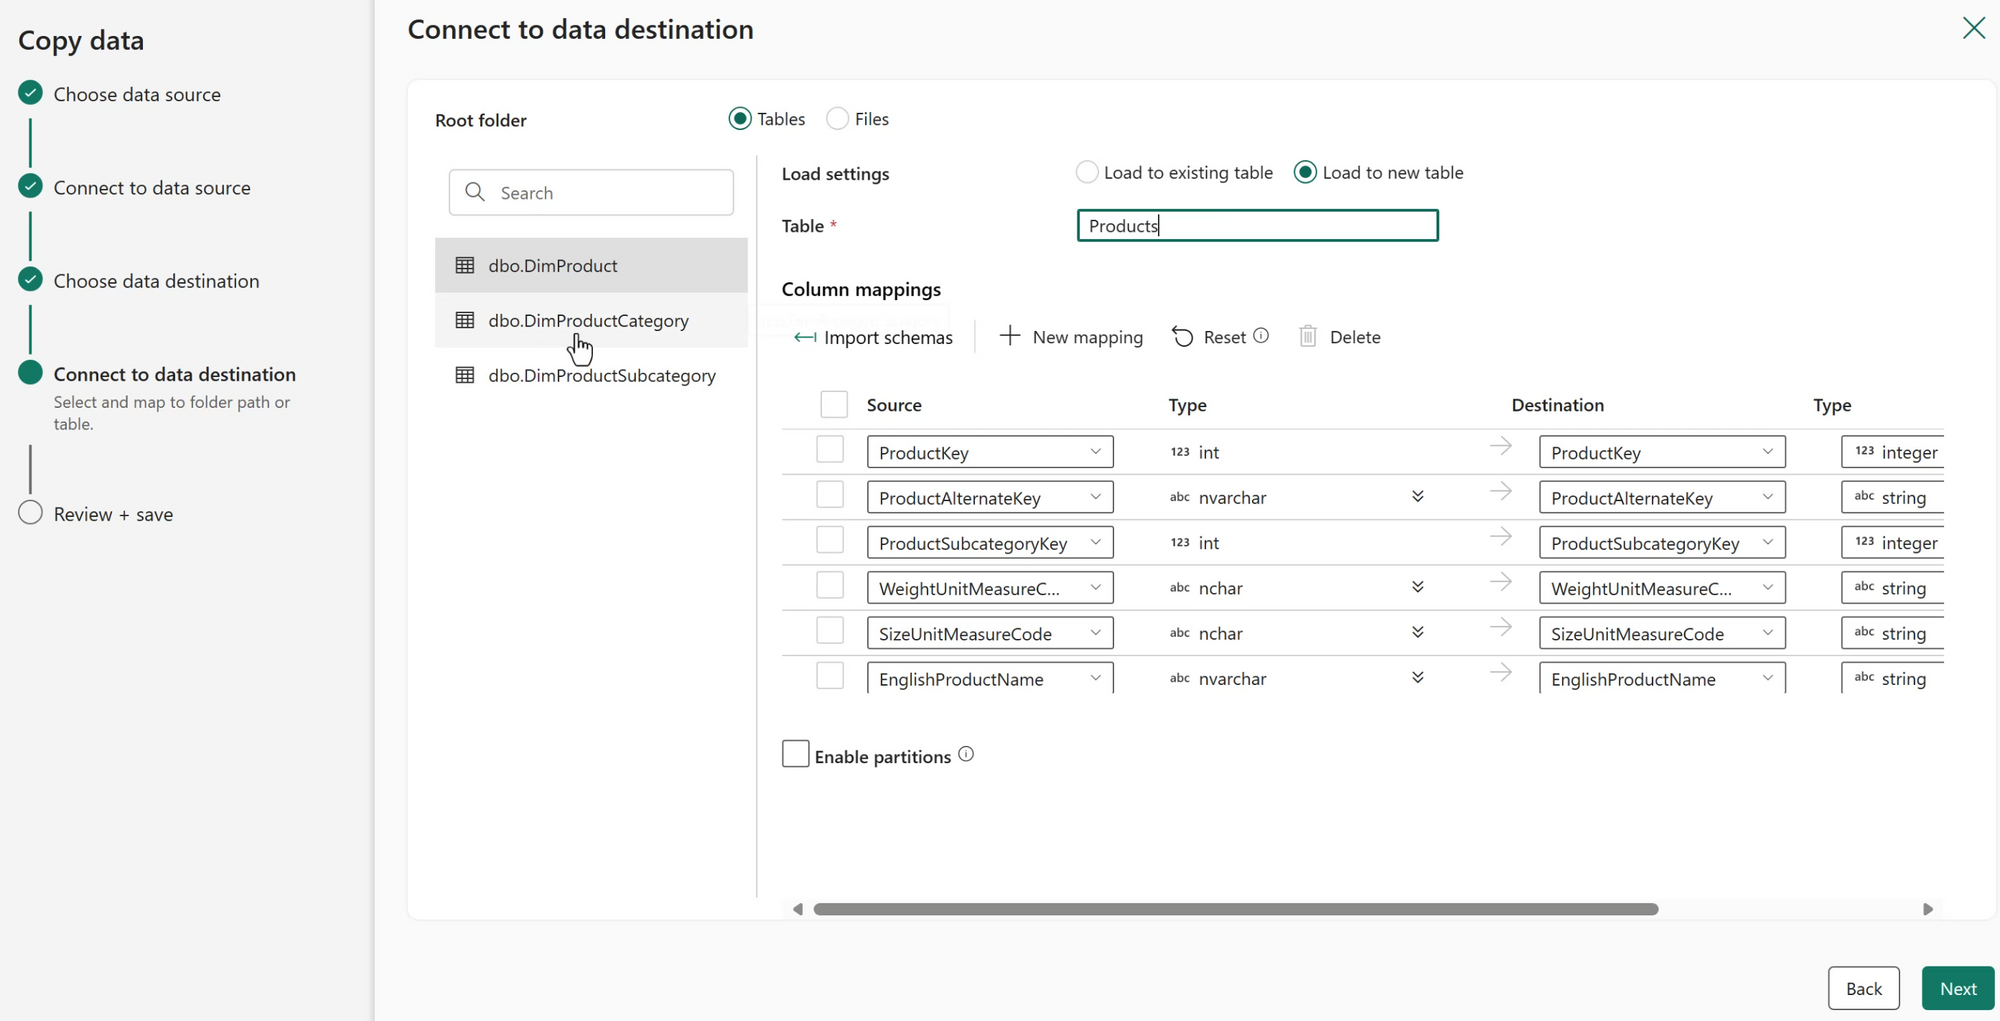
From this point we can specify how to land the data, change destination table names, data types and column names as usual.
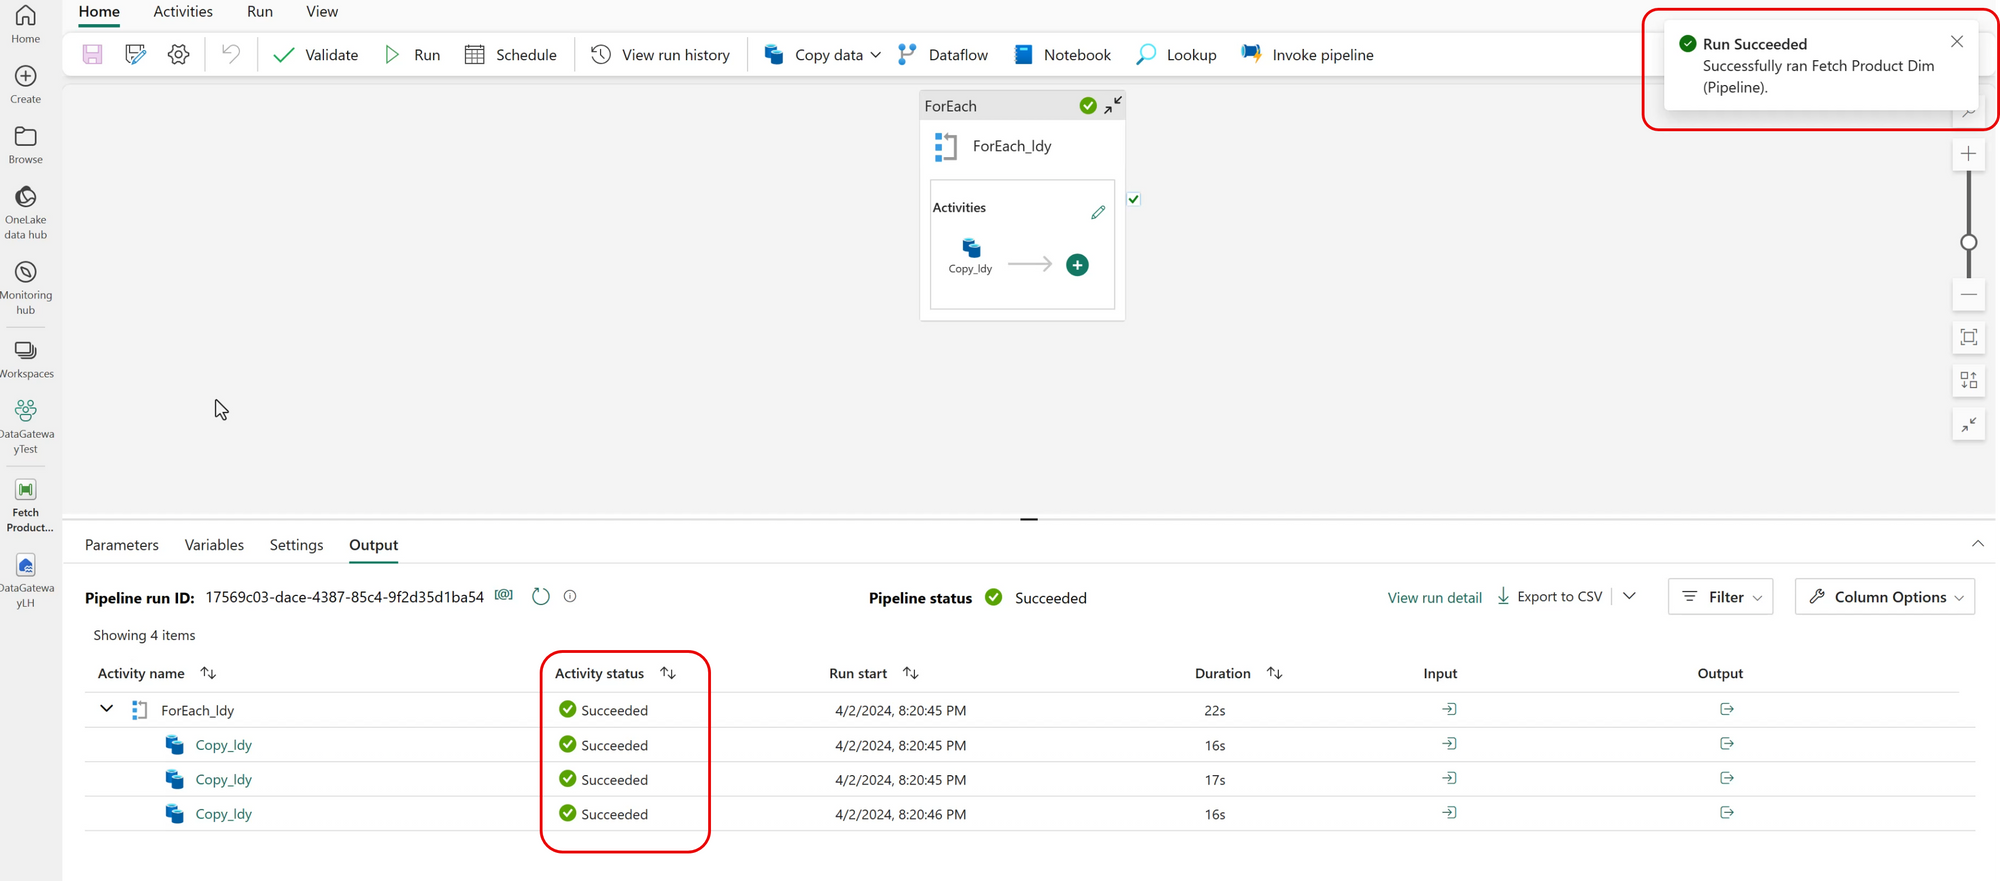
Run the Pipeline
Finally, we can run the pipeline as usual!
Summary
Support for On-prem data gateway in Fabric is an important step toward providing an easy-to-use, well integrated SaaS data engineering and analytics platform.
While the underlying data gateway technology is mature and familiar to most enterprise Power BI users, providing integration with Fabric Data Engineering tooling opens up a host of new possibilities for consolidating data from many sources into a cohesive OneLake data environment serving Reporting, BI, Data Science and Streaming use cases.