


Transferring data from a Snowflake Data Warehouse to Microsoft Fabric is supported natively, and fairly straightforward. In this post I'll quickly run through a basic data extract using a custom Snowflake query with a data pipeline, landing the data in a Fabric Lakehouse Delta table.
This post is available in video format on YouTube. The text version continues after the embedded video link.
Video version of this post
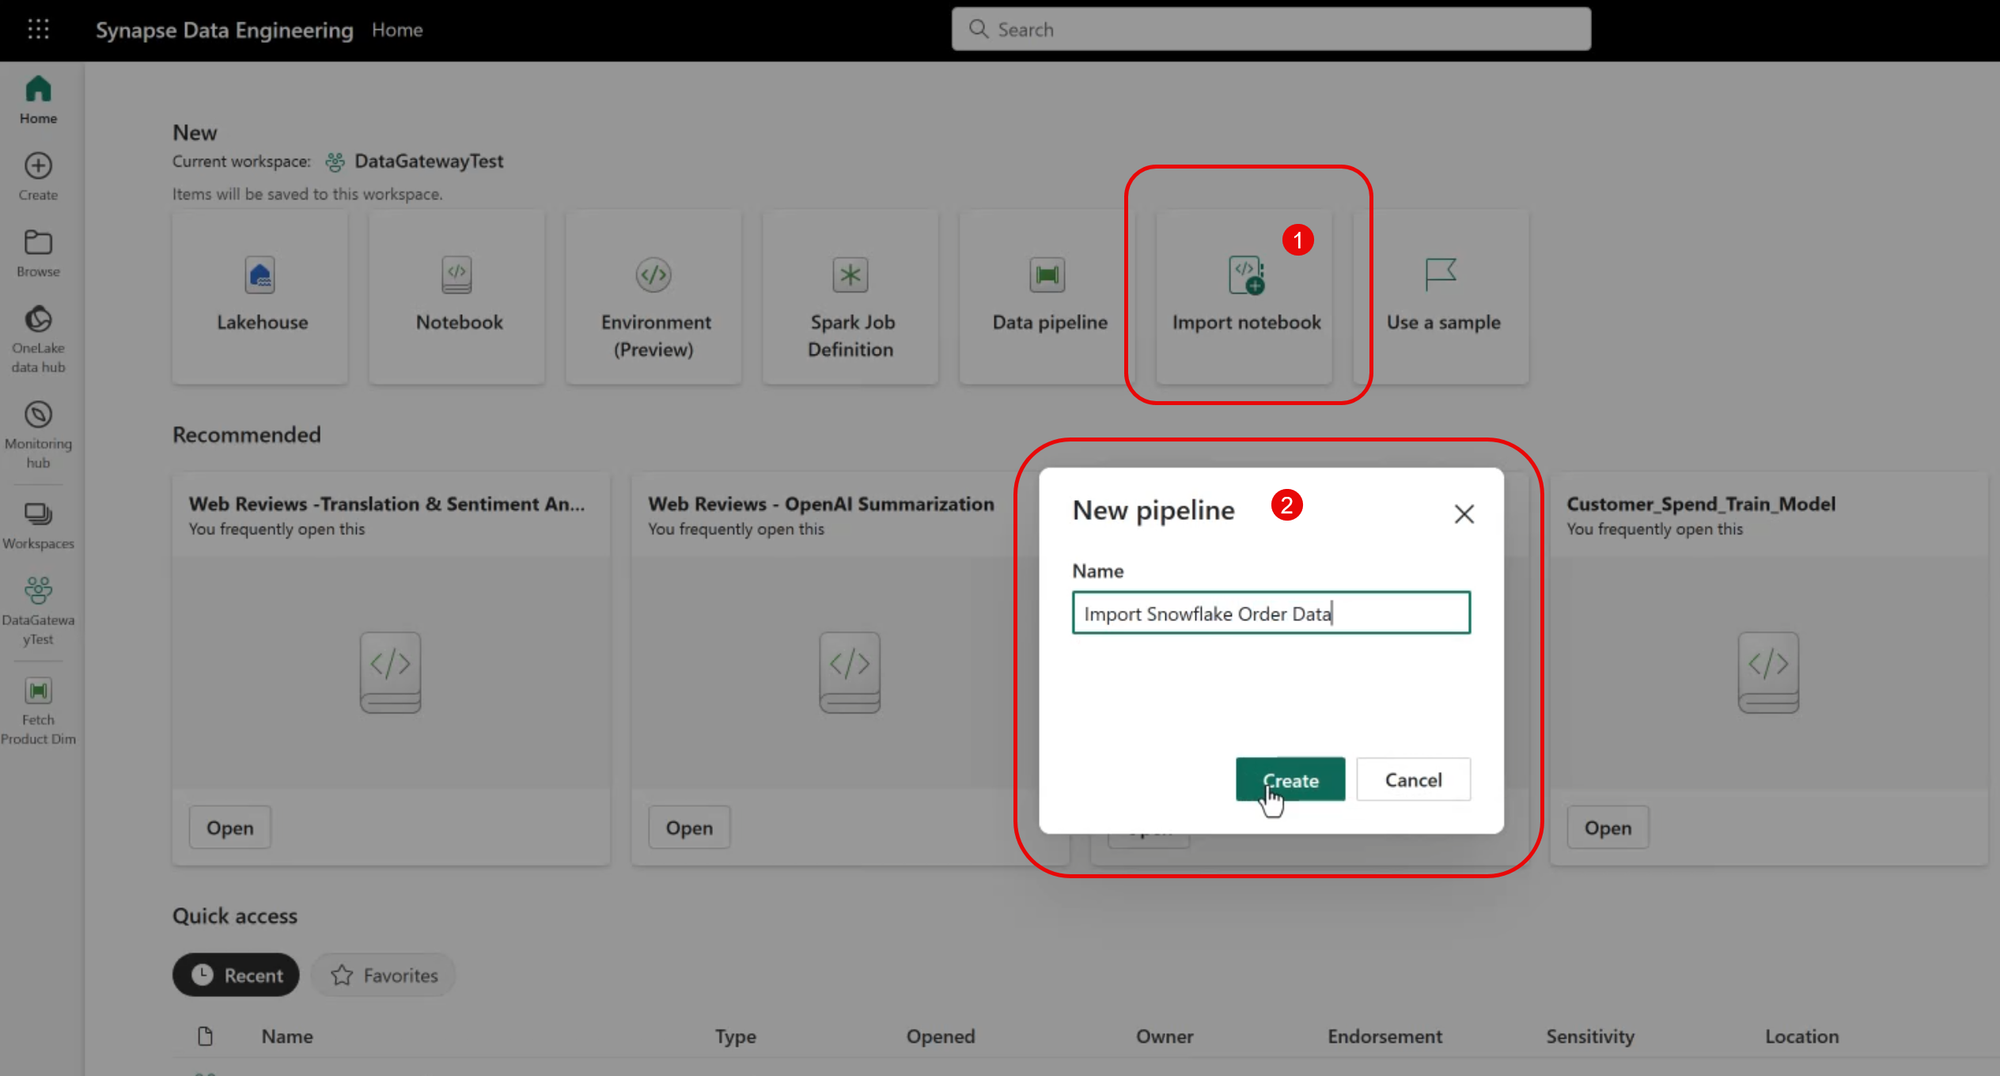
Create a New Pipeline
We'll use a Fabric Pipeline to transfer data from Snowflake. To begin, navigate to the Data Engineering experience, and create a new Pipeline object.
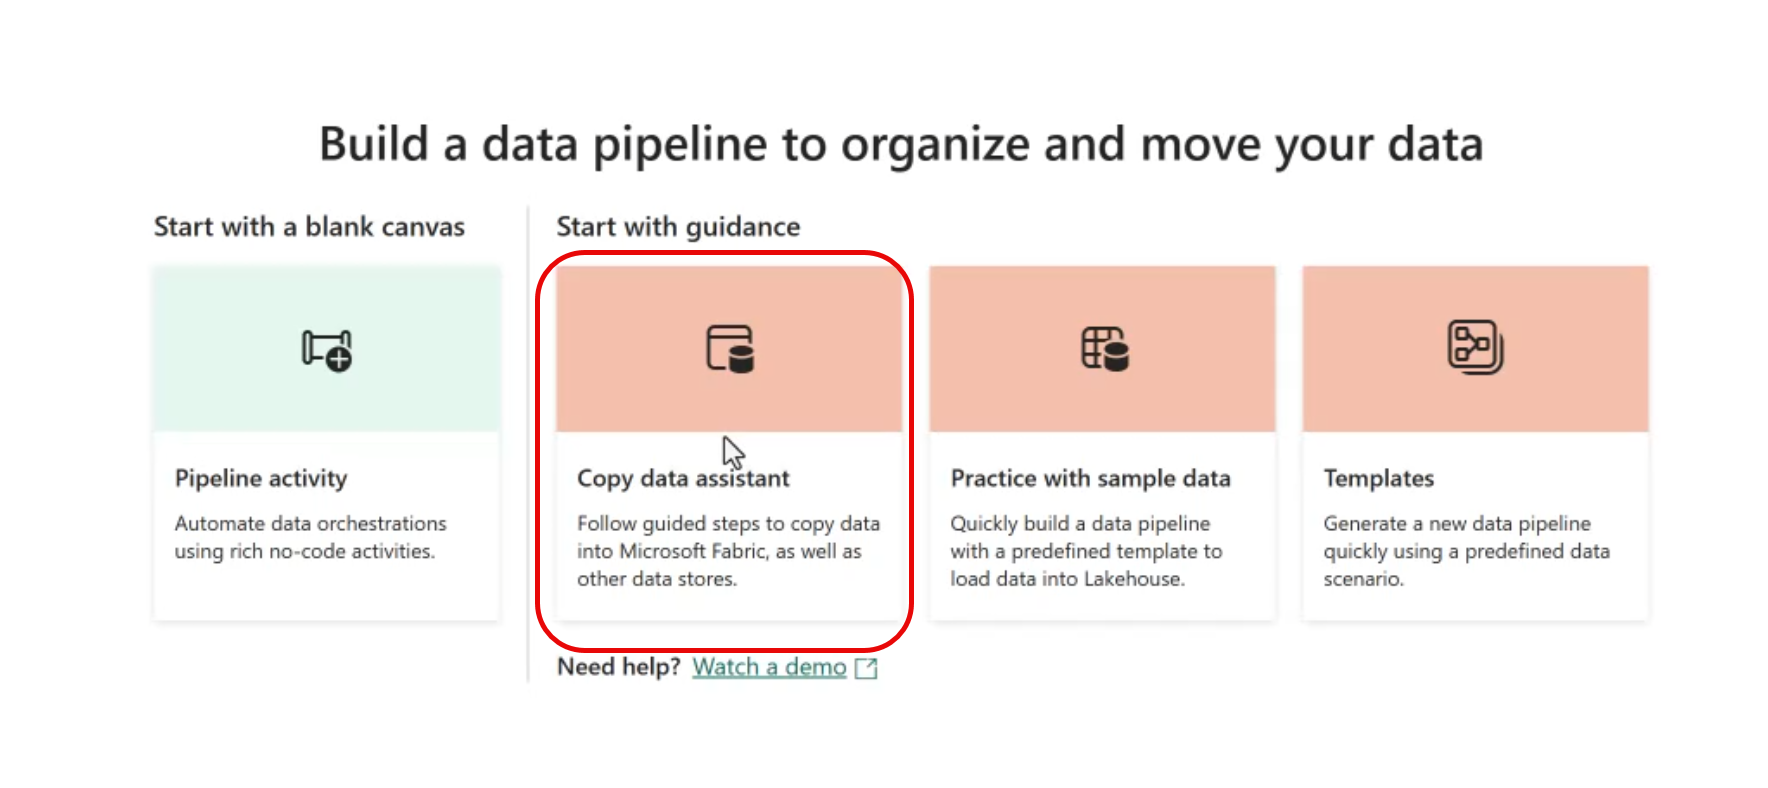
Start the Copy Data Assistant
The easiest way to get started is to use the Copy data assistant to walk through the process of connecting to external data and select the destination.
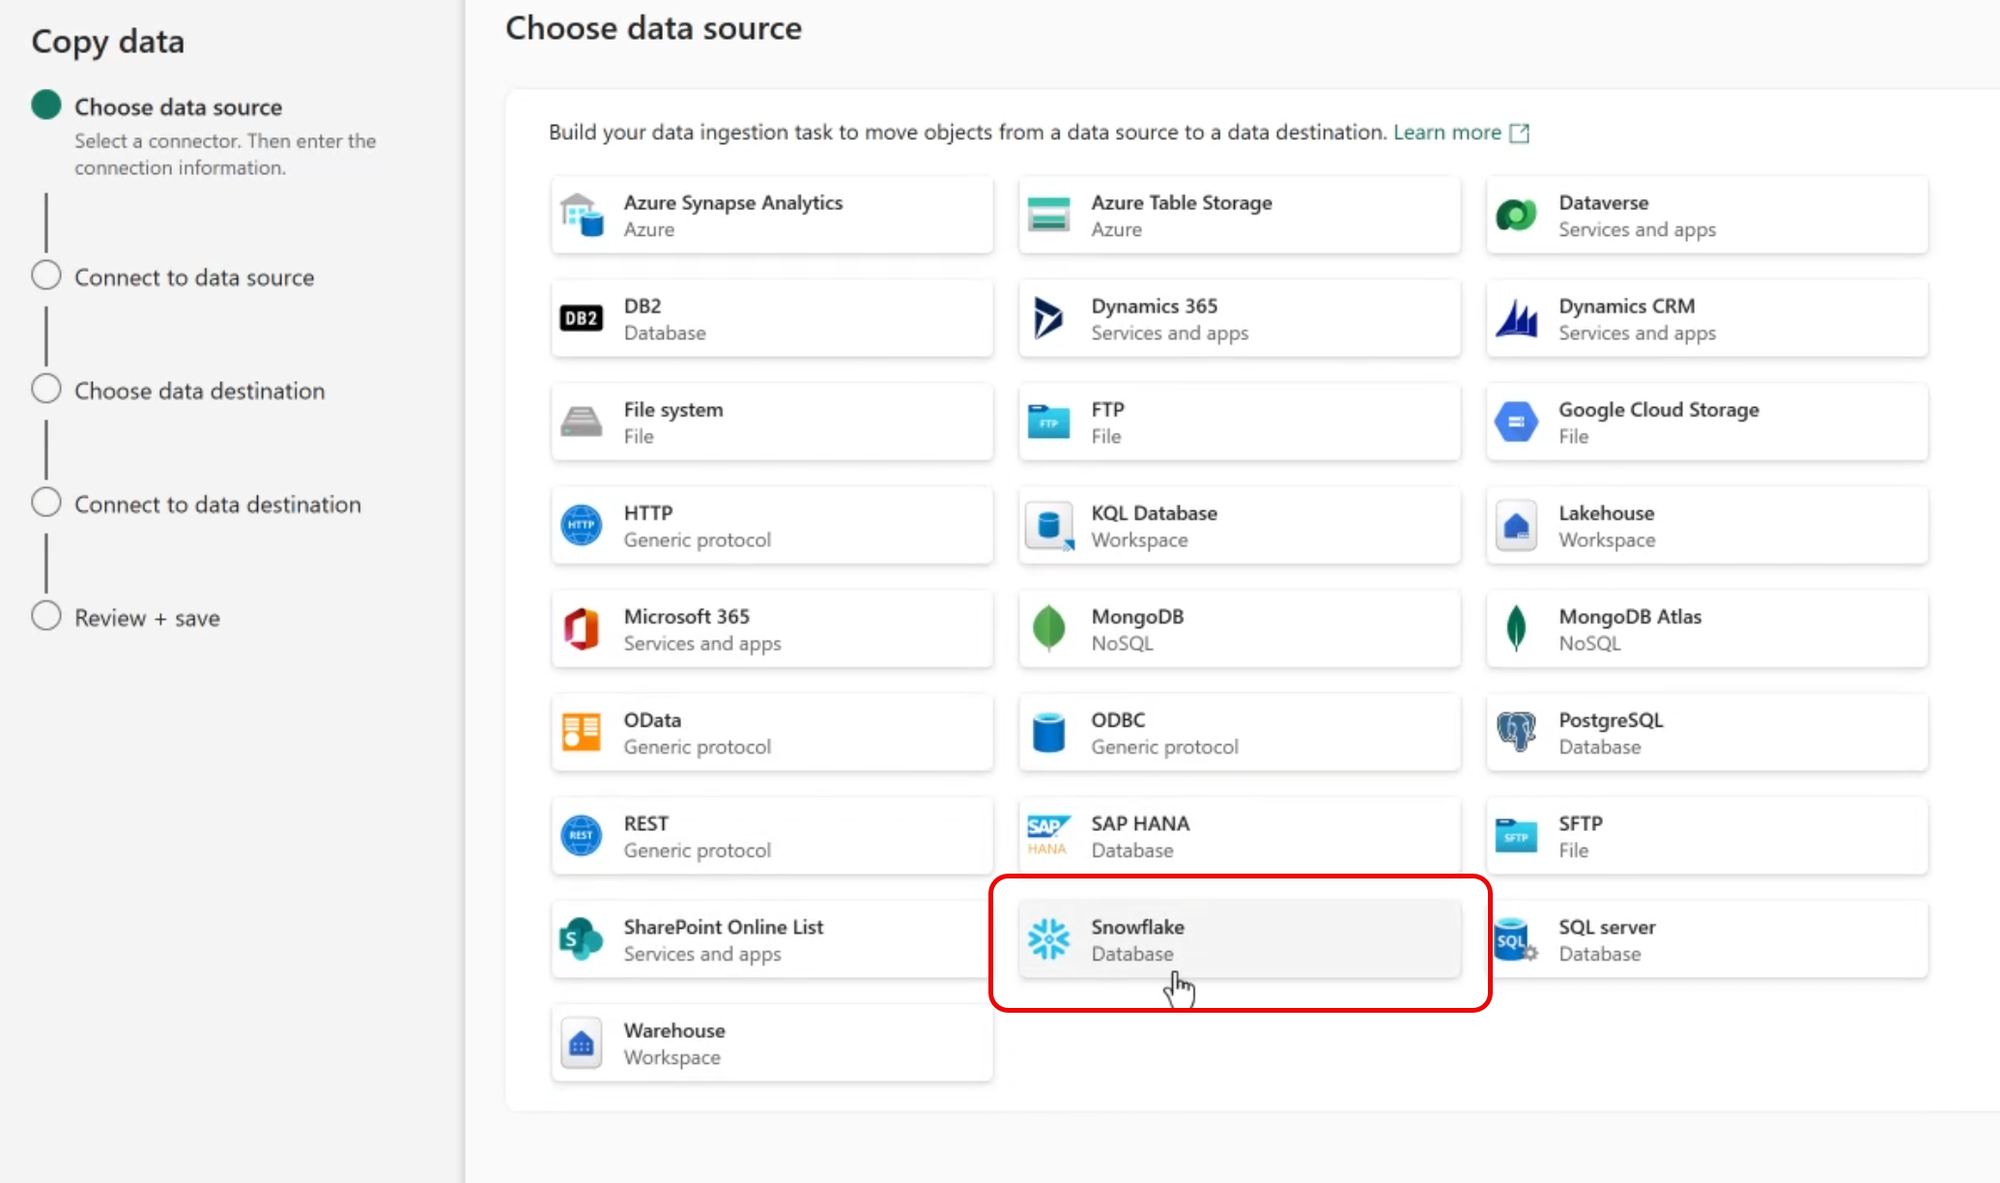
Select the Data Source
Snowflake is a pre-installed source data type, so select Snowflake from the list of installed adapters.
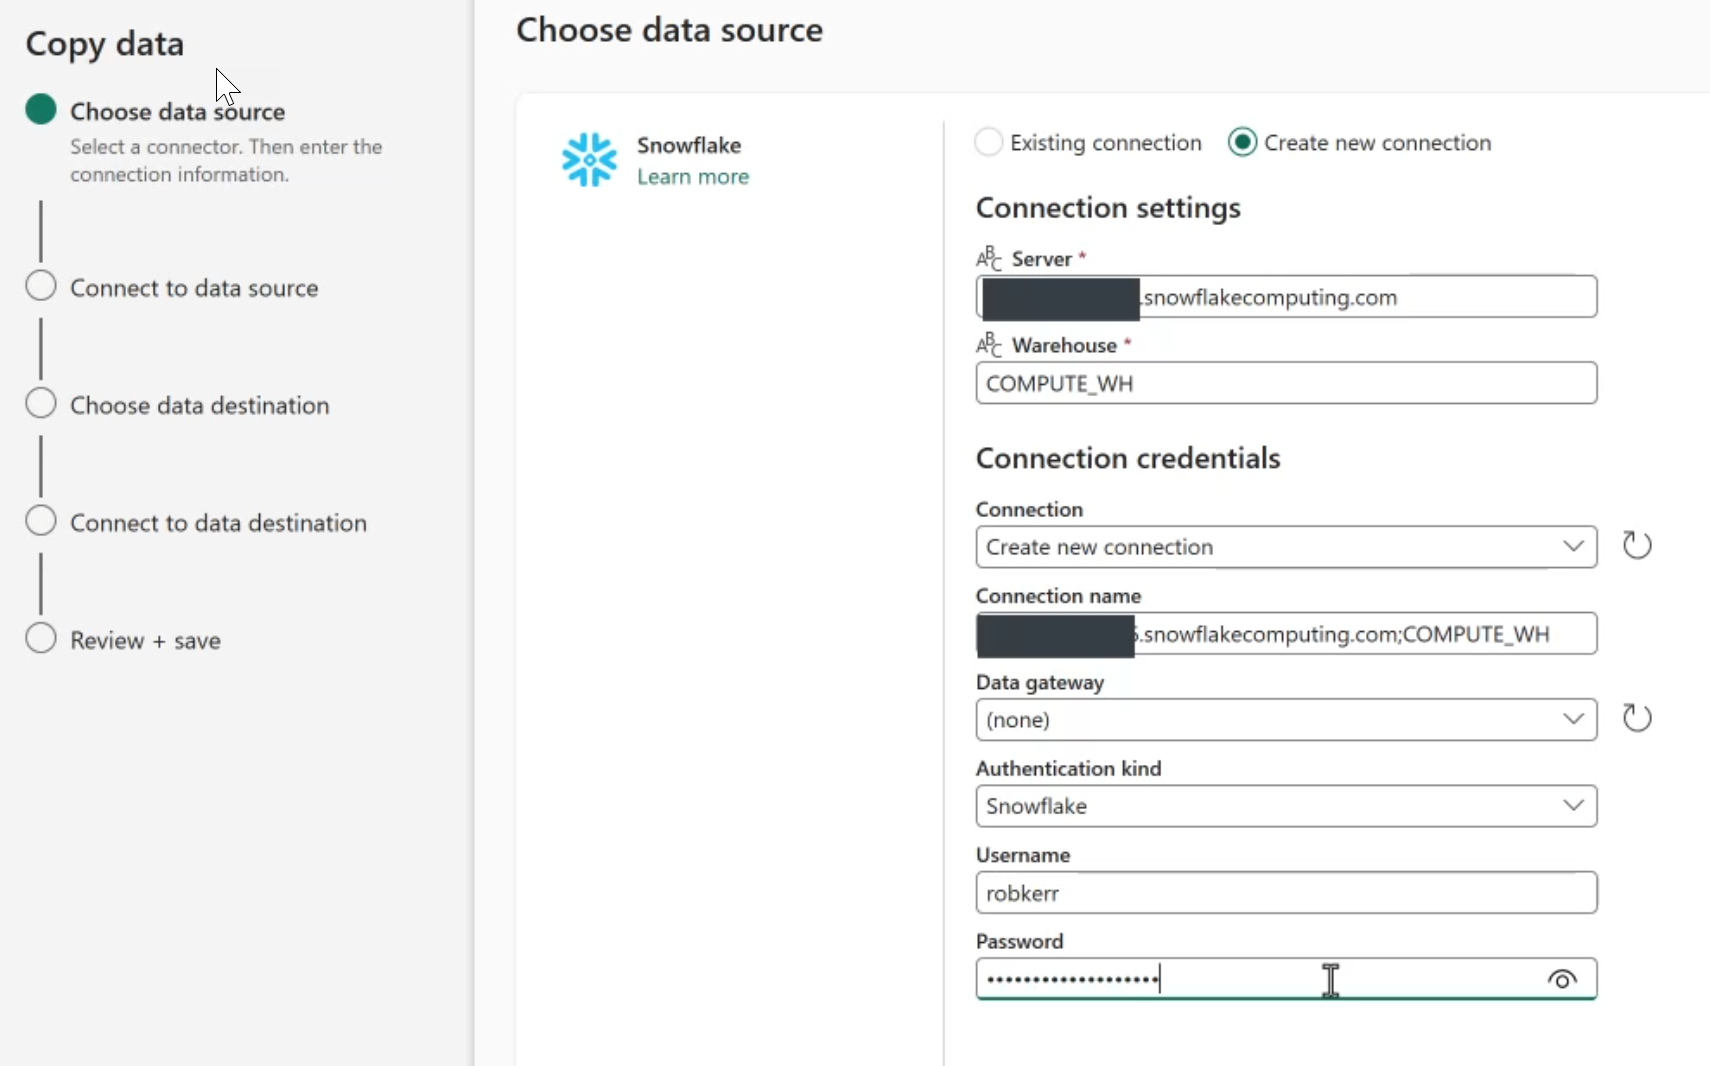
Provide Connection Information
If a connection to your Snowflake instance has already been configured, simply select it as an existing connection. If not, the Copy Data Assistant can be used to create a new connection.
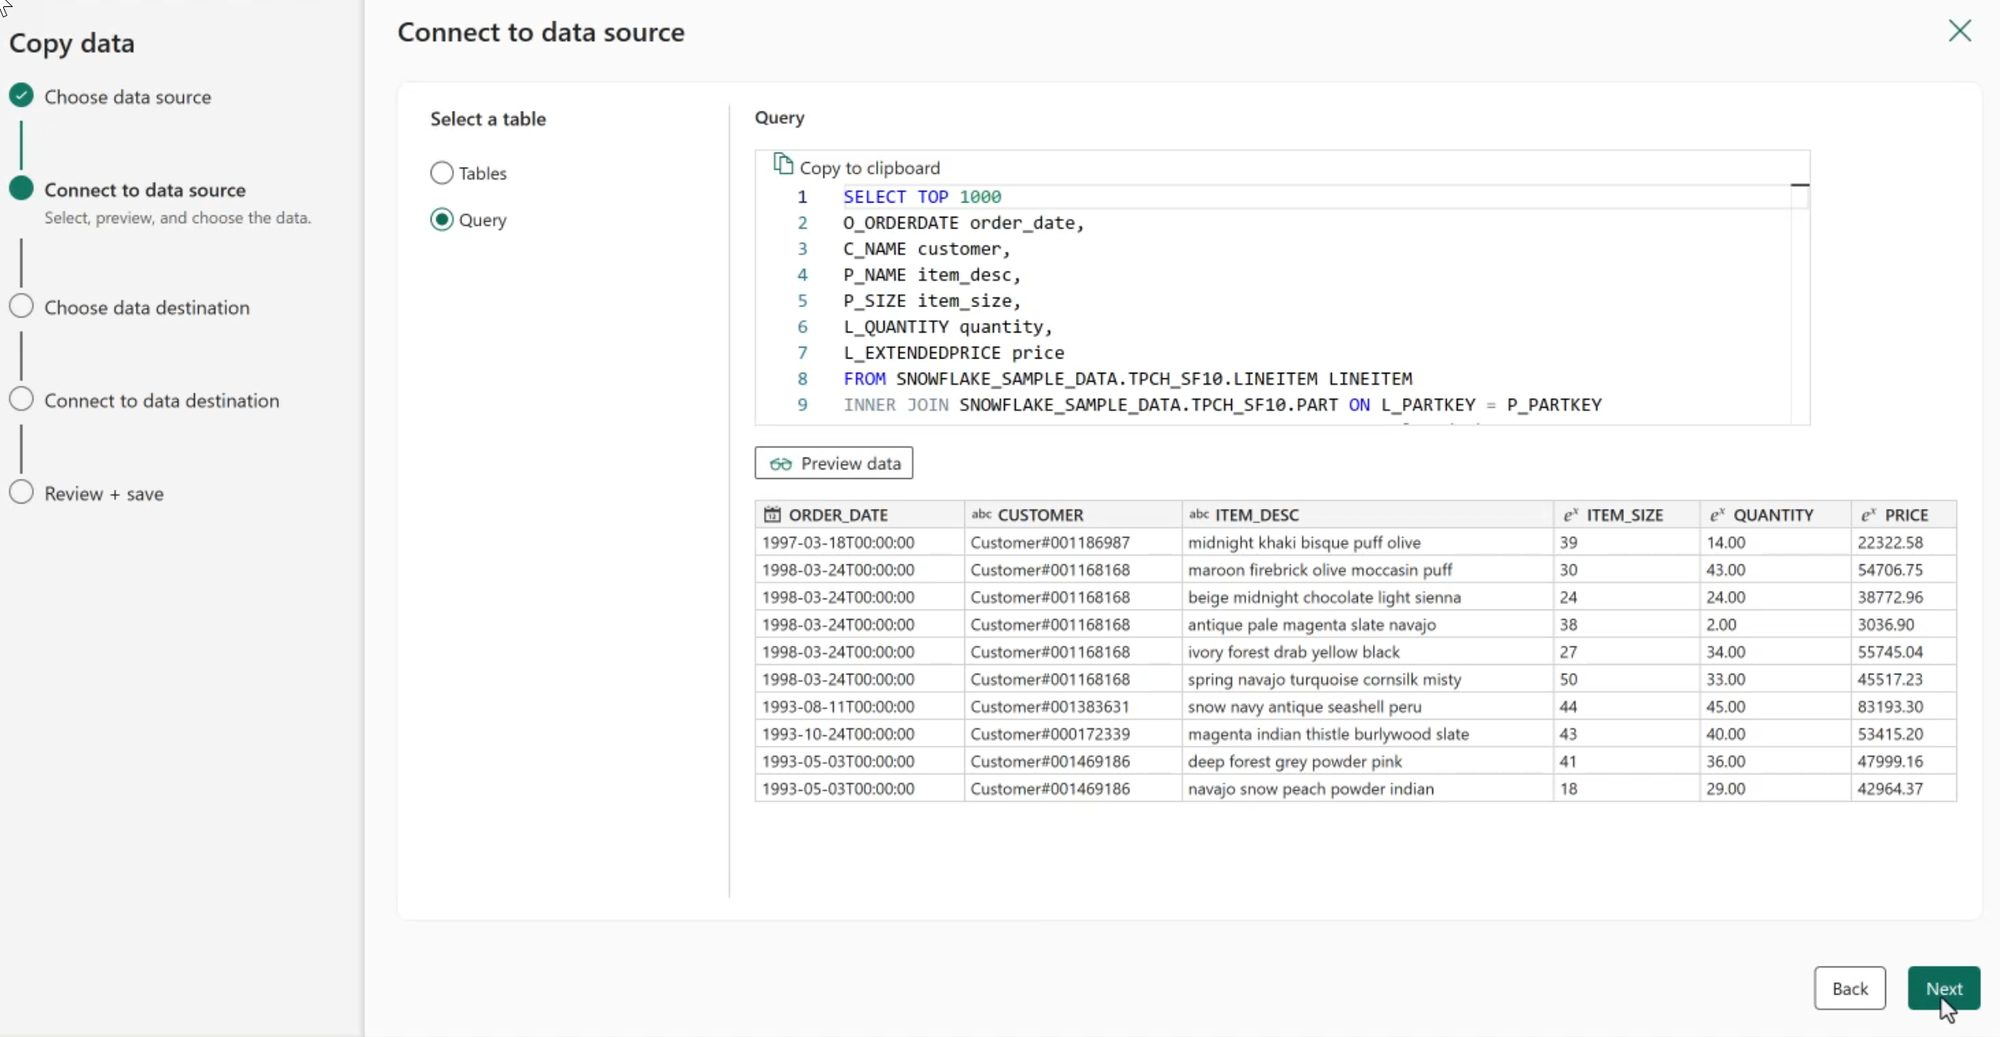
Select the Source Data
Next we can select tables to copy or provide a source query. In this example, I'll provide a query to use to extract just the data I want in a denormalized result set.
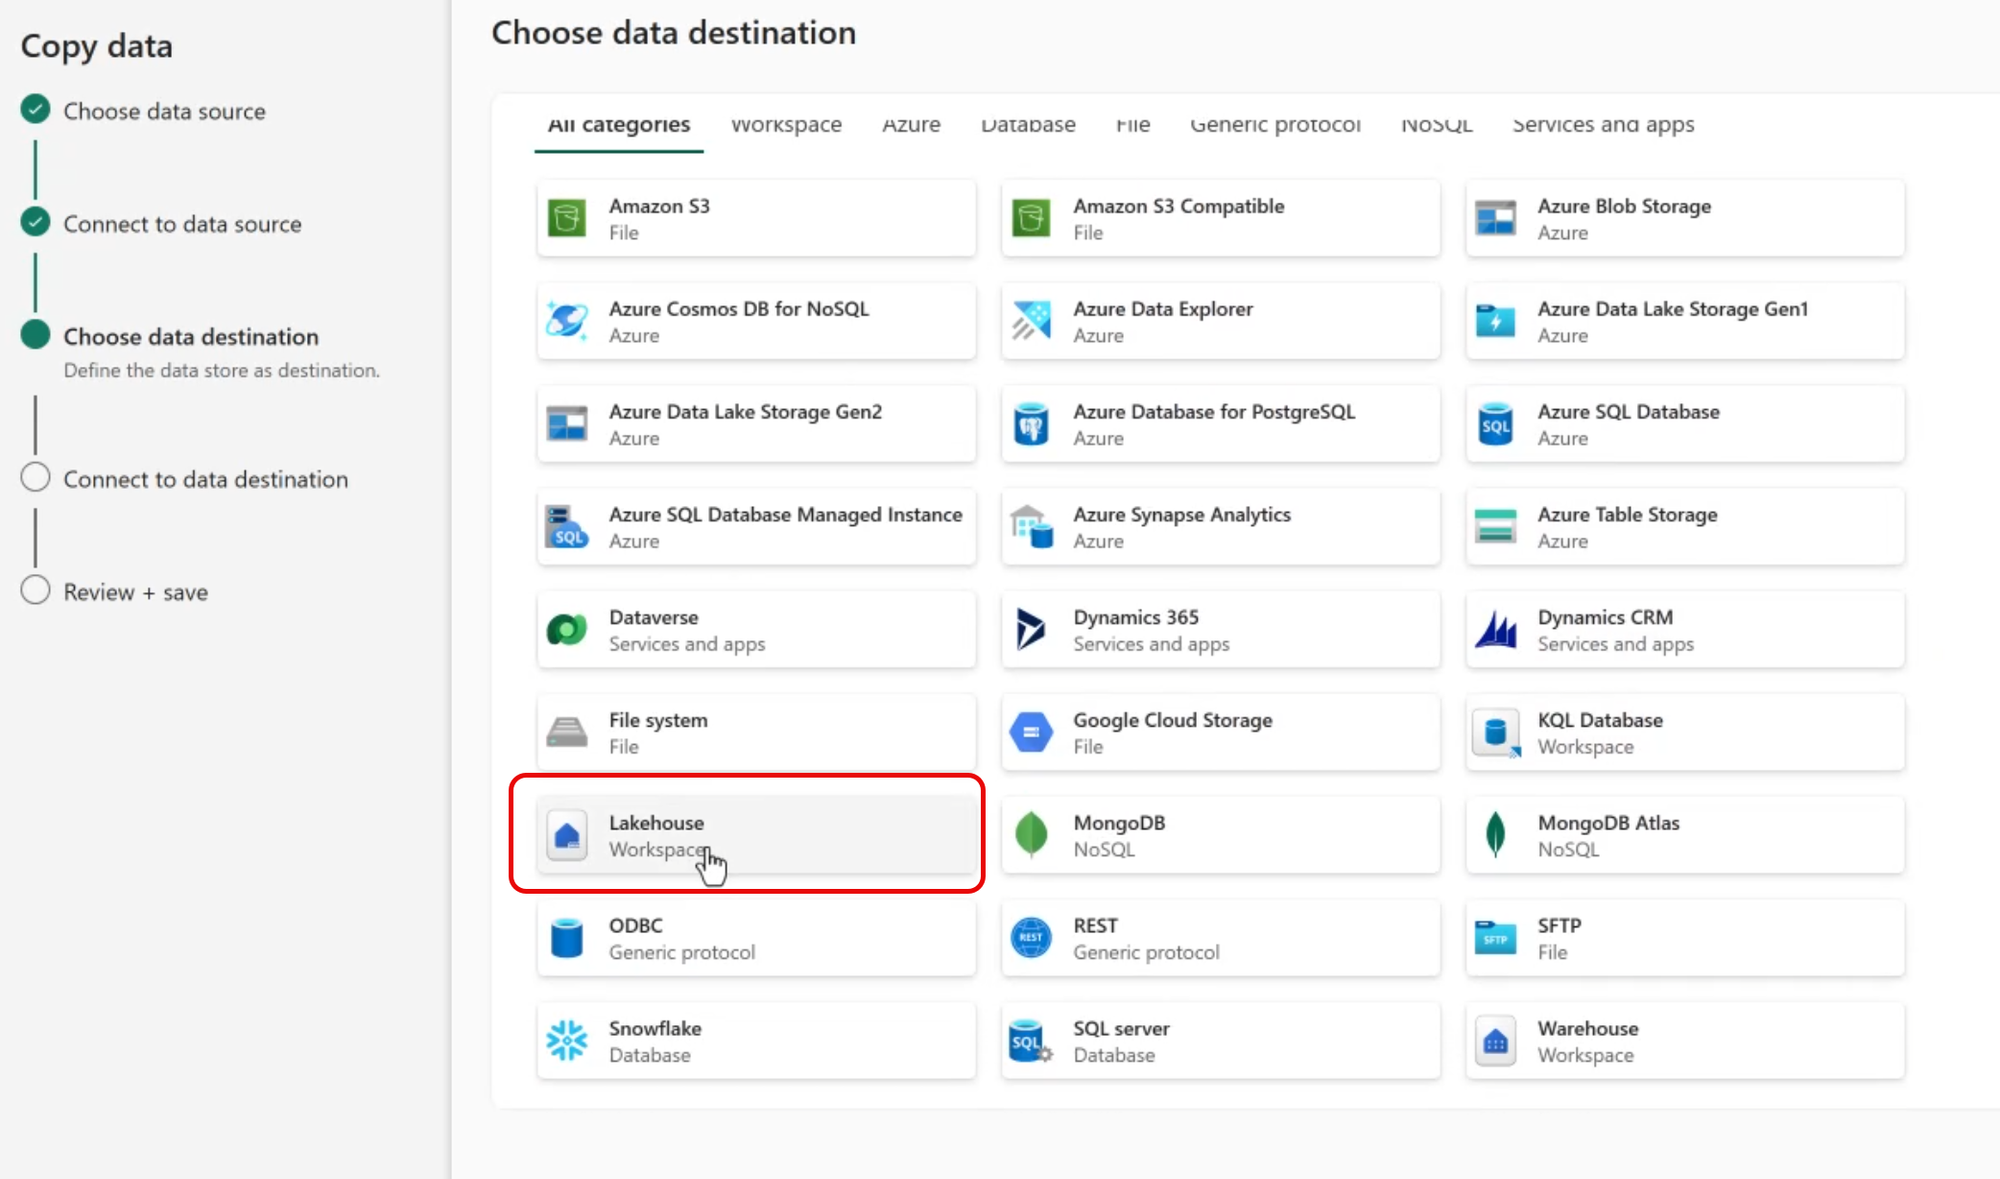
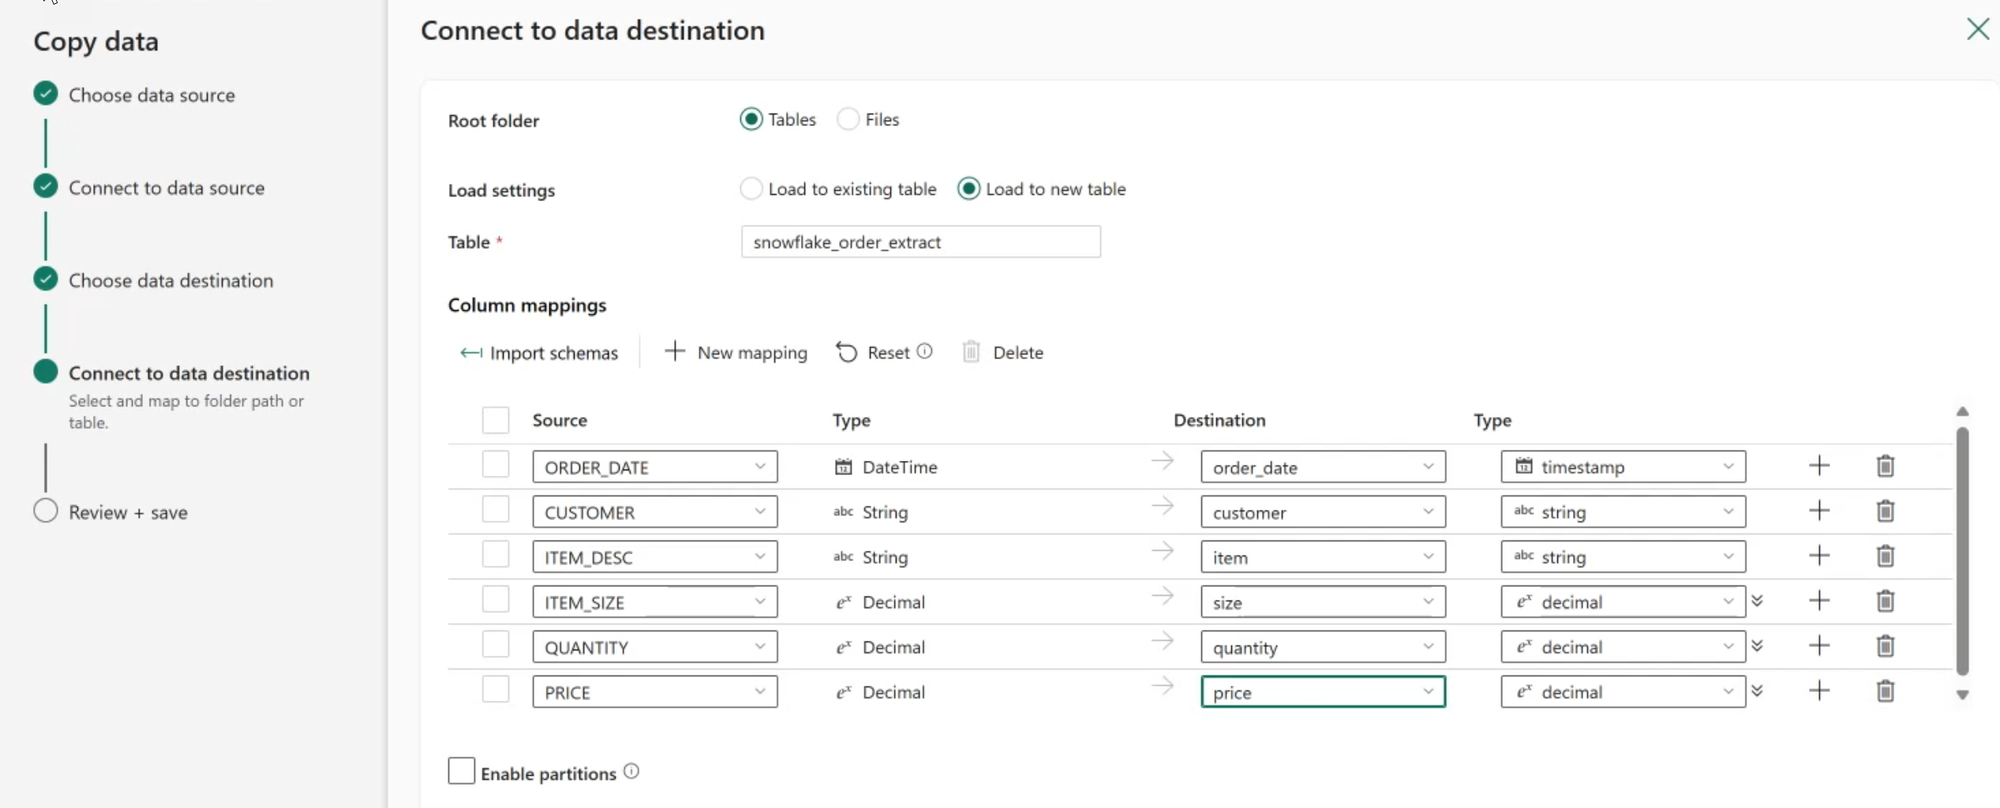
Specify the Destination Lakehouse Table
The Copy Data assistant supports many destination types. Since we want to land the source data in a Lakehouse Delta table, select Lakehouse as the destination.
The assistant next provides a list to select from the Lakehouses in the same workspace as the pipeline. Select the desired destination.
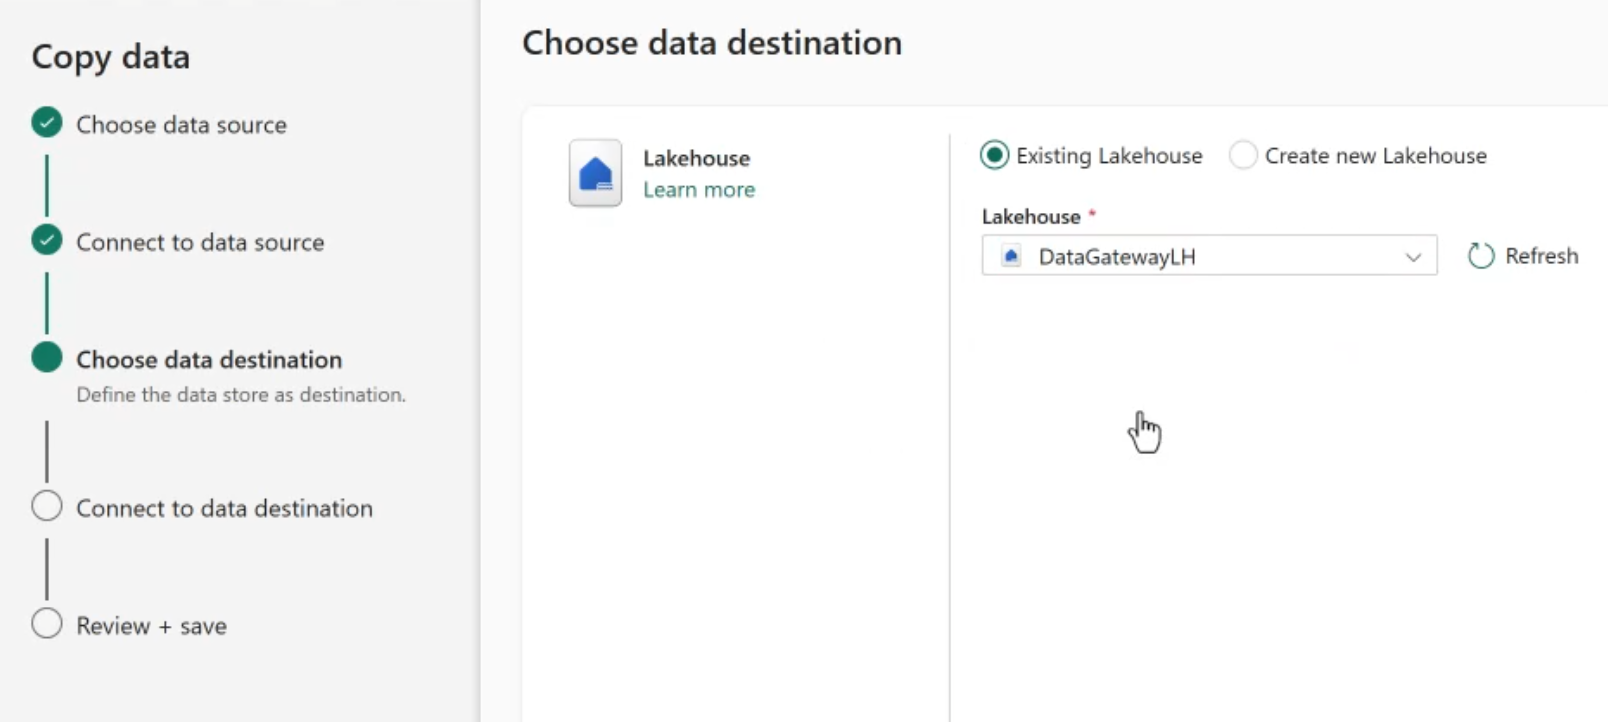
Then specify the destination location. In this case I'll land the data in the Tables section as a new table.
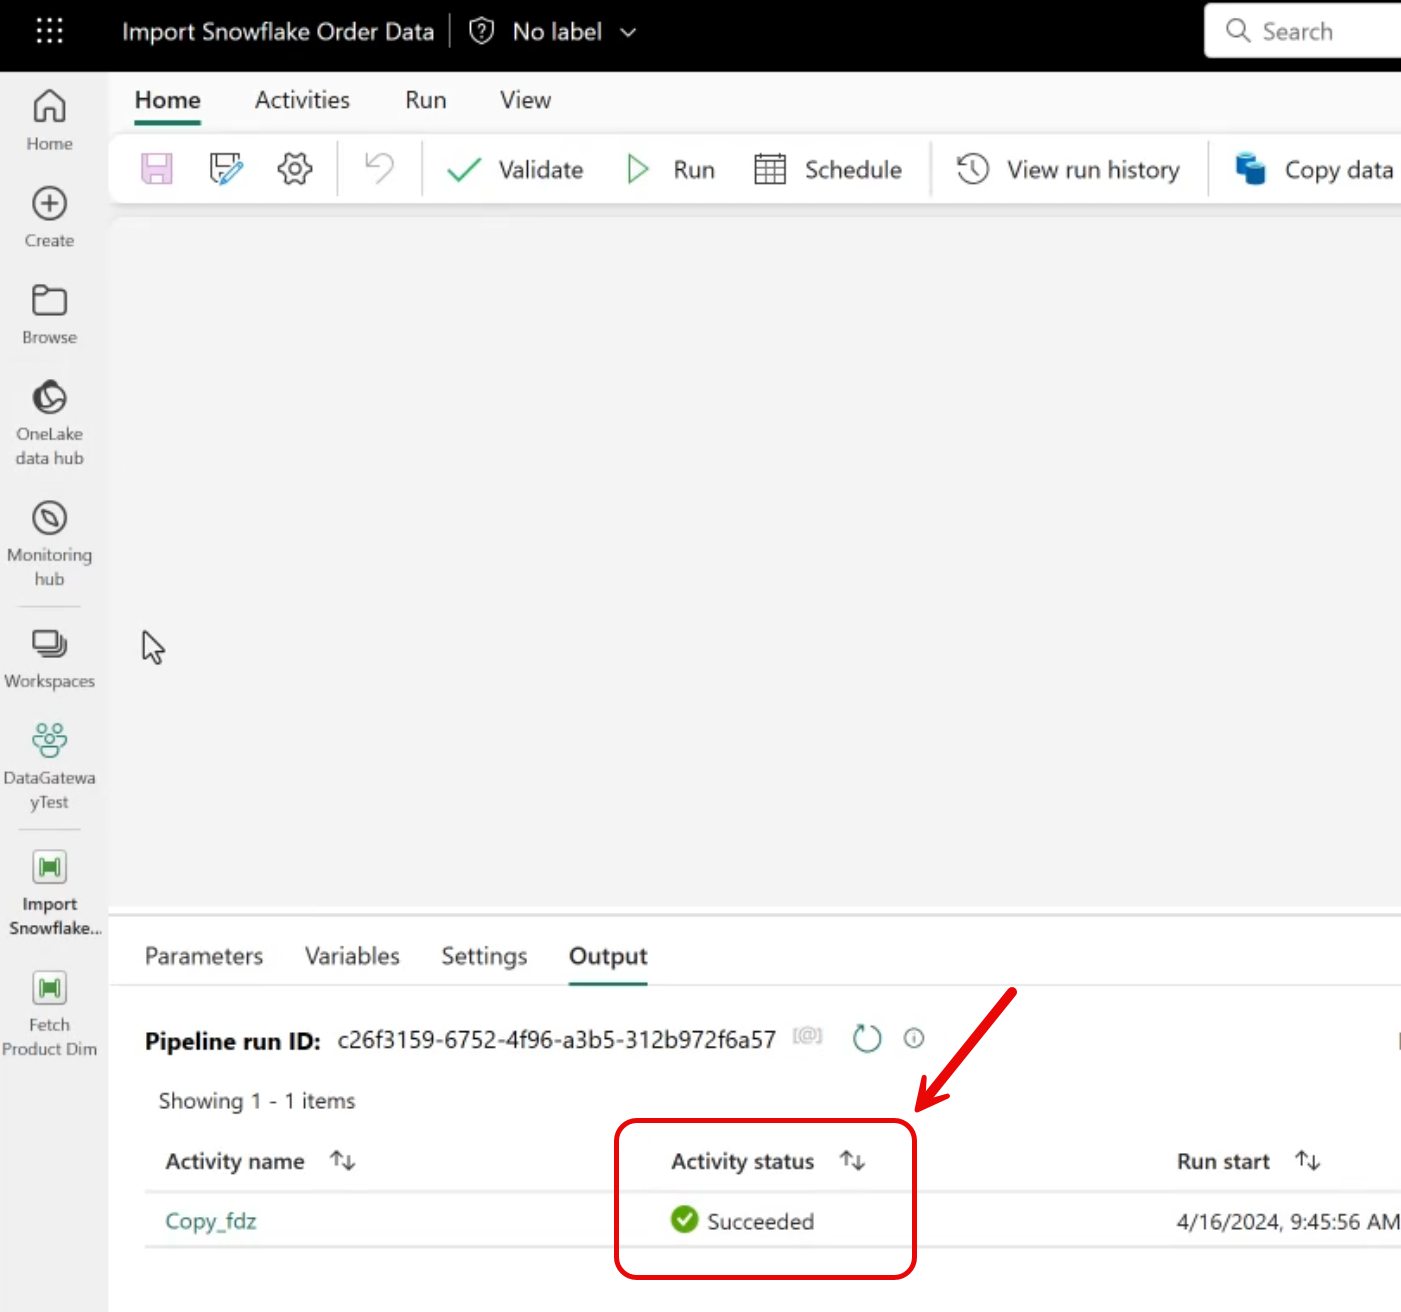
Save and Run
After saving, run the pipeline to extract and load data.
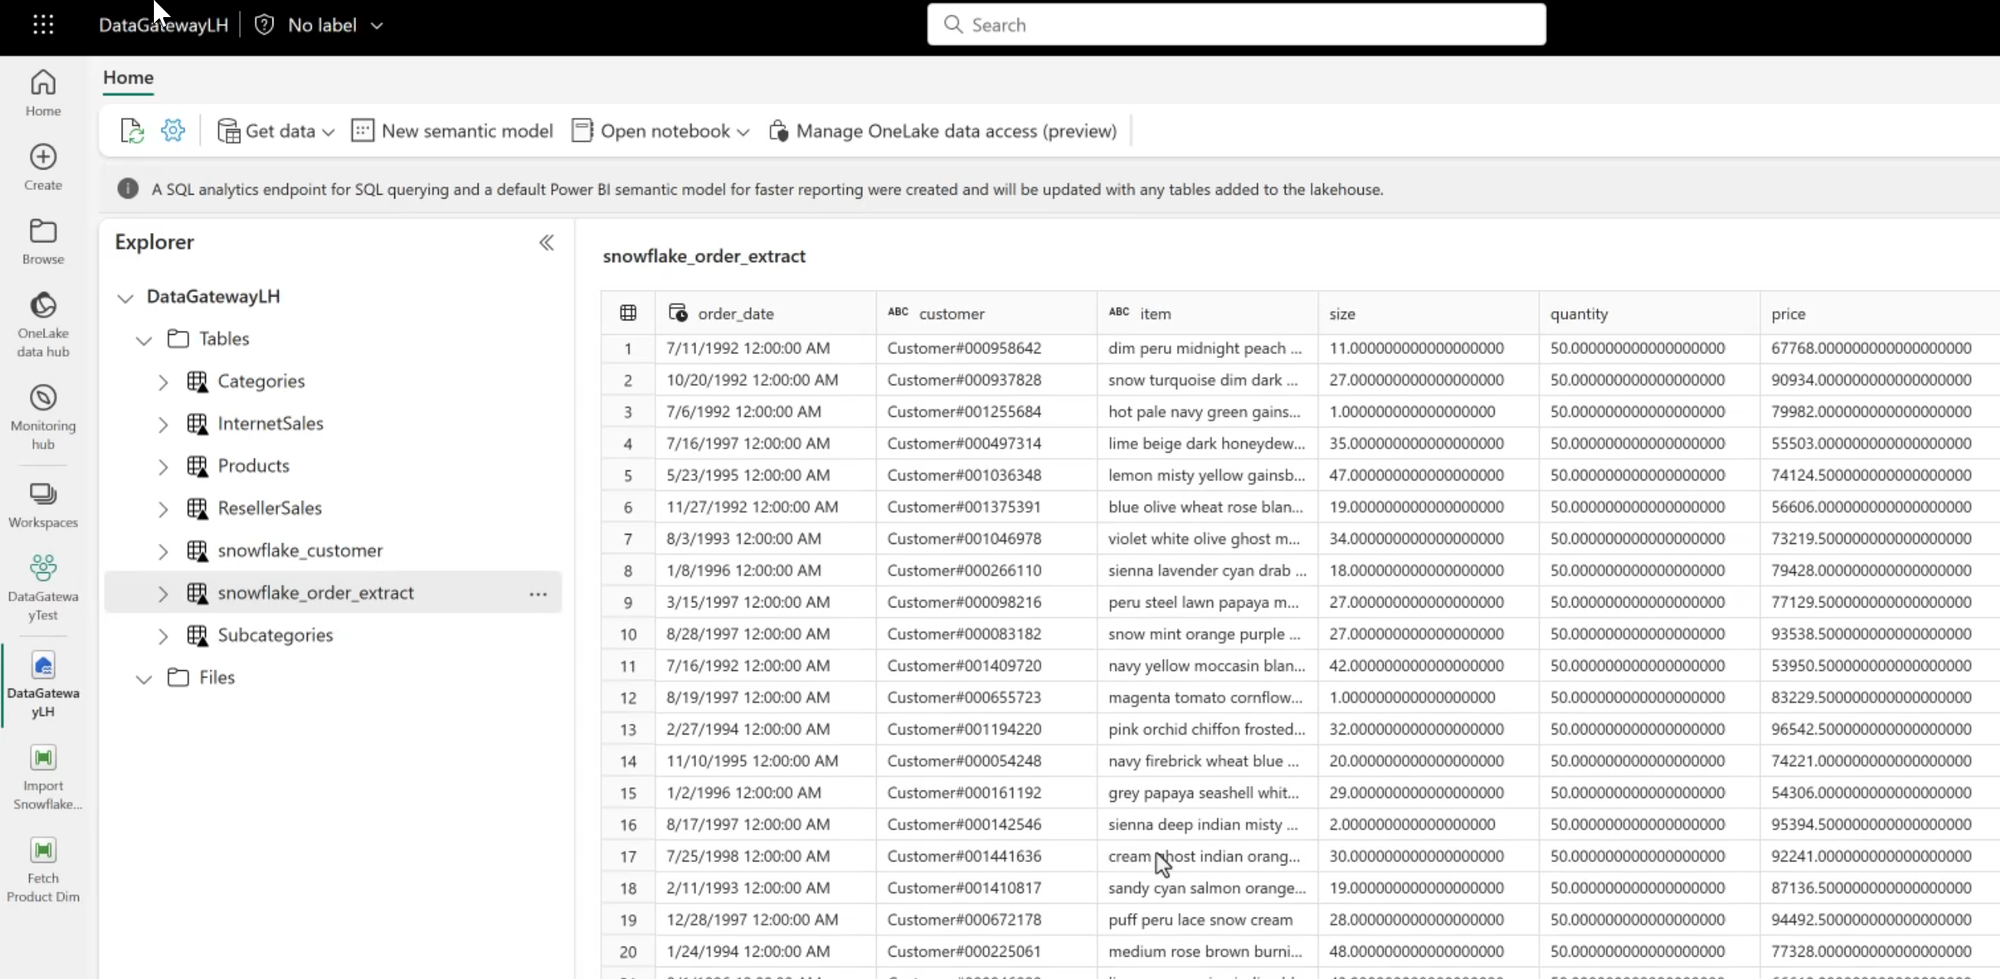
Review the Data
Finally, we can check the Lakehouse to see that our data landed as expected!
Summary
Extracting and loading data from Snowflake to Fabric is a straightforward and fully supported operation. Using a pipeline is just one option for integrating Snowflake data with Fabric (data mirroring is another!).
This post presented the most basic data copy from Snowflake to Fabric. Production solutions can incorporate additional features, such as scheduling, parameters and additional ETL/ELT transformations before saving data to a Data Lake or Data Warehouse.