


Packaging your code in libraries encourages reusability and reduces the need to paste commonly used code snippets into every new notebook. This post shows you step-by-step how to create and package your own code in custom libraries in a Fabric Lakehouse.
Fabric's Custom Code Package Support
Fabric supports using pip install to download publicly-available code packages from PyPl and Conda. We often use pip to install packages for machine learning (e.g. scikit-learn) and other commonly used Python packages that aren't pre-installed in Fabric compute clusters.
Fabric also supports custom libraries when packaged as Wheel packages (.whl files) or in Java Archive files (.jar files). For Python development, Wheel packages are the best choice.
For full reference of Fabric custom library support, refer to this link in the Microsoft docs.
Create an Environment
As a best practice, whenever creating a new Python project, create and activate a Python environment.
Personally, I use miniconda to manage environments. Using Conda:
$ conda create -n my_environment_name
$ conda activate my_environment_name
When using conda to create the environment, the Wheel package is pre-installed, and python is ready to go.
If venv is your preferred environment manager, something like the following instead. I don't use venv often, and I didn't test this walk-through with venv.
$ python -m venv env
$ source ./env/bin/activate
Creating a Custom Wheel Package
Wheel packages are a common, standard way to package Python libraries. For full reference to the Wheel library, refer to this reference link. Wheel implements a standardized specification for publishing Python libraries called PEP 427.
Fortunately, you don't need to understand all the background of Wheel or PEP 427 to include your custom code in Fabric. This post will summarize the process, and for a full demo/walk through, refer to the linked video on my YouTube channel.
The Wheel Folder Organization
A Wheel package is a set of files with your code, plus a setup.py file that informs Wheel what your package is about. On disk, a wheel project looks like this:
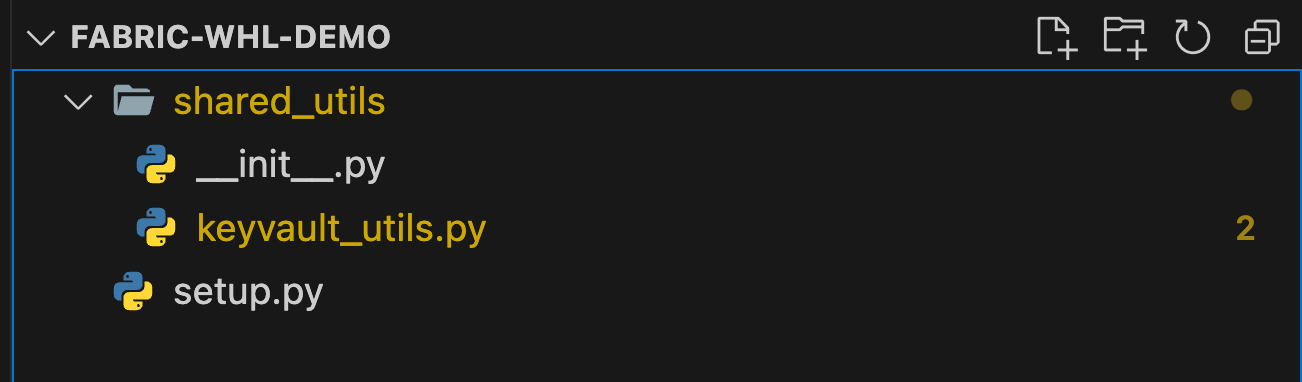
- The
setup.pyfile contains instructions how to generate the Wheel package from your source code - This package is called
shared_utils, and the code is in a folder of the same name - The shared_utils folder needs an
__init__.pyfile to mark it as a package. This file can be empty (as it is in the source repo). It can contain top-level package functions if you'd like to include them. keyvault_utils.pyis a module that contains code. There can be more than one of these files, and they're used to organize the namespace of your package.
setup.py
The setup.py file has a boilerplate structure (below), which defines the name of the package, the version, and standard instructions how to find code. There are additional tags that can be included but are optional.
from setuptools import setup, find_packages

setup(
    name='shared_utils', #needs to build fabric
    version='1.0.0',
    description='A sample library of utilities to use in Fabric notebooks',
    packages=find_packages(),
    install_requires=['pyarrow'],
)keyvault_utils.py
In the walk-through, I crated a module called keyvault_utils, and added a single function, get_keyvault_secret.
When setup.py is run from the Python command-line, this code will be packaged so that the keyvault_utils module can be imported into a Fabric notebook.
def get_keyvault_secret(key_vault_name, key_name):
  from notebookutils import mssparkutils
  from trident_token_library_wrapper import PyTridentTokenLibrary as tl

  # Get access token to key vault for current session ID
  access_token = mssparkutils.credentials.getToken("keyvault")

  secret = tl.get_secret_with_token( \
    f"https://{key_vault_name}.vault.azure.net/", \
    key_name, \
    access_token)

  # Print this for demo purposes (not recommended in production code)
  print(f"Got a secret with {len(secret)} bytes length.")
  return secret
Running setup.py
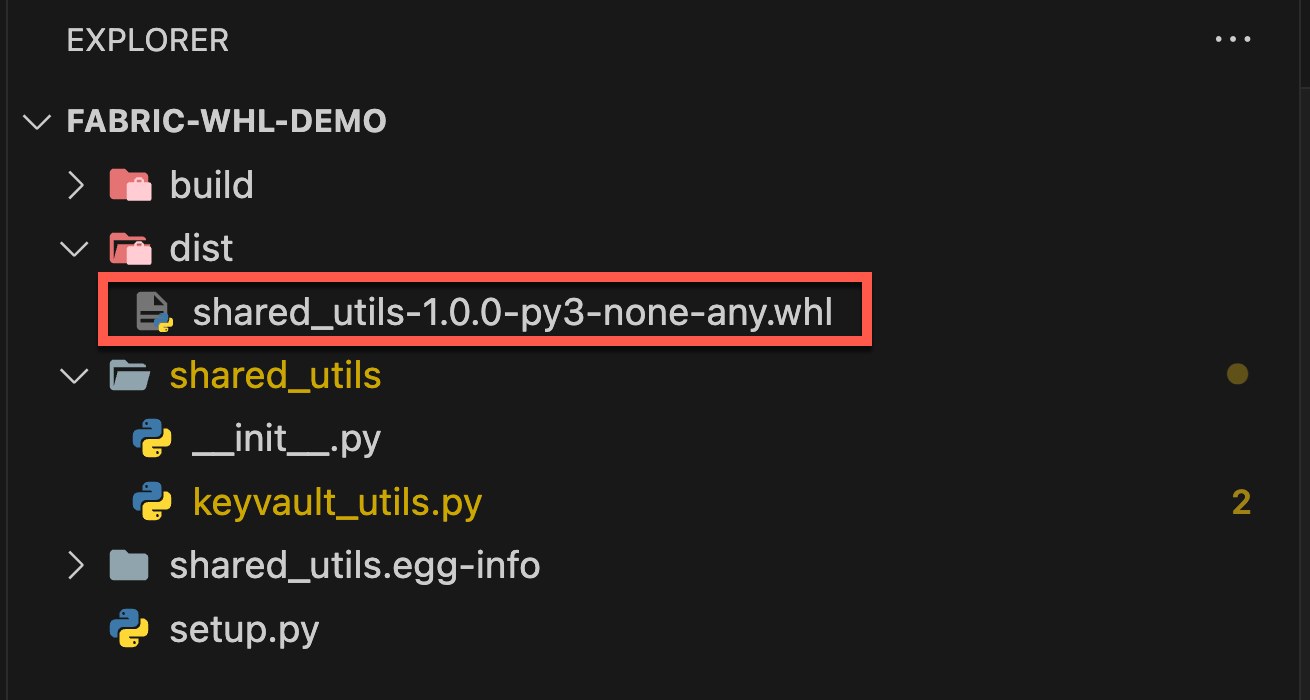
Once the package content is organized, run setup.py from the terminal in the top-level project folder to build the Wheel (.whl) file:
$ python setup.py bdist_wheelWhen the run completes, a number of new files will be created in your project tree. The final output is the .whl pacakge file located in the dist folder.
The .whl file is actually a .zip file with a different file extension, and contains the python package code plus additional metadata files that tell Fabric how to install the package.
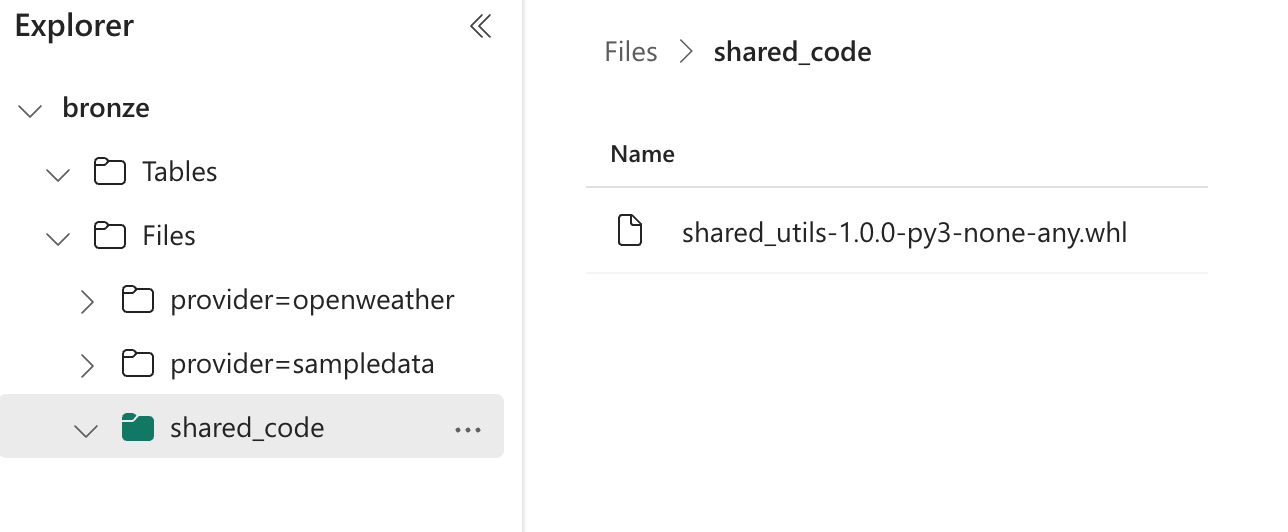
Installing the Wheel Package
Installing a Wheel package into Fabric is as simple as uploading it as a Lakehouse File!
Using the Wheel Package from a Notebook
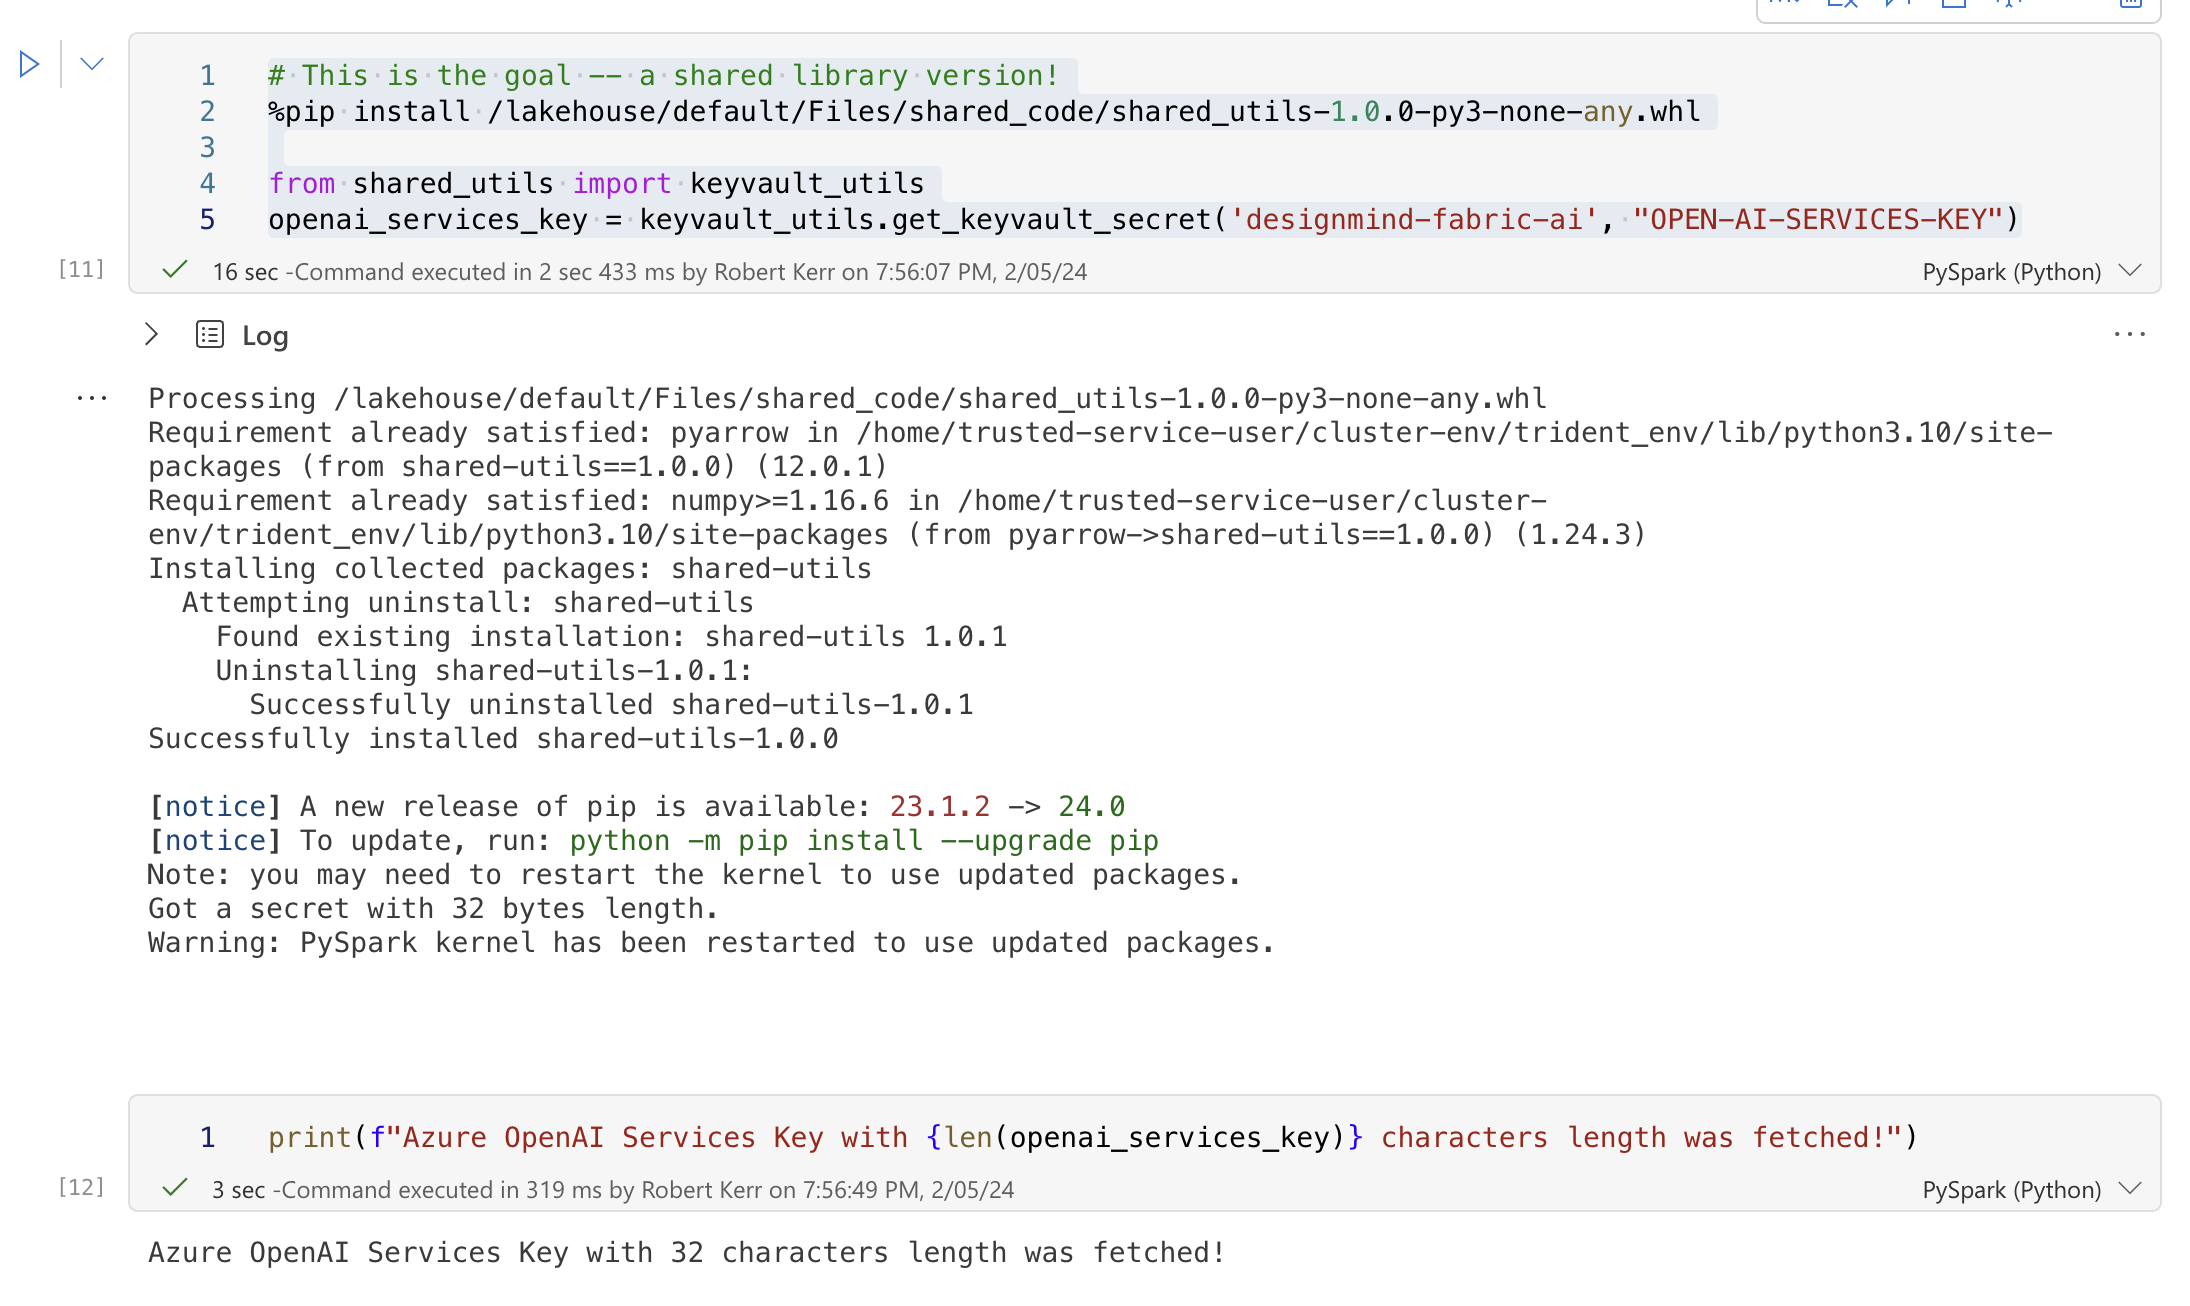
To use the Wheel package, simply %pip install it into your notebook, import the desired module, and call the function.
To call the get_keyvault_secret function in a notebook, for example:
%pip install /lakehouse/default/Files/shared_code/shared_utils-1.0.0-py3-none-any.whl

from shared_utils import keyvault_utils

openai_services_key = keyvault_utils.get_keyvault_secret('KEY_VAULT_NAME', 'KEY_NAME)
When the above code runs in a Fabric notebook, the Wheel library will be installed at the session scope, and the openai_services_key variable will be assigned the value of the requested secret from Key Vault
Summary
And that's it! Once you know how to create Wheel packages as in this tutorial, using them to package and reuse code in Fabric notebooks becomes easy and convenient.