


Snowflake provides security integration functionality that allows Snowflake and Entra admins to establish a one-way trust where users authenticated by Entra can provide proof of their identity to Snowflake--providing a seamless single sign-on experience for end-users.
In this post, we'll walk through the Entra and Snowflake configurations, and then demonstrate how to leverage this identity trust relationship in a custom React web application.
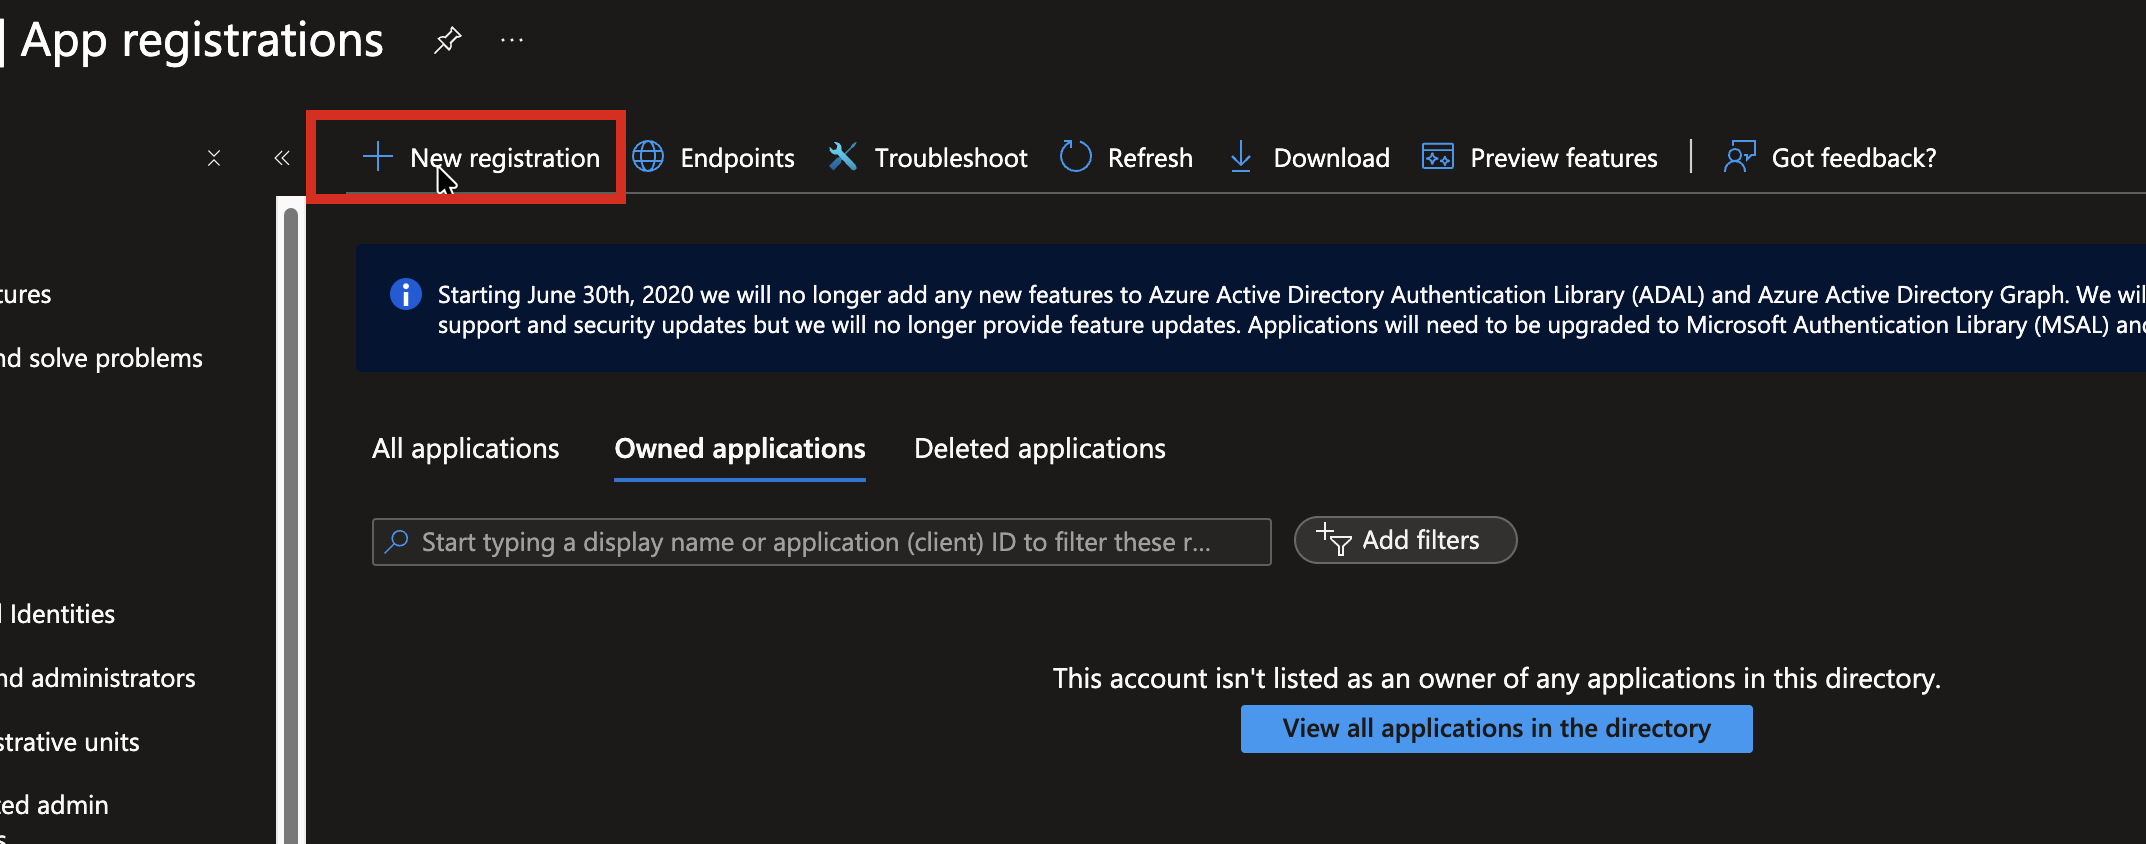
Fist Create an Entra App Registration
For the Azure Entra side of the identity integration, we first create an Entra app registration.
In this example, the React web app will use the app registration to authenticate users and request Entra Access Tokens.
Make the following configuration entries:
- The user-facing display name. This is the name the user will see in permission UI, and can be any descriptive string.
- To support only users in the current directory, leave the default Accounts in this organizational directory only.
- Select Single-page application (SPA), which is the correct selection for React (and other JS applications that run in the browser DOM). Other application types may use a different app type setting.
- Specify the first Redirect URI. We'll add the URI used during development, http://localhost:3000. Other allowed redirect URIs can be added after the app registration is created.
- Press the Register button to create the App Registration with the initial configuration values.

Add Admin Authorization for User.Read
This step isn't required, but typically in an internal application we'll add Admin consent to the User.Read permission so that each user isn't required to grant permissions individually.

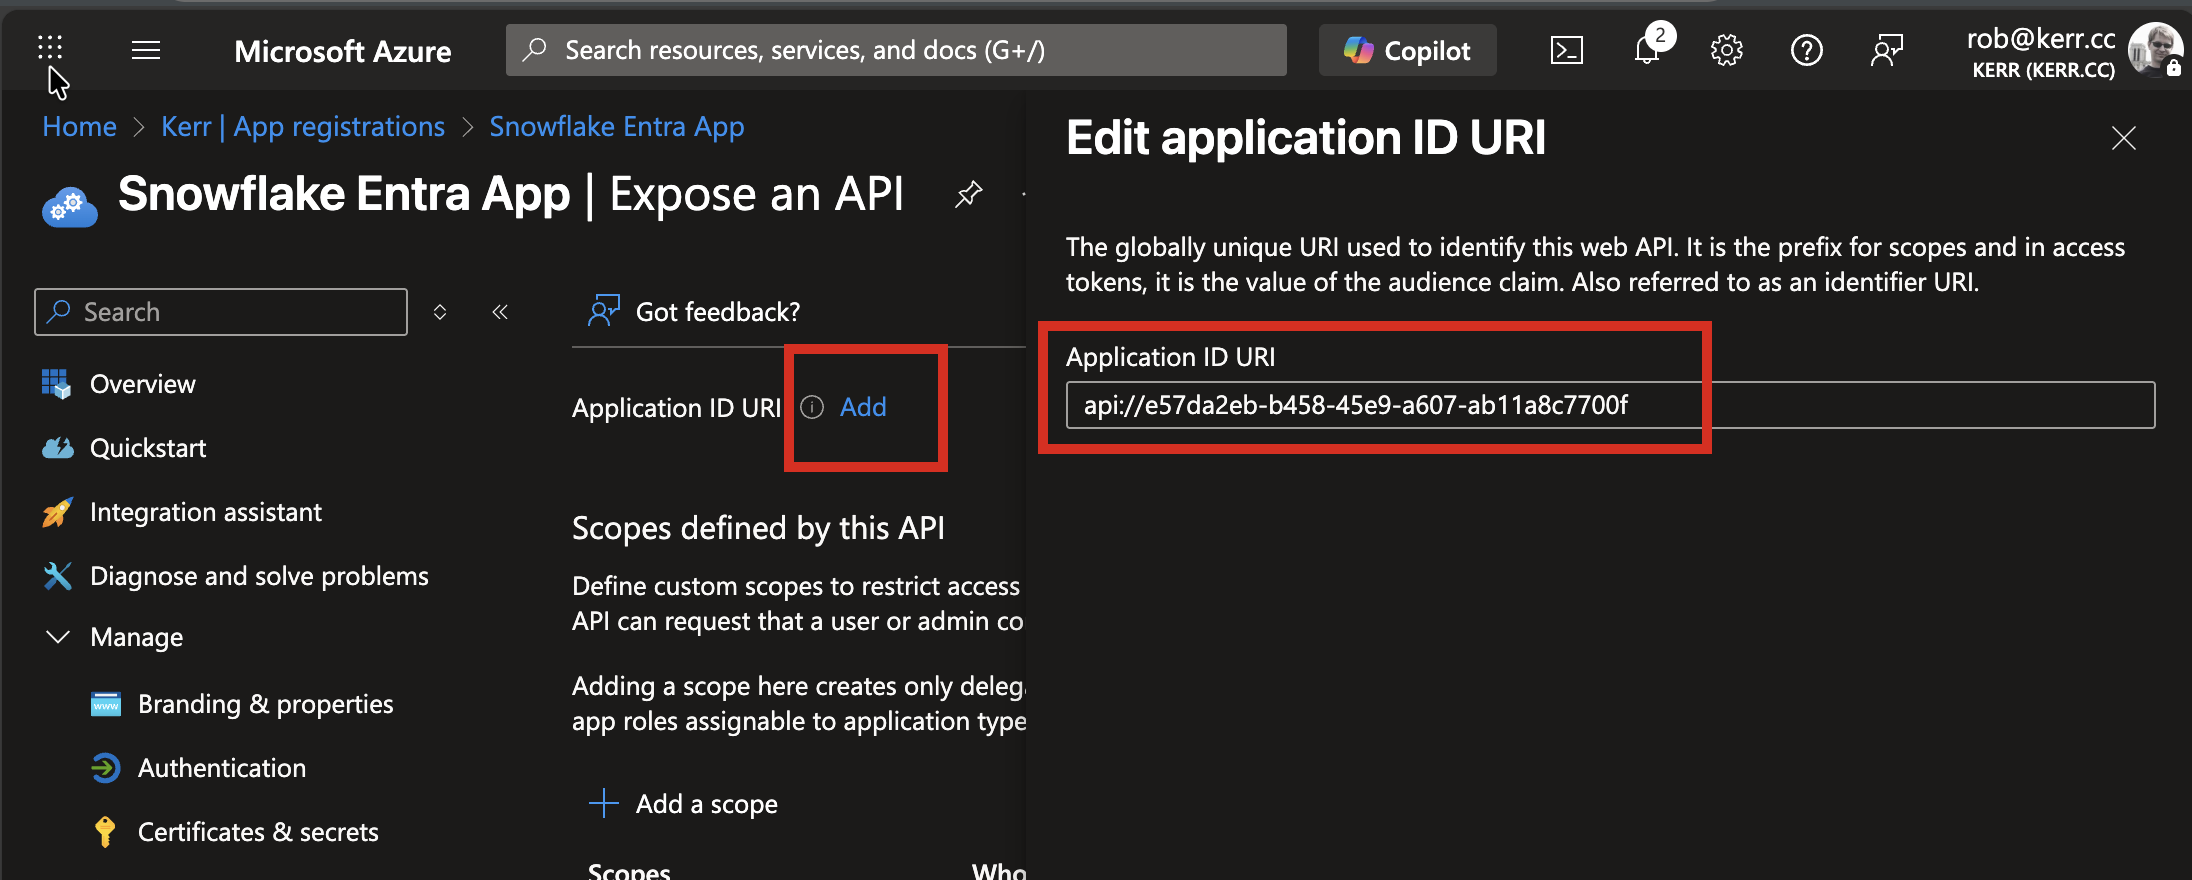
Expose the Snowflake Access Token API
So far we've enabled a user to sign-in to the React app using their Entra ID. Next we need to create an API that front-end applications can use to obtain an Access Token that will be provided to Snowflake to authorize the user to access Snowflake data.
Create an Application URI
Each application that creates Access Tokens needs an application URI. This URI can be anything we decide, but the default is to create an API URI that contains the UUID of the App Registration. On the Expose an API page, click the Add link, and accept the default Application URI and press the Save button.
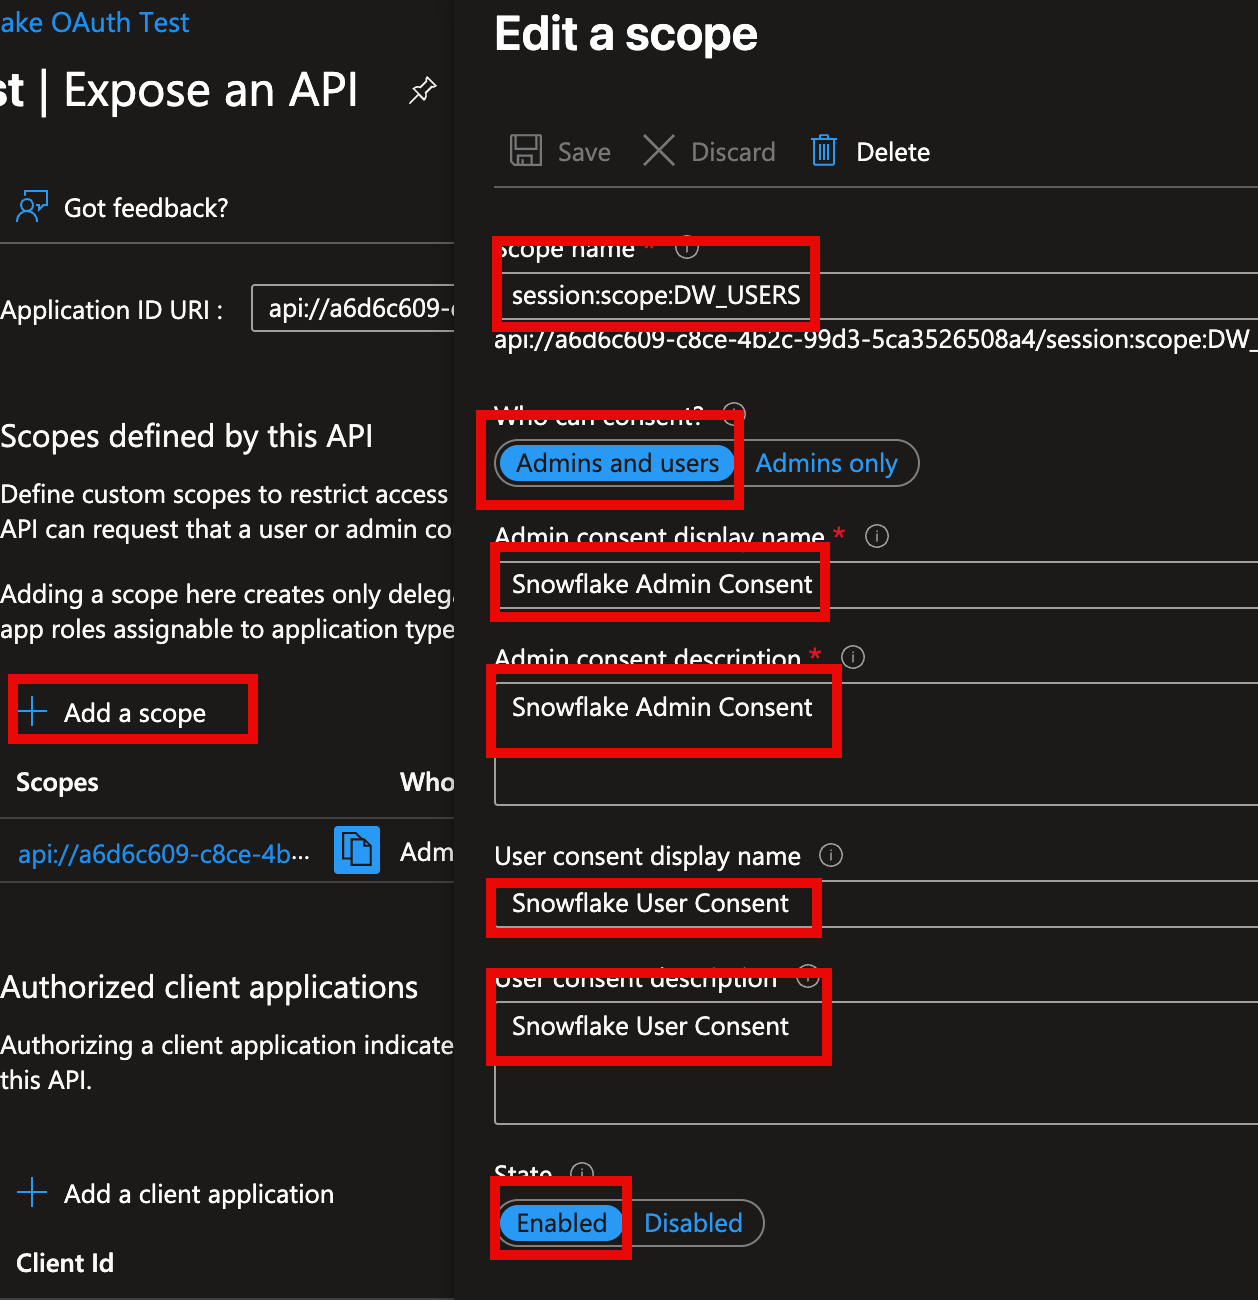
Add a Scope
Now we'll get into the specifics of the Snowflake integration.
The API we've created can have one or more associated scopes. For Snowflake identity integration, by default each scope authorizes a user to access a single Snowflake database role.
To expose a scope, Click the plus (+) button next to Add a Scope, then provide the following scope details:
- The scope name, which should follow the format:
session:scope:{SNOWFLAKE_ROLE}(without braces). The{SNOWFLAKE_ROLE}component of the scope name corresponds to the name of the Snowflake role that the user bearing the Entra access token is requesting to use. Note: this scope doesn't grant access to a role--the scope is merely requesting that a SQL query is executed using the given role. - Specify whether the user can consent on their own behalf, or whether only admins can consent. The default is Admins and users, and in this example we'll leave the default.
- Add text that will be displayed to users as the role consent prompts are displayed.
At this point, we've created the Entra side of the SAML configuration.
- An App Registration is created (which will create identity tokens and authorize user sign-ins).
- A Scope is created (which will be used to create access tokens to request user access to Snowflake roles).
Create a Role in the Snowflake Database
We won't go into detail on this step of the process in this post, but the integration we're creating authorizes Entra users to access Snowflake using specific security roles.
In this example, we have an existing role DW_USERS in Snowflake. In the App Registration above, we created a scope that will create an access token that requests this Role when a user uses the token to submit Snowflake queries.
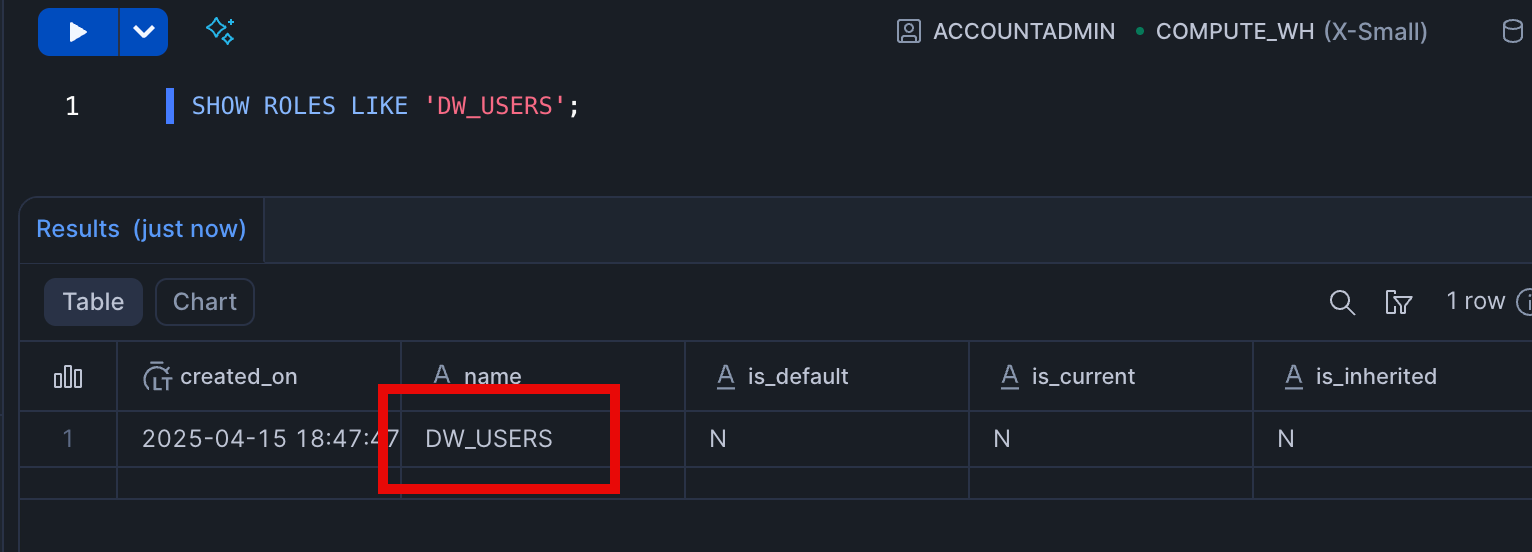
Later we'll see how the access token is used to provide the Entra user_id and role authorization to Snowflake.
Add a Security Integration to Snowflake
The React application will provide the access token defined by the App Registration + Scope to Snowflake to authorize the user and request a role to Snowflake. Now we add a security integration to Snowflake so that Snowflake will trust the Entra tent that crated the access token.
Lookup Entra Directory and App Values
The Snowflake security integration is essentially an entry in Snowflake that tells snowflake to trust a specific Application Registration within a specific Entra Tenant.
Before creating the security integration, we need to lookup the Directory and App Registration UUIDs within Entra. The values we need are:
- The Entra Tenant UUID, referred to as
{TENANT}below - The App Registration UUID, referred to as
{APP}below
Create the security integration
With the Tenant and App Registration UUIDs, create a security integration in Snowflake.
create security integration {INTEGRATION_NAME}
    type = external_oauth,
    enabled = true
    external_oauth_type = AZURE
    external_oauth_issuer = 'https://sts.windows.net/{TENANT}/'
    external_oauth_jws_keys_url = 'https://login.microsoftonline.com/{TENANT}/discovery/v2.0/keys'
    external_oauth_audience_list = ('api://{APP}')
    external_oauth_token_user_mapping_claim = ('upn', 'email')
    external_oauth_snowflake_user_mapping_attribute = 'login_name';
In the SQL above, the audience_list should include the Application ID URI for each App ID that will provide Access Tokens to Snowflake.
Once created, you can update a security integration with the command:
ALTER SECURITY INTEGRATION {INTEGRATION_NAME}You can review security integration specifics with the command:
DESCRIBE SECURITY INTEGRATION {INTEGRATION_NAME}To list all security integrations:
SHOW SECURITY INTEGRATIONSReact Application Flow
Now that we've created the App Registration and the Snowflake Security Integration, let's use them together. The user experience for the React application is as follows:
- The user signs-in to the application using Entra's sign-in flow
- When the user executes a command that requires Snowflake data, the React application requests an Access Token for the scope we created above during App Registration configuration.
- The React application makes a data query request to the Snowflake REST API, including the Access Token in the Authorization header.
- Snowflake checks the Access Token:
- Is the Issuer (Azure tenant) trusted?
- Is the Audience (App Id) trusted?
- If both the Issuer and Audience is trusted, Snowflake will extract the Snowflake
user_idfrom the access token, and also extract the Snowflakeroleto use from the access token. Again, the role is treated only as a request--role security is enforced in Snowflake as usual. - Execute the query in the REST body using on behalf of the
user_idusing the Snowflake Role provided in the access token scope.
User Sign In
As users sign in to the React application, they're challenged with an Entra sign-in popup (or, if they've already signed in, they may bypass the popup and sign-in silently).
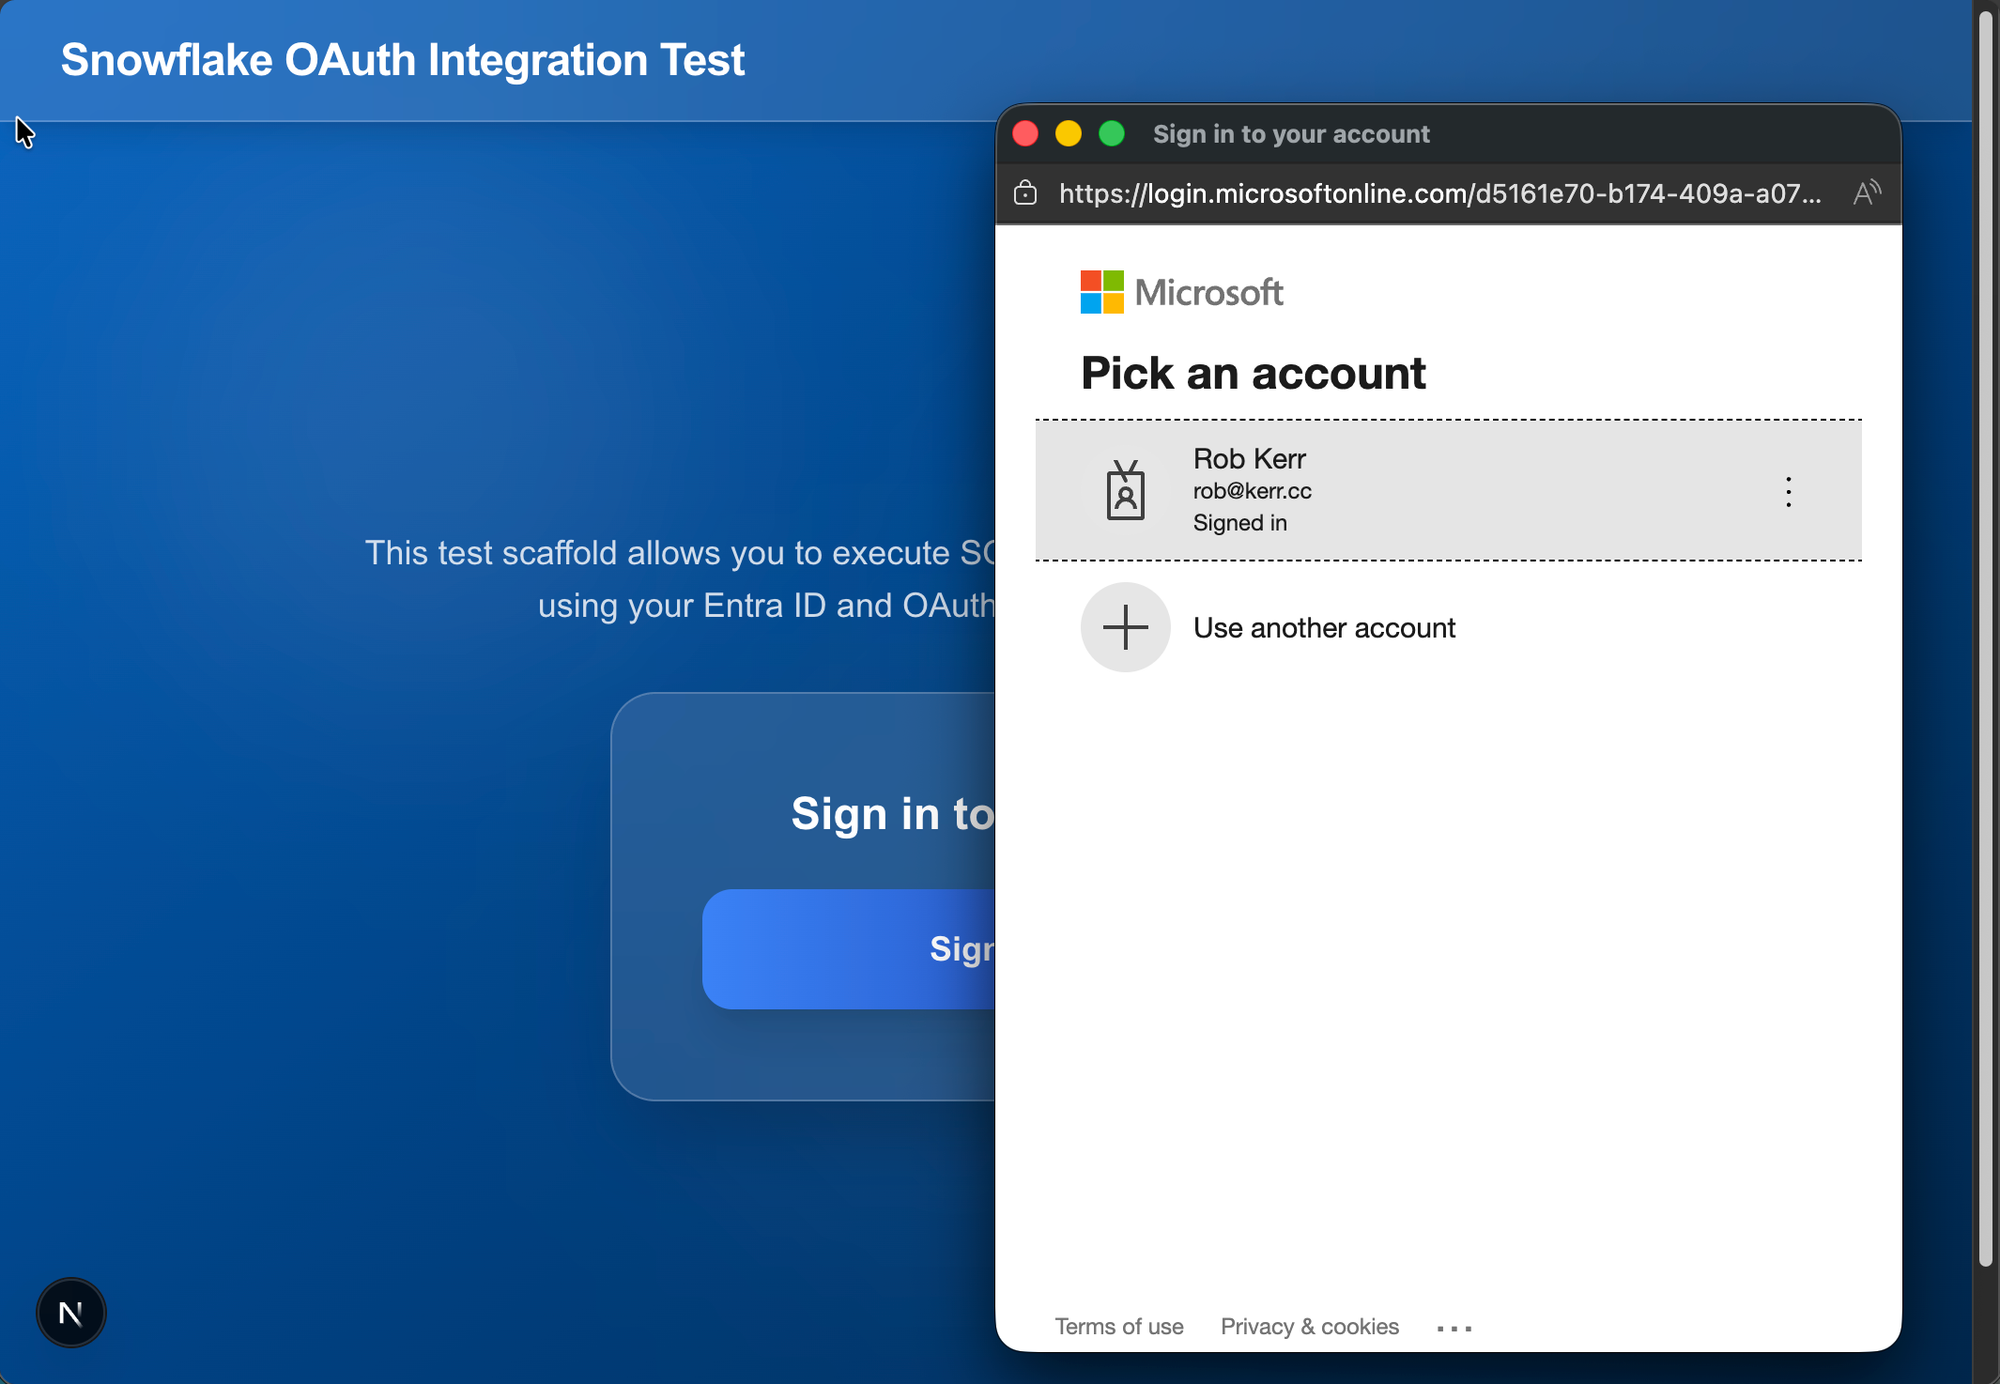
The code that executes the sign-in pop uses the Entra MSAL library. Here's an abbreviated example (see the Github code repo for full details).
// Excerpted from source for illustration
const msalInstance = new PublicClientApplication(
  auth: {
   ...
  }

let scopes = ["User.Read"];

response = await instance.loginPopup({
  scopes: scopes,
});

activeAccount = response.account;
instance.setActiveAccount(activeAccount);
Get Access Token
After the user signs-in with Entra using the App Registration, they click a navigation item that requires a query response from Snowflake. Because Snowflake requires an access token with the user's ID and the scope, the React app requests an access token from Entra, using code such as:
// in the real app, scope isn't hard-coded; it is here for clarity of the example
const scope = "api://a66c6345-c2cf-3b2b-6783-5ca35213508c4/session:scope:DW_USERS"

const request = {
   scopes: [scope],
   account: activeAccount,
};

const authResult = await instance.acquireTokenSilent(request);
const token = authResult.accessToken;

// token is the access token to add to the Authorizatoin header of the Snowflake REST API call.
Explaining the Access Token
If we paste the token above into a token decoder, such as https://jwt.ms, we can inspect the various elements of the token. If you refer back to the integration setup, you'll remember that the Snowflake integration is looking for the Issuer, Audience, Scope and User Id.
Each of the elements is encoded into the Access Token, using the fields indicated below:
| Element | Entra Field | Access Token Field |
|---|---|---|
| Issuer | Entra Tenant as URL | iss |
| Audience | Entra App ID URI | aud |
| Scope | Scope (Snowflake Role) | scp |
| User Id | Entra and Snowflake User ID | upn |
upn field to the Snowflake login_name attribute.Call the Snowflake API with the Access Token
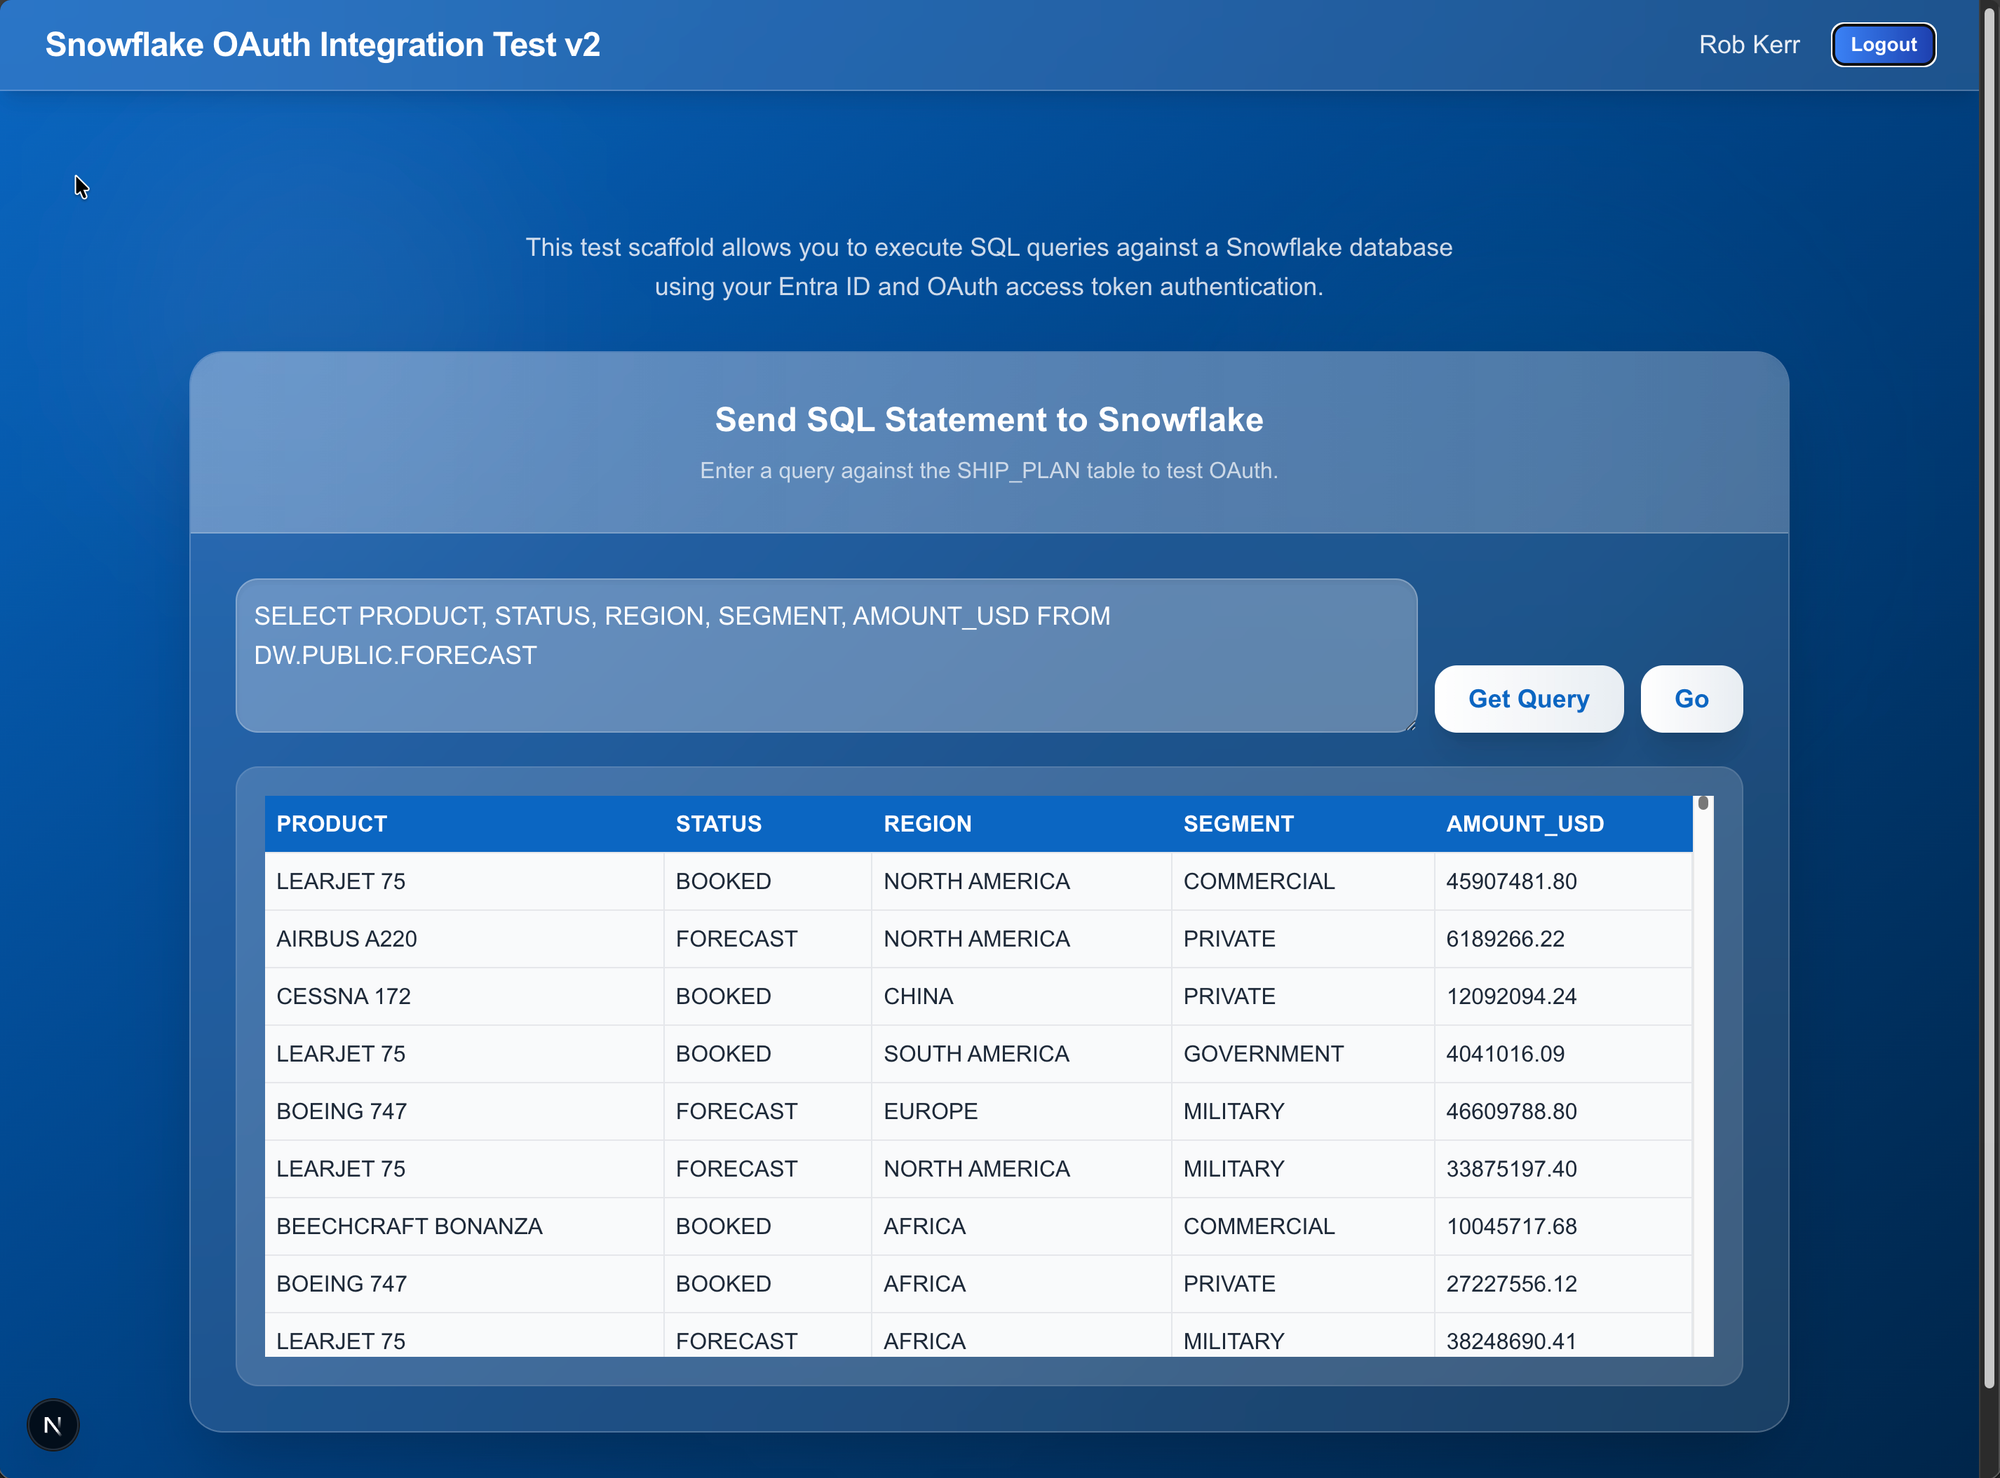
Having the Access token, we can call the Snowflake REST API to execute SQL Statements against the Snowflake database.
In the React app code, this REST request using the standard React fetch method would look something like this:
const sql_statement = "SELECT ....";
const url =`https://${snowflakeInstance}.snowflakecomputing.com/api/v2/statements`;

const response = await fetch(url, {
  method: 'POST',
  headers: {
  'Authorization': `Bearer ${token}`,
  'Content-Type': 'application/json',
  'Accept': 'application/json'
  },
  body: JSON.stringify({
    "statement": sql_statement,
    "timeout": 60,
    "database": `${snowflakeDB}`,
    "schema": `${snowflakeSchema}`,
    "warehouse": `${snowflakeWarehouse}`,
    "role": `${snowflakeRole}`
  })
});

const response_json = await response.json();

// response_json will be a result set formatted as an array of JSON objects.
In the sample application, the output of the Snowflake query would look like this:
Summary
In this post we looked at a detailed walk-through how to use Entra SSO to authenticate users, and use that Entra identity to query a data warehouse in Snowflake.
The benefits of using this technique:
- Users can sign-into an enterprise application using their Entra IDs, and access data from a Snowflake DW seamlessly.
- In many scenarios, a user wouldn't be aware that the Snowflake integration had been done, since the authorization process is managed by Entra.
- Snowflake admins don't need to manage separate user login credentials; the security integration establishes a one-way identity trust, and Entra becomes the authentication point (e.g. MFA challenges and passkeys are handled by Entra).
- Snowflake admins maintain control of what roles can/cannot be accessed via SAML-authenticated applications, and Entra admins maintain control of who can access applications that incorporate Snowflake data.